How much does it cost to have your carpet stretched?
If you wonder how to stretch carpet, know how much it will cost too. For carpet stretching near me cost nearly $51 to 100 bucks.
How do you get a bump out of carpet?
- Roll the rug in the reverse direction
- Put heavyweight material over the carpet.
- Place your carpet upside down in sunlight for few hours.
- Use steamer
- Iron your carpet
- Stretch the rug
- Use taps to stick rug onto the floor
- Place ice cubes in rugs to cool them down
- Use rug pads
How do you stretch a loose carpet?
Remove the old rug and remove the nail from the floor. Delete the excess rug and place the new rug.
Can you stretch carpet without a stretcher?
It is possible to lay a rug without using a carpet stretcher. But improper installation results in bucklings.
How to stretch carpet?
Learning how to stretch a carpet can be a valuable skill for homeowners, apartment dwellers, small business owners, and landlords. The process of stretching a carpet involves using a carpet stretcher with a fabric loop with a series of embedded or detachable plastic handles. Carpet Stretching helps increase the usable area of a room by creating a walkway or eliminating the need for more oversized area rugs.
A power carpet stretcher (Carpet stretcher rental) consists of an arm ahead and a base with teeth that puncture a carpet when pulling it through the tread. To use a power stretcher, you will need to decide where you want to cut. Look for areas of the wall that are parallel to each other but not perfectly straight or at an angle. Start with the arm of the stretcher and run it under the first task of the carpet. Go back up and repeat the process is moving from the center of the room to the outer edges. It will create small, even layers and allow you to stretch the carpet in those tight areas.
You can save yourself time by pulling the carpet as flat as possible. Some models have a foot adjuster that lets you choose how tight the strips around the legs should be. If there are any tight areas, you may need to trim extra fabric to cover the area. Make sure you do not cut the backing of the carpet, as this will cause holes. If you do not, you may have to add a second tack strip to cover the holes.
Once the carpet is in place, check it for tack strips or damage; if your carpet is new, it should come prepackaged with tack strips and cement nails. If it is old, you may need to buy additional strips and nails. You may need a hammer and chisel to cut the carpet to size for large pieces of furniture. For tight areas, you can also use a utility knife. Either way, take your time and make sure you do all the stretching carefully, so you don’t mar the look of the floor.
When you are done stretching the carpet, you should have a smooth surface. To keep furniture from moving while you work, you will need to apply some putty to the bottom of each tack strip. Work the carpet stretching technique over each strip, making sure each strip is fully extended and evenly spaced from each other. You want the carpet to lay smooth. Then you can put the finishing touches.
Cut the carpet to the desired length using the utility knife and chisel. You will need to score the area you want to put the embedded nail with the carpet cutter cutting teeth. The nail will be buried under the existing tack strip and visible when you take the utility knife edge of the strip and gently slide it under the embedded nail. Make sure the nail is flush with the surface of the floor.
With the utility knife to cut the photo 10 inches from the end of the original carpet. Use the utility knife again to score the newly added space between the original carpet and the newly added spot. Apply glue to the newly cut spot, careful not to touch any underlying glue that may remain on the carpet. It may require some squinting to ensure the photo is not underneath any underlying glue when you hold the spot in place with the glue gun.
You now need to use your cold chisel and cut along the new line you just created. Be careful as you do this that you don’t cut through the original backing. Once you have the entire carpet lined up correctly, stand back and admire your handiwork. If you have trouble laying the carpet back neatly, you may need to consult a professional for assistance. And that’s it – with these simple steps, you can learn how to stretch a carpet.
Here’s a mighty carpet stretching diagram for your perusal. After years of daily foot traffic and frequent usage, your carpet could need to be stretched out, especially if there are some severe wrinkles, lumps, or even damaged fibers. Before offering extra suggestions and tips on how to stretch carpet, this article will take you step by step through the procedure.
To begin with, you need to remove the old padding from your carpet. One side can be accomplished by first pulling it up using metal pin strips and a strong glue gun. Once the padding is removed, you’ll see a strip of “waffle” material on one end. Peel back this piece of rubber to expose the backing fabric, which should have a slight pattern to it. It is the central part you’ll be working on.
Next, you’ll need a carpet stretching machine. There are various kinds on the market, so it may be challenging to decide on one. Find the one that feels comfortable in your hands. Ensure the handle is wide enough, as you may find that you have to wiggle it a bit to get the full impact of the re-stretch tool when stretching your carpet. You also want a handle that is small enough to fit into your hand easily. It will help you not grip the handle too tightly, which could cause your machine to become unstable while in motion.
Next, you need to buy a high-quality carpet stretcher attachment. This tool has a ring handle and a pinion that allows you to put a robust and secure force behind the stretcher. To start stretching your rug, attach the pinion to the rod, and start rotating it. Rotate the ring handle in a clockwise direction until you feel the stretching start to take place. When you reach the pre-stretch goal line, gently pull the carpet back up to the starting point.
One way to start a good stretch is by using a seam ripper. Start with a clean, dry area that has no knots or cracks in the carpet. Get a power stretcher attachment and take the same rod that you used to lift the garment through the door frame, pulling it through as far as you can. Stop at the first seam you identify, pull the carpet tacking back up to the starting point, and tuck in the sides. It will help ensure no wrinkles in the seam area.
After all of the seams are finished, the last step is to put the padding back over the entire area of the room, smoothing out any wrinkles in the carpet enough to make it flat. You can use your flathead screwdriver to grasp the edges where the padding meets the floor lightly. If there is any extra fabric that does not go where you expect it to, put it on the back upholstery attachment of the sewing machine and remove any excess material with your pliers. You can also use the carpet knife to help with this process. Keep in mind that you should not be pulling on the carpet edges too hard, or else it could rip the backing.
After the backing is in place, use the utility knife again to reattach the edges of the carpeting. You can reattach the ends by sewing them under the tabs of the carpet if need be. Then, take the carpeting down and move it to the edge of the wall. Using the same cleaning tool, you can start stapling it onto the baseboard.
For extra carpet along one side of the room, you will need to first cut an allowance in the carpeting so that you can tack the first piece into place next. Then you can tack the second piece onto the first and finally run a bead of silicone caulk behind each piece of carpeting to give extra hold to the carpet piece. Once you are satisfied with the room’s overall appearance, you can put your new padding back into place. If desired, then you can put a mat in front of the room so that you don’t have to scrape up the old carpet when people come into the house.
For some homeowners, learning how to stretch carpets seems like a complicated task. It involves cutting and pulling the carpet to change the length and width. The result is typically an increase in home value and a boost in the appearance of the home. However, with a few essential tips, anyone can learn how to stretch a carpet without a lot of fuss.

Before getting started, it’s essential to have the right tools. Several different items make carpet restretching easier, including special rubber and latex gloves, a pair of high-quality scissors, and reasonable quality tape measures. Each of these things can be found at major home improvement stores or online. If unsure about which supplies to buy, many retailers offer a complete selection at discount prices.
Once all of the necessary supplies are in place, it’s time to get to work. To perform stripping, it’s best to start by locating the room that requires the most stretching. Start by measuring the floor space, including any doorways, windows, doors surrounding the room, and any other fixtures that might need to be extended. Next, mark down the room’s dimensions on the tape measure so that you know exactly how much room to work with. Once you have the measurements in hand, it’s time to begin shopping.
Once the room has been marked down for stretching, it’s time to go home and gather up the needed supplies. The first step involves finding a good-size piece of cardboard that has an opening at the bottom. Use this opening to hold one end of the carpeting strip while twisting it towards itself. It will form the base of your pliers.
The next step is to lay down the carpeting strip along the base of your handy power stretcher. Start pulling the strip through, keeping the center strip tight to the carpeting. The carpet will stretch out automatically as the stretcher is pulled through. You may need to do some additional pulling to keep all of the strips connected, as they may not be able to pull through all at once. Once you’ve gotten all of the strips stretched, push them all the way down into the floor.
For heavier furniture, you’ll need to use a heavy-duty stair steamer. Stand two chairs or tables directly under each other, then position them so that they’re resting on either side of the doorway that drives to your room. Run the stair steamer over both pieces of furniture. While it’s heating up, stretch the carpeting using the knee carpet kicker tool that comes with your carpeting was stretching machine. When it’s ready, lift the stair steamer and move it up and down on the piece of furniture. It will warm up the carpeting, which will make it easier to stretch.
If your utility knife isn’t long enough to get into the tight spaces, you can use a different carpet along the bottom edge. Work your way from the ground to the top, using your carpet restretching machine to stretch the extra carpet along the way. Before putting the carpet back down, add a little more to the bottom edge so that you won’t have to scrape the carpet when removing it. After the carpet stretches, run the utility knife along the entire length of the bottom edge of the door. Be sure to scrape any scuff marks that may be left from the utility knife.
Once you’ve removed the carpet stretcher, lift the stair steamer up and down a few times, making sure that the whole thing stretches to its entire length. Then, stand on the carpet stretcher up and move it toward the door. Using both hands, pull the carpet stretcher toward the front door, being careful not to pull it too tight. When you’re finally through, stand the carpet stretcher up and use the power stretcher to seal the gap between the stairway and the door.
Requirements
- Hammer
- Needle-nose pliers
- Utility knife
- Rubber mallet
- Stapler
- Power carpet stretcher
- Pry bar
- Cold chisel
- Flat-head screwdriver
- Knee carpet kicker
- Tin snips
- Carpet cutter
Required Materials
- Tack strips
- Carpet
- 5/16-inch staples
- Carpet pad
Special tools
- Carpet cutter – It is used to trim the edges of the carpet
- Knee Kicker – It helps to tighten the rug
Step by Step procedure for How to stretch carpet
Step#1 Peel back the old carpet and pads
Remove the old carpet from the floor. To remove the carpet, lift the corner of the carpet using hands or by using pliers. Peel the carpet. Remember, there will nails under the carpet, so be cautious while removing the rug.
Step#2 Remove stapes
These staples are used in carpet pads to hold the carpet firmly. So to lay a new carpet, you need to remove staples from the carpet pad using a screwdriver or pliers. Remember to remove the staples smoothly; you must be careful while removing the carpet without breaking the carpet pad or seam. If you can’t do this one, you should hire a professional to fix it. It is the perfect time to audit your floor; after removing the carpet, have a keen observation of the floor and fix it.
Step#3 Eliminate the old tack strips and fix them with new strips
Pull out 4 feet tack strips with a pry bar so that you can install new strips. After removing the strip, discard it because it holds nails, so discard it. While removing the strips, wear safety gloves if you forget; trust me, your hand will be filled with blood. So wear gloves. Place pry bar under the strips and press to remove the strips.
Suppose you own tack strips on a solid floor, accurately layout your footprint on the floor, and chisel through the tack strips just outside the layout marks. Next, pull out the wood by the concrete nails and break-off the nails by tapping them sidelong with a hammer. Breaking-off the concrete nails will leave holes in the concrete, making it difficult to run new ones.
Step#4 Cut Tack strips
Cut tack strips to the length of the floor with pair of tin snips. Wear protective gloves to safeguard your hand.
Step#5 Nail down the tack strips
If you want to install nails and other hardware into concrete floors, you can choose to drill through, nudge up or nudge down the holes. But if you want to keep the hardware flush with the floor surface, you can use adhesive nails. It is the most common option because it requires little extra time and does not damage the concrete’s surface. It is the only option that is legal in most states.
Instead, specialized epoxy glues are now sold at many home improvement shops especially designed to attach tack strips to hard-surfaced concrete. They come in either hot glue or troweled down style of application; some are self-adhering and fast-drying, and others are laid in through a traditional caulking gun or a gas-powered tool. Epoxy is the best choice for a number of reasons. It is easy to install, seals well and provides excellent insulation against moisture and noise.
You can nail down the tack strips to the edges of an existing carpet, or you can nail them to the baseboard itself. Nails can damage the carpet, especially if there are metal shims under the nails. Nails may also cut into the tile and cause tiny gaps between tiles. Nails can also get caught under the tack strip and cause a buildup of moisture behind the strip that can rot the wood and ruin the underlying floor.
If you are going to lay down carpeting as you are installing the room’s floors, you have a few other options for securing the subfloor. One popular method is called tongue and groove. In this installation method, a narrow strip of carpeting is installed first over the tack strips. Then, you follow the carpeting up from the strips, cutting the fabric at the same length as the strips. It gives you a clean seam and allows you to match up the carpeting pattern with the subfloor.
Some people choose to purchase the strips pre-made and then work with them directly. A variation on this installation technique is called pre-measure and cut. In this case, strips of carpeting, often three or four feet long, are purchased and then measured. The strips are positioned so that one edge is at the bottom of the door frame and the other edge is along the stairwell. They are then cut so that they coincide with the stairwell.
When installing carpet on an already existing floor, especially one with heavy traffic, extra care should be taken to ensure a smooth and even setup. If there is even a slight discrepancy between the newly installed floor and the existing one, the new floor will be noticeably different. To remedy such an issue, a second or third set of tack strips should be added. Installing carpet this way will assure a proper fit. It will also help to create an extra layer of cushion on the floor that can absorb sound. It can quickly reduce noise pollution in the home.
If you are looking to install carpet in an area like a kitchen or bathroom, where tight spaces are shared, extra care should be taken. Because the tighter areas of the room tend to have more foot traffic than surrounding areas, extra carpeting must be applied before installation. Nail down the tack strips or use a stud finder to mark the subfloor. It will make it easier to remove the carpet when necessary.
Most experts recommend that installing carpet over already existing flooring is avoided whenever possible. Adding padding over the floor can significantly decrease the project’s cost, while adding additional protection to the floor will prevent damage from occurring. Nail down the tack strips or use a stud finder to mark the subfloor. It will make it easier to remove the carpeting when necessary.
Step#6 Fix the carpet and stretch the carpet
If your old carpet needs repair, you can always reset the carpet to restore its original shape. But before you do, there are some things that you should first do. First, make sure that you cut and staple the existing padding beneath the carpet. It is to ensure that no permanent damage will be done to your carpeting when you stretch it.
If there are staples in the middle of the carpet, cut them with a pair of scissors or an electric blade. Then, take the tack strips in the space between the carpet and the pad and tie them together using strong tape. The purpose for doing this is so that you will not just cut through the carpet padding but will also cut the tack strips. Then, you will have a flat surface upon which you can begin stretching the carpet.
Once you have cut through the carpet padding, remove it entirely and discard it. Now, lay your carpet on a clean flat surface such as a kitchen table. Staple the new tack strips in the place where the old ones were.
Cut and tack the pad in the same way you did with the carpet. Start at one end of the carpet and cut as you go. It might be necessary to replace some staples if you do not get a good cut. Be careful not to cut through the original padding fibers, which the old carpet is made from. It will lead to a very unsightly mess.
Once you have finished cutting and stapling, you will now have a flat surface upon which to stretch the carpet. Keep in mind that while you are doing this, you should work only in the direction of the pile. To determine the proper distance to stretch the carpet, stand on the pad and look at the middle of the back part of the pile. That is the closest distance to the floor, and you should stretch.
Stand on the carpet next to that and measure how far that distance to the floor is. Cut another piece of chalk to measure the depth of the space between the first piece of chalk and the second. It is the depth of space that you will need to overlap the carpet. When you stagger the new carpet, it will make the old one look like it is not new. Start stapling the new carpet to the pad, starting from the center and working your way out. You can also stagger the stapling if you want the old one to become less noticeable.
When you are done with the tack strips, cut them, so they are one inch longer than the depth you measured earlier. Then, push the new strip along the baseboard until it runs parallel to the walls. Secure the strip with staples and replace the tack strips.
Stretch the carpet to the full width between the tack strips. Check for errors and adjust accordingly. Next, iterate with the second half of the carpet. Finally, replace the tack strips and any extra padding, and you have just stretched the carpet.
If there is a room with a door in it, the easiest way to stretch a carpet is to stand on the door and walk through it. It is a simple enough exercise that does not require any special preparation. Place the carpet as you would for a room with an actual door in it and walk through it. The same stretching method applies to the other rooms in the house.
Once you have finished the room, it is time to add the padding. Start with the ends of the room and work your way toward the middle. If need be, add the padding to start at different points in the center. Then, tape the newly-stitched carpet to the pad as you did with the door, and repeat around the room.
Once the carpet is installed in the room, remove the tack strip and check for errors. If any need to be fixed, do it right away. Test the carpet several times before and after installation, using both the tack strip and the pad. Adjust the padding as needed to achieve the best comfort and appearance of the carpet.
Step#7 Trim the carpet
Now, mark the carpet and trim the carpet with a utility knife. Remember to keep three-inch extra on both sides.
Step#8 Stretch and fix the carpet
Fix the power carpet stretcher towards the baseboard and include extension parts until the top is around six inches away from the wall. Push it with the lever of the power carpet stretcher and fix the carpet on track strips.
Step#9 Tight corner areas
Stretch left tight fields with the carpet knee kicker. Hold the teeth about 6 inches, back from the wall or inbuilt, and force with the spot above your kneecap.
Step#10 Carpet stretching sequence
When it comes to carpet stretching, there are two steps involved. First, you have to identify where the problem is, and then you have to fix it. Step one, of course, is identifying the problem and the second step involves the actual repair. I know that this seems like a simple task, but in fact, it’s not. These tips will make carpet stretching easier.
Before we start the carpet stretching cost sequence, you first need to determine where the problem is. Do this by pulling out the tack strip. Once you’ve pulled it out, you can easily see where the problem is. For this job, you need to know the length of the carpet piece, which is usually two inches on each side.
For this reason, the second step involves the measurement of the carpet length. If you know the length of your carpet piece, you can quickly get the width of the carpet stretcher by subtracting one inch from the total length. The width of the stretcher is crucial because it will be used to stretch the carpet piece evenly across your room. So, for this purpose, you need to measure the width of the room.
After you have the measurement, the third step is the installation of the carpet stretcher. For the third step, you need to put together the stretching carpet sequence correctly. For example, you can use the center punch to punch holes all over the carpet, depending on how wide the carpet stretcher needs. Then, you need to tie the four-sided tack strips to each other using the right kind of clamps.
For the fourth step, you can start stretching the carpet using a power stretcher. Start by stretching it at two feet for every ten square feet. You can also use a power stretcher at three feet for every ten square feet. When you use the power stretcher at two feet, you need to do it for three days before switching to the next extension strip. And when you are using the power stretcher at three feet, you should do it for two days in a row.
For the fifth step, you should tie the clamps again using the right kind of clamps. Also, you need to check the installation process of the carpet power stretcher. You need to make sure that the fabric is held firmly to the frame so you can start stretching it at four feet for every ten square feet. Then, you can cut the carpet into four equal strips by using the straight edge of a piece of wood. It is better if you make a mark on the back of the strip that you will use for cutting.
For the next step, you should spread out the strip with your hands to get enough leverage. After that, you can take off one end of the strip with your hands and insert the new strip into the hole. It is better if you align the cutting edge of the strip to the backside of the frame. And, it is better if you mark the location with chalk lines to get the proper clipping point for the installation tools.
The last step is to install the clamps in a way that they are locked with your hands. You need to do this by sliding them to the backside of the frame and then cutting them with your hands. Those are simple steps that you should do to stretching the carpet with a power stretcher. You will find it easier if you read the instruction and you will get more information about it if you search the internet.
Step#11 Knee Kick the initial side
Stretch your new carpet towards the baseboard with a knee kicker and fix it with a tack strip. Here is the tip, use a power carpet stretcher to finish it efficiently.
Step#12 Stretch in the alternative side
Stretch your new carpet towards the baseboard on the opposite side with a carpet knee kicker and fix it with a tack strip. Here is the tip, use a power carpet stretcher to finish it efficiently.
Step#13 Fix the tight surface
Knee-kick, the tight surface, start from the front and end it towards the wall.
Step#14 Complete the carper using a cutter
Remove excess carpet using the cutter and trim the carpet.
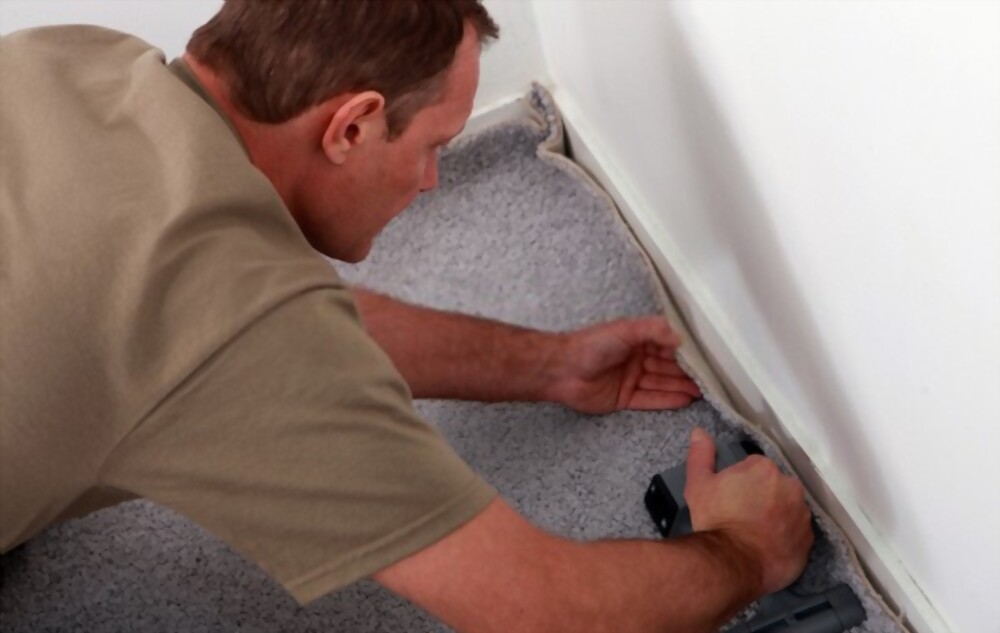
Step#15 Cut the tight area
Trim the area around the corners with a utility knife. And, remember to leave ⅛ inch for tucking.
Step#16 Fix the edges
Now, after trimming the edges, staple the carpet onto the carpet pad.