While several kinds of drawer slide one posterior property or make, I continually look to drift back to these full-extension performance teaching slides. I understand I nevermore have to bother concerning the drawer rolling out or wrapping the way I do with different systems. With that said, they are additionally much easy to install. If you haven’t previously checked out our easy DIY Drawer tutorial (notice: no router (plunge, cnc, …) or stand saw required!), then watch along below to get the drawer installed and sliding evenly.
Summary: Measures and installation are tailored to our Mid Century Nightstand guidance.
Cost: $12
Course: 20 minutes
Complexity: Easy. With a couple of careful measurements, these slides screw right into place.
Steps To Install Drawer Slides
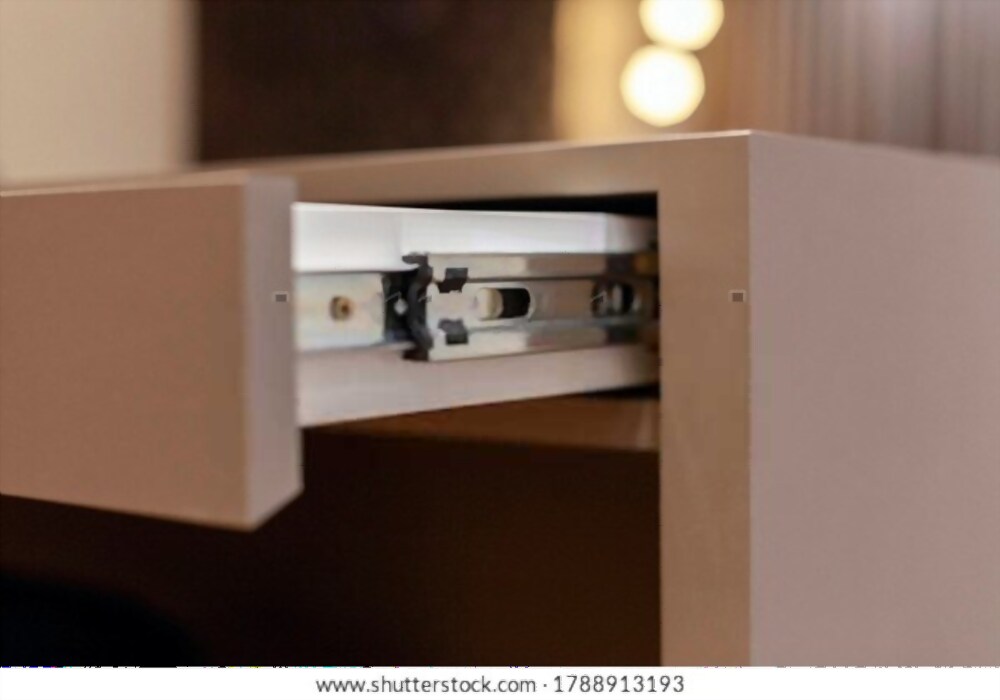
1/Mark the Position of the Slides
Measuring from the cabinet’s internal floor, note a length of 8¼ inches near all side wall’s front and back. Using the values and a straightedge, bring a level line beyond the wall on any cabinets inside the wall. Create a dot on each line that’s 7/8 inch of the front edge of the cabinet. It allows room for the depth of the drawer front plus a 1/8-inch inset.
2/Place the Slides
Follow the bottom edge of the first slide beyond the line, as proved. Locate the front edge of the slide following the mark near the face of the cabinet.
3/Connect the Slides
Keeping the slide tightly in place, push the addition forward until both sets of bolt holes are visible. Using a drill/driver, penetrate shallow pilot holes in individual screw holes near the slide’s front, including back. Using the bolts given, mount the slide to the inside of the cabinet. Repeat levels 2 and 3 to attach the second drawer slide on the different sides of every cabinet.
4/Note the Drawer Sides
Handling a tape measure, check the middle of the drawer box’s elevation on its outer sidewalls. (Notes: this drawer is given without the drawer face, which will be installed after this tutorial.) Practicing a straightedge, consider a straight line along the edge of the drawer box on all sides.
5/Locate the Slide Extension
Detach the detachable segment of various drawer slides, and set it on the identical drawer side. Locate the slides to focus on their corresponding line and flush with the drawer box’s face, as shown.
6/Connect the Slides to the Drawer
Managing a drill/driver and the screws provided with the drawer slides, climb the slide to the drawer.
7/Include the Drawer
Press the drawer level in the head of the cabinet. Put the edges of the slides connected to the drawers into the steps inside the cabinet. Pushing evenly on each side of the drawer, slide the drawer into position. The first slide within can sometimes push a bit more complicated, but the drawer should slide back out and in evenly once the cuts are engaged.
8/Locate the Drawer Face
Use wood glue to the surface of the drawer box. With the drawer sealed, place the drawer face with even gaps on the top and side edges. Using clips, adjust the drawer face upon the drawer box.
9/Assign the Drawer Face
Delicately slide the drawer open, and later press 1-inch screws into the slots in the drawer case and within the backside of the drawer face to squeeze it in the area.