For DIY enthusiasts, rotary tools are a vital part of their toolboxes. Indeed, we can rarely find a personal craft project without a rotary tool besides other gadgets, like workhorse screwdrivers or trusty hammers.
While professional craftsmen are well aware of its versatility, power, and how it works, beginners may find it hard to start a task with a rotary tool.
How to use a rotary tool? In short, the basic guide on using a rotary tool to handle various tasks includes six steps:
- Wear protective gear
- Go through its parts
- Choose a suitable bit
- Attach the bit to the tool
- Adjust settings
- Place your workpiece on a stable surface
This article tells you what a rotary tool is, how to use it correctly, and the different uses of a rotary tool. Shall we begin?
What Is A Rotary Tool?
A rotary tool is a handheld power device with a fast-rotating spindle that accepts multiple tool bits and attachments, such as cutting wheels, sanding bits, or polishing tools. The ability to work with an array of accessories contributes greatly to its flexibility, no matter what kinds of tasks are on your to-do list.
Tradesmen consider it a do-it-all device and use it mostly for light and decent projects. This tool’s compact design and speed also make it a must-have in any tool bag.
Do you have to deal with a small sanding or grinding project that is too rough for sandpaper yet too simple for a miter saw? Are you seeking a tool that suits light woodworking or stone carving? A rotary tool will be a nice choice.
Let’s look at some interesting characteristics of this functional gadget!
Types Of Rotary Tools
You might have realized that people usually call a rotary tool a Dremel interchangeably. Actually, Dremel is a rotary tool brand entering and dominating this market in size and reputation. As such, rotary tools pop up in most users’ minds as a ‘Dremel.’
In a word, Dremel is a rotary tool, but a rotary tool may not be a Dremel.
Generally, there are three major types of rotary tools.
- Die grinders
Die grinders are the biggest, most powerful, and most versatile rotary tool and often appear around tough projects. These devices apply to the heavy industry more than a Dremel rotary tool or other tools. Of course, due to the excellent features, they’re on the costly side.
- Dremel-style devices
While compressed air gears a die grinder, a Dremel rotary tool works on electricity. These tools are extremely popular among home DIYers because of their efficient motor. If you’re searching for the right device for decent around-the-house jobs, a Dremel is the way to go.
- Pencil grinders
Pencil grinders work both on electricity and compressed air. Of all rotary tools, they are the most compact and handiest models.
You can hold them in hand comfortably like a pencil. Also, a pencil grinder’s movement is super easy to handle, thanks in part to its slim design.
If you want a rotary tool that delivers high precision, particularly for carving small details, and is inexpensive, a pencil grinder is right for you.
Rotary Tool Specifications
So you’ve known a bit about a fast-rotating tool. Next, we’ll clue you into what forces it to spin, tick, and function – or its specifications.
- Engine speed
Rotary tools come with a broad range of torque, meaning there will be a device that can tackle your job, be it light or heavy-duty. Despite plentiful power levels and models, rotary tools all share high speed and a lot of torque in common.
Typically, a rotary tool motor spins at around 20000 RPM; some can reach up to 35000 RPM. Taking their small package into account, it’s surprising that these rotary tools can deliver an exceedingly large amount of power.
That’s the reason users don’t have to suffer discomfort or hand fatigue but still gain adequate speeds to accomplish demanding jobs around the workplace.
- The spindle
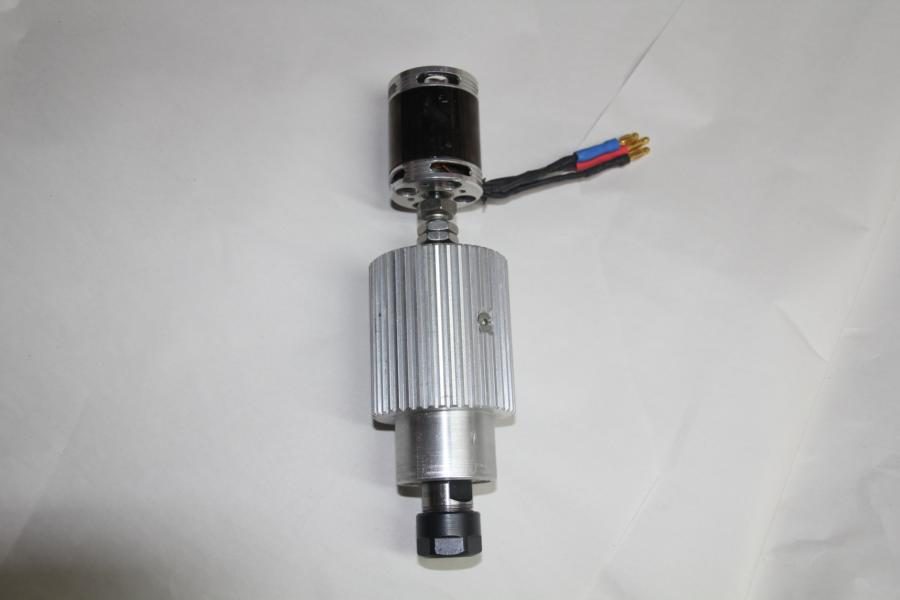
Once the motor runs, the spindle spins as it’s connected to the tool’s motor.
This threaded spindle accepts the collet nut and the collet. While the collet directly goes through the axis, the latter screws into the collet to secure everything and clamp down the flanges and on different attachments.
- Speed control
You’ll see the speed control on the tool’s body, which can show up as a slider or buttons. Depending on the type of project and accessories at hand, you use this control to adjust and get a proper speed.
How To Use A Rotary Tool?
Although rotary tools produce a variety of superb results and allow different attachments, they basically work in the same way. Users can rely on this basis to modify their uses efficiently.
Here’s the guide on how to use a rotary tool to tackle different jobs.
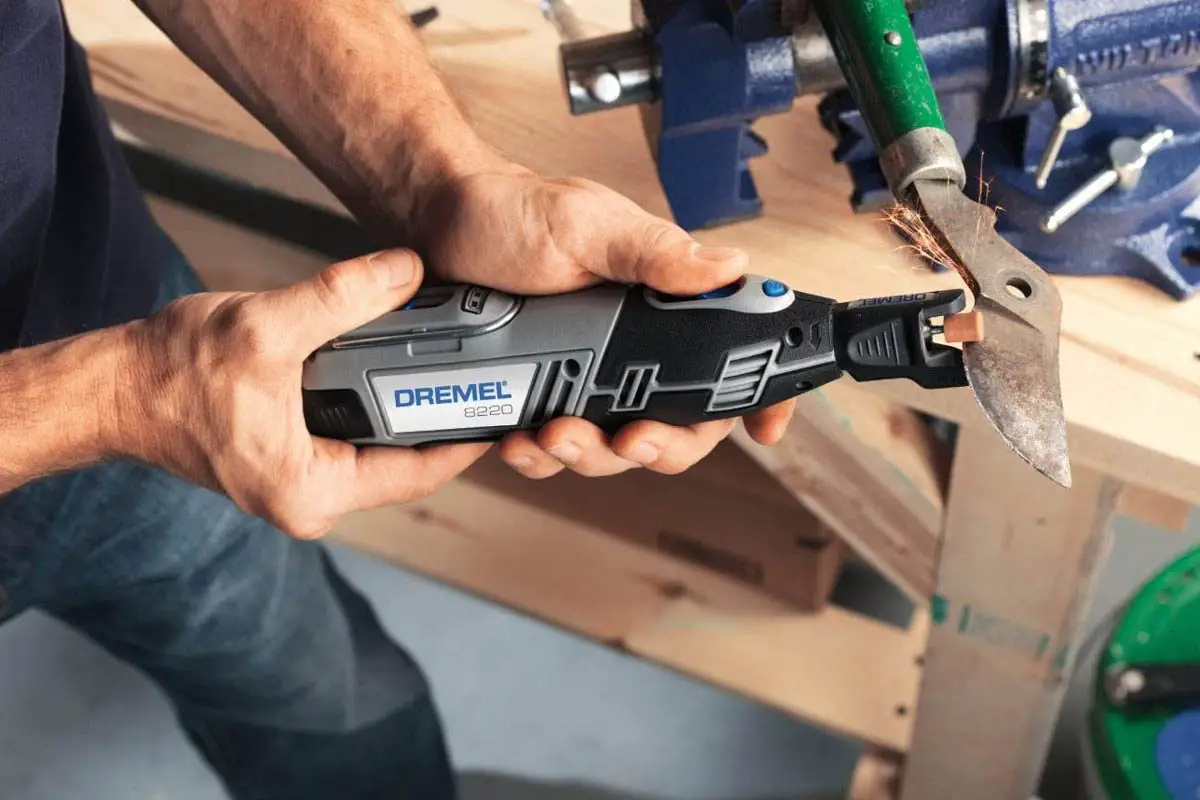
Step 1: Prepare For Protection

The important safety tip is to conduct your job in a well-ventilated area, particularly if your materials can produce tons of dust.
High-quality protection gear is also very crucial. When working with a rotary tool, you should wear a face mask or face shield to avoid inhaling fine particulates spraying around.
Eye protection should also be the top concern when it comes to woodworking. One of the essential precautions is to wear safety glasses.
Rotary devices will disperse tiny particles into the air due to the abrasion on metal and wood surfaces. These shards would irritate your sensitive eyes and cause them to feel sore or itchy.
So it’s advisable to wear safety glasses to protect your eyes and deter small metal or wood particles from damaging them.
If your hair is long, cover it with a bun or a ponytail or tie it up. Believe us; you don’t want it to be caught in the rotary tool as it’s spinning.
Besides, hand protection is also important. Rotary attachments not only rotates at super high speeds but also have sharp metal edges that can hurt you if you tip it accidentally.
Thus, you need to wear a pair of thick gloves to save your hands from injuries when gripping the tool tightly and minimize slippages. Particularly, high-quality gloves would be of great assistance when it comes to intensive tasks.
What’s more, when operating with high torque, rotary tools can get very loud. You’d better cover your ears with headphones or earplugs to protect them from a harmfully high level of noise.
The last safety precaution is to always turn the tool on before letting it contact the materials. And after you finish a job, don’t forget to turn off the device and unplug it before changing the attachment for a different job.
You have to ensure your fingers won’t accidentally slip around the spindle area.
Step 2: Check All The Parts
Another step to take before activating a rotary device is to go through different components of the unit. This way, you can make sure nothing’s wrong with your tool.
On top of that, you’ll know where the main parts are positioned and, therefore, apply various attachments while performing multiple projects properly.
First, you locate the tool’s power switch and the speed dial. Then, you need to find its locking spindle button, which helps fix and remove a bit from your rotary tool. Once you locate it, press the button to see if it’s still working.
Next, you check the collet carefully to determine the shank’s size fitting through it. After that, you inspect the bits to make sure they can fit well into the collet.
Should your rotary tool be cordless, you need to find the battery, remove the battery from the unit, and fit it into the battery aperture.
Step 3: Choose The Right Attachment
The right attachment or bit contributes greatly to the final satisfactory results of your work. Although bits can vary in tips and shapes, their shank size is nearly the same and doesn’t change considerably.
The suitable bits for a medium speed range will be sanding drums and discs, cutting wheels, and grinding accessories. If you want to drill, cut, shape glass, porcelain, and other masonries, it’s best to use a diamond-tipped bit. This type of bit suits high-speed levels as well.
If your job requires a lot of detail, you can pick among sanding discs, grinding stones, wire brushes, cutting discs, and engraving bits.
Below are the most common types of bits that pro craftspeople usually apply for a wide array of projects:
- Drill bits
A drill bit can perforate holes effectively through different materials, like wood, concrete, plastic, or metal. A drill bit’s tip features a distinct shape that helps it penetrate through items easily.
One thing to note is that the tips can vary depending on the drill bits.
If you’re working on concrete structures, diamond bits are a nice pick. They can handle intensive tasks efficiently. Also, diamond bits do a really good job of puncturing harsh surfaces.
Meanwhile, a carbide bit can puncture holes effectively on metal finishes. So it’ll be an ideal choice if you want to drill holes on metallic accessories.
For plastic materials, you’d better choose a smoother bit.
- Cutting wheel
A cutting wheel is a strong and sturdy bit, featuring a sharp edge that can cut various
materials, like metal or wooden furniture. As such, they’re able to handle multiple home tasks.
- Wire brush
Wire brushes are a great helper when you’re scraping off rust or paint from various surfaces. Their bristles may vary, depending on what kind of work you’re conducting.
- Polishing pad
Polishing pads are good at shining a surface and make it look glossier.
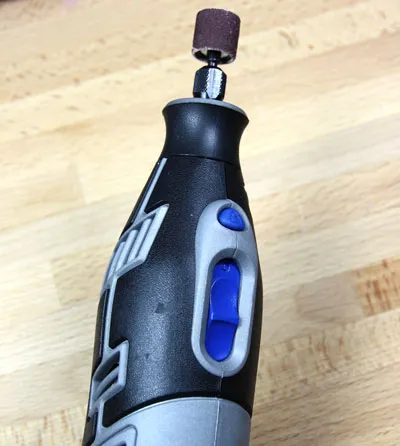
- Sanding attachment
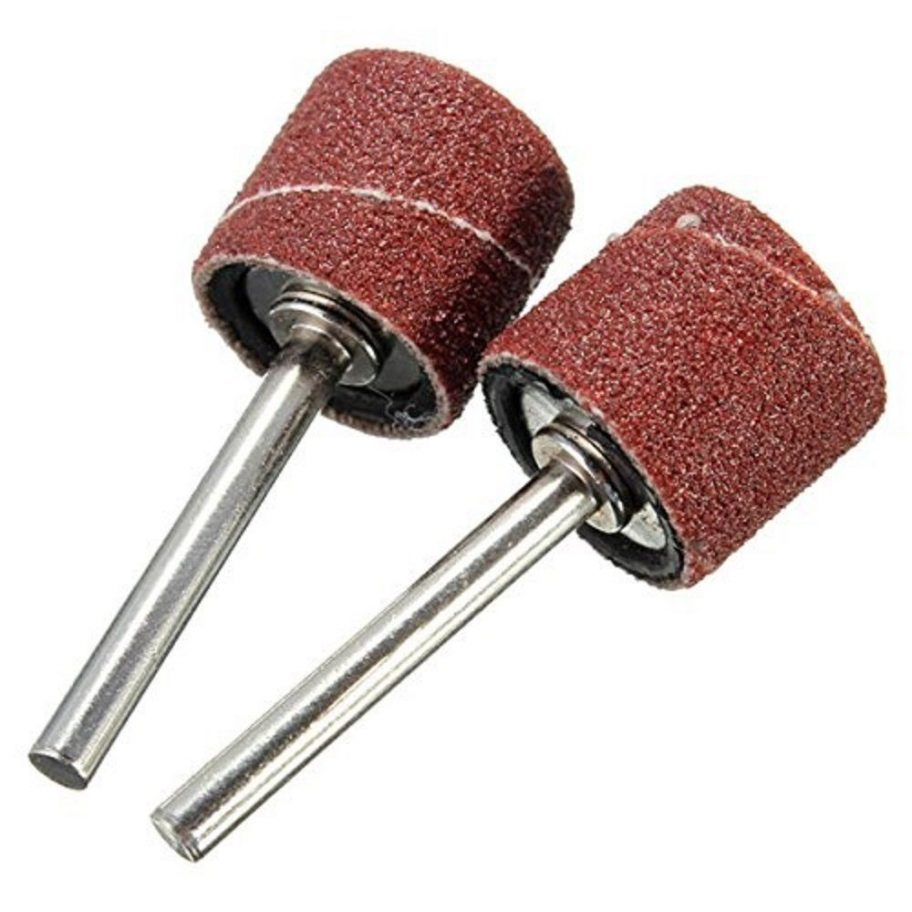
Sanding drums come with an abrasive, rough, sandpaper-like surface. These discs are useful for smoothing wood pieces, brightening old brass, refinishing furniture, removing rust, and more.
- Grinding wheels
The major purpose of a grinding attachment is to sharpen blunt edges with its abrasive, rough, and coarse surface. These wheels are able to machine tough materials, deliver highly precise dimensions, and sharpen the milling cutters.
- Router bits
This attachment assists you efficiently in carving and engraving wooden items.
Step 4: Connect The Bit To The Tool
After picking a proper attachment for your work, the next step is to connect it to the rotary tool.
First, you need to find the locking mechanism on the device’s chuck and untighten it. Once the collet’s diameter becomes wide, it’ll provide you with adequate space to position the shank.
Then, you insert the bit into your rotary unit. This step requires you to know how to fix it in place safely.
In particular, you’ll have to put it into a hole at the rotary tool’s end and slightly back it out. Next, you tighten the collet nut to keep the wiggling and bit in place. Suppose you want to switch the bits, press down the shaft locking button of the tool when turning the collet. This way, you can loosen the current bit and change to a new one.
To finish the attachment, put the bit in the center position, allowing it to move freely.
As you insert the bit, make sure the device is off. Also, you shouldn’t fit the entire length of the bit into the tool because you may reduce its efficiency in handling different jobs.
Step 5: Adjust Settings
If your rotary tool is cordless, you need to check if the battery runs out and charge it to ensure enough power before proceeding with the project.
Besides, should you be using a corded device, you’d better look for or set up a power supply outlet nearby your working area. In case the nearest outlet is still quite far from the job site, you can use an additional extension cord to connect it to the tool’s power cord.
As mentioned, rotary tools bear a compact design but pack huge torque and speed. One of their key selling points is adjustable speed control. Users should adjust the right torque for the task at hand.
Say if it’s a drilling project, the rotary tool should run at the slowest speed possible. Or, if you’re working on sanding or cutting DIY projects, it would be best to select a medium range of RPM options. At the other end of the scale, a diamond-tipped engraver bit can operate at the highest RPM, nicely applying to carving and engraving various materials, like wood or glass.
Apart from the diamond bits that come with the rotary tool, there are many tip sizes and shapes available in the market for very detailed engravings.
Step 6: Position The Workpiece On A Sturdy Surface
It’s important to set up a solid working surface to put the workpiece on. This way, you can minimize movements and vibrations, which leads to smoother results and no injuries.
Also, your material should lie in a strategic area that won’t damage the working surface. Or else, the bit could pierce and scratch the working finish.
Once you’ve done all the steps above, you simply press the trigger to activate your rotary tool.
What Can We Do With A Rotary Tool?
With a rotary tool, woodworkers can come up with many brilliant ideas of what types of projects to do. The outstanding versatility and flexibility make this humble rotary device capable of any construction.
You just simply find the right attachment for your project and switch it properly; then, there comes a huge number of DIY projects to perform.
Below are the most common uses of a rotary tool.
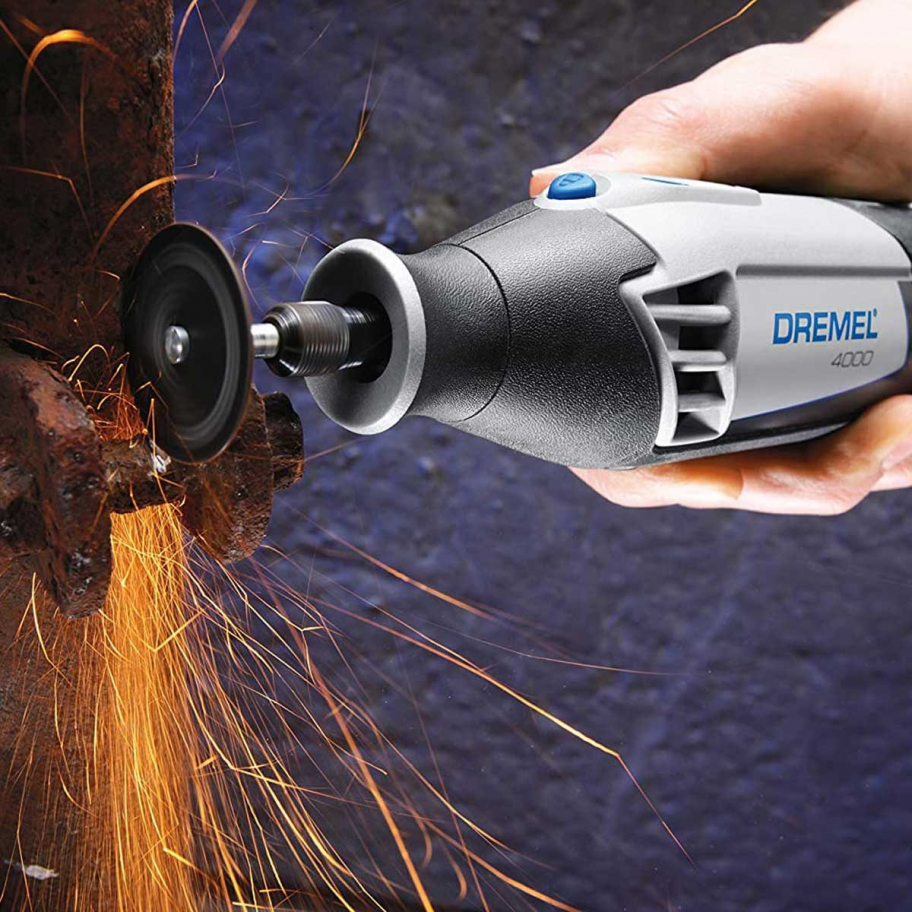
Cutting
Do you know that rotary tools are a plumbers’ secret weapon? They usually use a rotary tool to cut through hard situations when fixing bathroom faucets, repairing kitchen cabinets, or working in tight spaces, under floors, and inside walls.
We can list some daily cutting tasks using a rotary tool:
- Using straight bits for easy wood, plasterboard, and drywall cutting.
- Using cutting wheels for plastic and metal cutting.
- Using carbide burrs for smooth steel or metal cutting.
When it comes to both simple and heavy-duty cutting projects, you won’t go wrong with a rotary tool. However, it’s not the most effective solution to deal with huge cuts. More powerful tools will help you make large cuts more easily.
A useful tip before starting the process is to determine the cutting area by marking it with a pencil. In so doing, you’ll find it easier to cut through materials and produce a more precise result.
If you’re working on small metal pieces, we suggest applying some cutting oil to the surface so that you can lower heat and improve the carbide wheel’s efficiency.
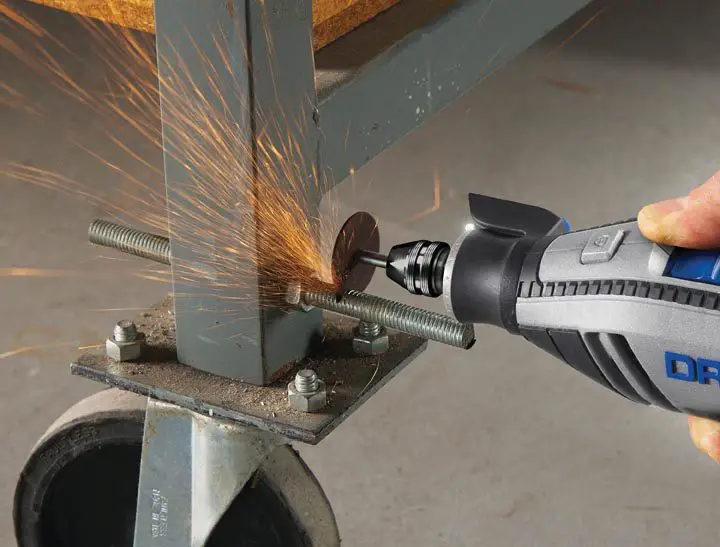
Grinding
Once you attach a grinding bit to the unit, such as a bonded abrasive stone, it becomes a functional grinder.
With this portable grinder, you can tackle the following sorts of grinding tasks:
- Grinding metal edges into submission
- Creating sharp edges or eliminating them
- Sharpening any kind of blade
- Removing rust
Drilling
Although a rotary tool is not a reasonable choice for demanding drilling work, they excel at small drilling work.
There are plenty of router bits and drill bits you can connect to a rotary tool to drill holes through soft materials, such as plastic, wood, gypsum ceilings, and drywall.
Nevertheless, we suggest opting for a sufficient drilling machine to deal with hardwood, plywood, and metals.
Carving and Engraving
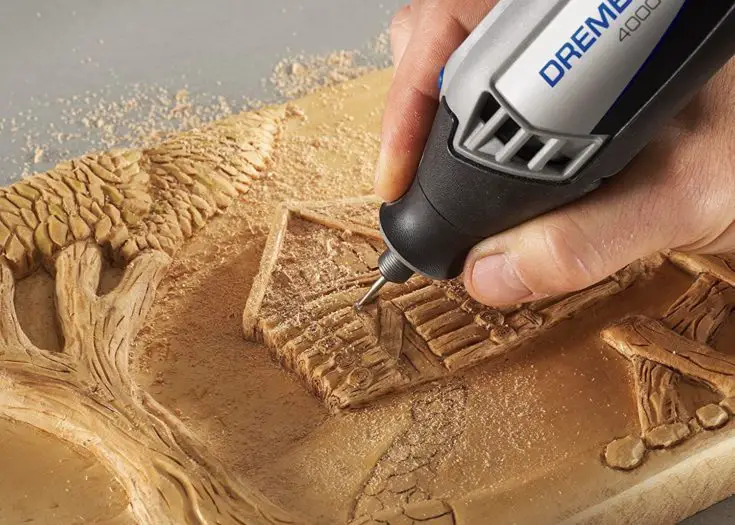
Fine craftspeople usually take advantage of a rotary tool’s small size, comfortable handle, and versatile nature for intricate carving and engraving jobs. This cool companion would provide wood, even glass, and stone with detailed designs.
To produce a nice outcome, you’d better run the tool at the lowest speed level. You may ruin details if you forget to adjust the settings before getting into the engraving process.
Sanding
By simply attaching a sanding bit, like a flap, band, wheel, or disc, your rotary tool then turns into a sandpaper-like device.
Small-scaled furniture, metal pieces, or molding sanding is hard and risky to accomplish. It’s advisable to practice on wood pieces first before actually doing the job.
However, doing sanding work in tight spaces, like windowpane corners, is not really a difficult task. You just add your sanding bit to the rotary tool, and it’s the way to go.
The key is to pick a suitable sanding attachment based on the materials at hand. For instance, you’ll need a coarse sanding drum if you’re working on hard materials with uneven surfaces. Besides, a soft sanding drum can work if your materials are smooth and just require simple polishing.
Glass Working
An important thing to keep in mind when conducting glass-working projects is always use a diamond cutting point wheel. This bit is made of steel and has diamond grits on it. It won’t damage the glass when cutting or removing a part of the glasswork.
You mustn’t attempt to use regular bits instead. They can break the glass and result in dangerous injuries.
A useful tip for our readers is to place a glass of cold water next to the working space.
During the glass carving process, the bit can heat up. You can cool it down by dipping it into the water frequently.
Polishing
Polishing is a simple task that you can complete within minutes. When shining a surface, the speed settings should be at a low or medium range to ensure an evenly bright finish.
Before starting, it’s better to apply some polishing beeswax to your surface. During the procedure, you can increase the speeds gradually to generate a superb result.
With a proper attachment, such as wire brushes, polishing wheels, or polishing points, you are ready to clean plausible things, including old devices, silverware, and even jewelry.
Wrap-Up
So, there you get it – everything about how to use a rotary tool and its various uses. At first glance, it may be challenging for you to use a rotary device. However, with our helpful guide on using a rotary tool, different home projects should turn out to be a breeze now.
A rotary tool is literally an all-in-one companion in every DIY improvement and personal craft project. The gadget offers superior versatility, power, and comfort at hand.
It’s time to add this do-it-all tool to your arsenal!