Deep ideas combined with proficient use of modern jointer are two important factors that a carpenter needs to bring valuable wooden items.
By alternating the use of modern straight edge jointing, the details on the product are surprisingly accurate. At the same time, it can help you optimize the time to make a product.
The jointer is a typical product that we want to cover in today’s article. It is a tool that helps make the angular details of a piece of wood precise and square.
However, to successfully have those characteristics, you need to follow the production process of the cradle fully. So how to use a jointer?
We have a total of 8 steps in the process of using the connector:
- Adjusting the coupler.
- Handling Fence of the Jointer.
- Follow the sizing principle of the coupling.
- Set the Upper Limit and Depth of Cut.
- Learn more about wood materials.
- Flatten the Stock.
- Decide the Level of Crook.
- Run the Board Through the jointer.
Let’s get right into the details!
How To Use A Jointer?
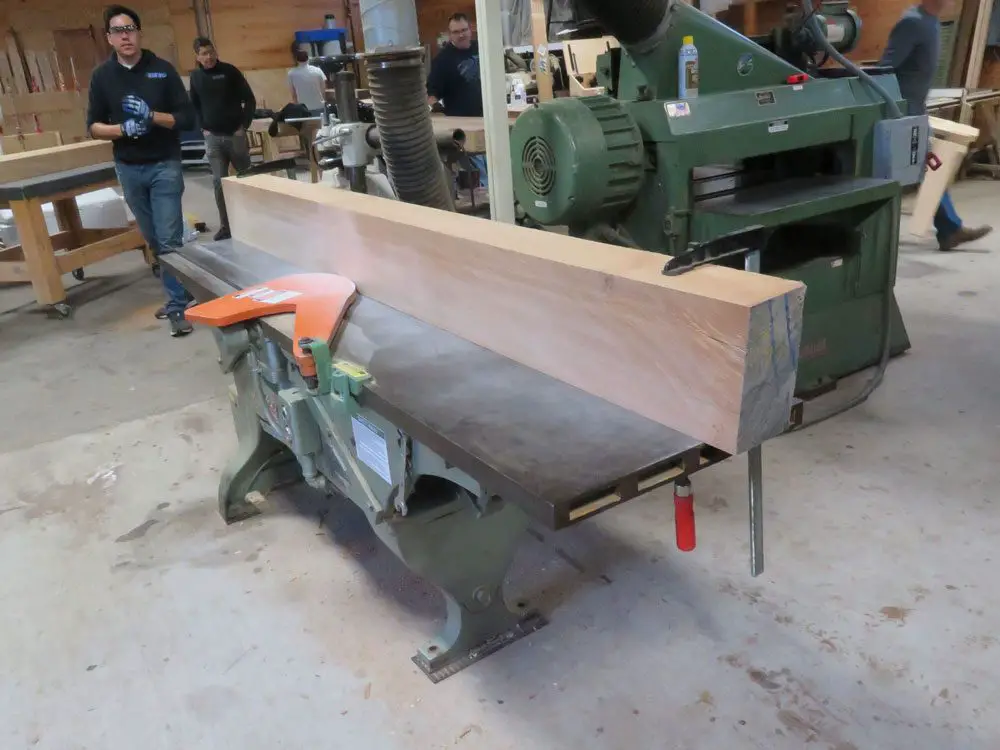
The splicing jointer in some countries is called a planer, and it is commonly known as a jointer that can create longitudinal planes of the board. They are essential equipment for making delicate, precise woodwork. Let’s learn how to use this tool through the article below!
Adjusting the coupler
The first important step we have to do is to adjust the coupler. You can completely adjust to your preferences to avoid problems during operation that cause the wood to warp, maybe even break.
If you are new and have not fully understood how to use the jointer, you should use the default adjustment mode of the infeed table coupler instead of adjusting it yourself.
We recommend trying it on different pieces of discarded wood instead of valuable timber. Because this step of straight edge jointing will help you both practice proficiently and effectively save practical wood panels.
However, this method is only for new members. You can immediately use large wooden boards from the beginning if you are an experienced person.
Handling Fence of the Jointer
To get your favorite joints, you need to treat the fence of the stabilizer joint.
We need to cut down how to make the connection details between the two wood panels similar. Accuracy, in this case of concave edge jointing, is always appreciated and directly affects the performance of the jointer.
You should measure them carefully and then plan the exact cuts to bring the perfect accuracy to your wood panels. Absolutely do not mess around, you just follow emotions because it is easy to fail.
We need to have our intentions in creating perfect and valuable wood panels.
Follow the sizing principle of the coupling
The standard dimensions for your wood paneling will be an important detail you need to take care of. You can completely adjust the size of the wood to your liking, as long as they are suitable for your next project.
However, above all, you should still refer to some normative numbers to bring accuracy to the product.
You should not intend to wear them too small, so it will seriously affect your hands. If it is more severe, it can make your hand dead, and it takes a long time to recover.
We think that the included tools are a shield placed on a wooden panel that will help us move easily through the fence without worrying about affecting our hands.
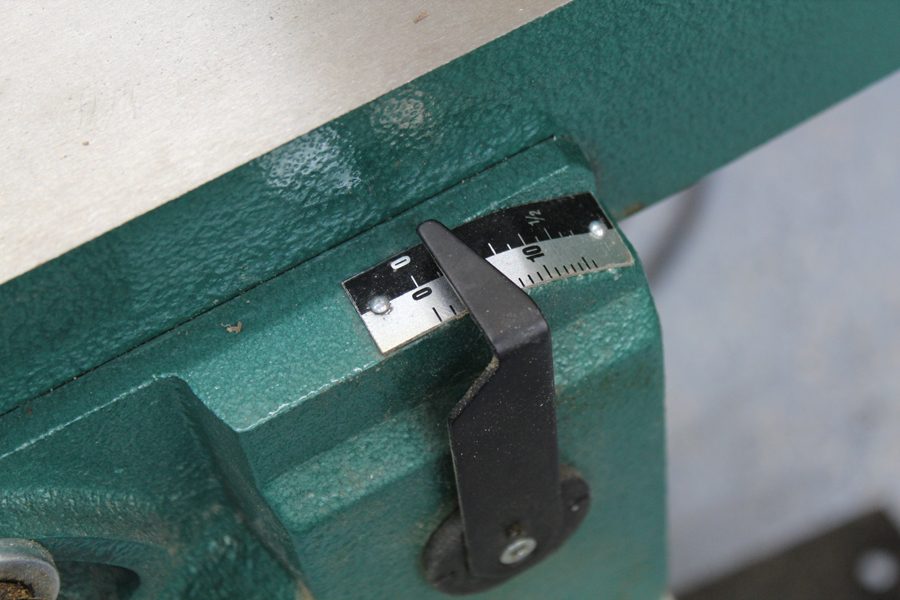
Set the Upper Limit and Depth of Cut
A certain basic rule you must grasp is that the length of the board should not exceed twice the length of the cutter.
Because they will cause a lot of trouble when we pass through the barrier. It is very heavy, and the manipulation will also be much more difficult and time-consuming.
Ideally, in all cases, the length between the wood and the infeed table and outfeed table should have a certain similarity, not too much larger or smaller.
On the other hand, for the depth of cut, you need to make sure the parameter of straight edge jointing is just right for the important strides behind it.
This parameter will directly affect the quality of the finished product, so you need to pay attention to it.
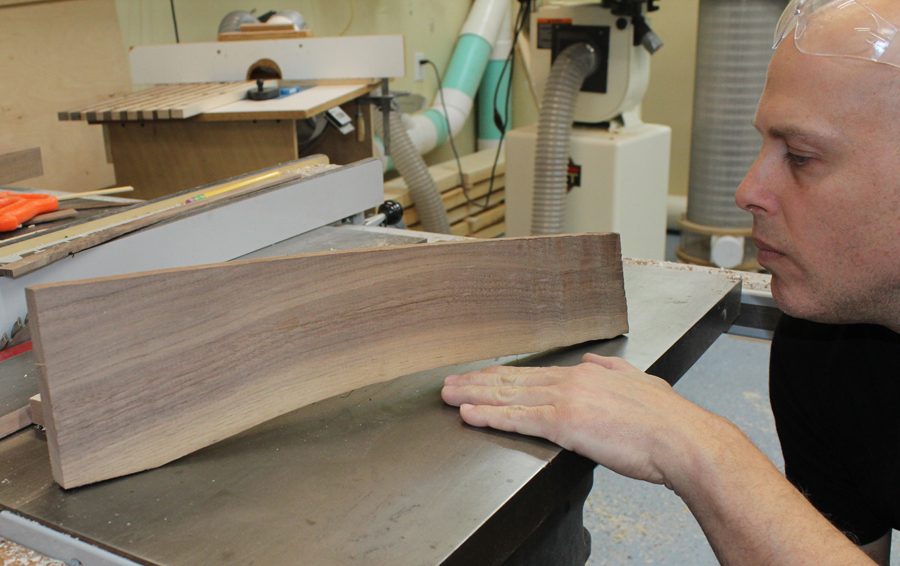
Learn more about wood materials
You should accumulate for yourself how to identify the wood material because it directly affects the quality of the final product.
You need to learn the basic properties of wood and how to read the grain so that you can make a suitable cut or treatment plan to avoid damaging the connection inside the wood.
We should not use poor quality wood because it will create less aesthetic wood layers when we put them over the fence.
And of course, with such pieces of wood, they will be discarded and cannot be used for any work. This will waste a lot of time and money.
Therefore, from the very beginning, you need to understand the wood material to choose the right one thoroughly.
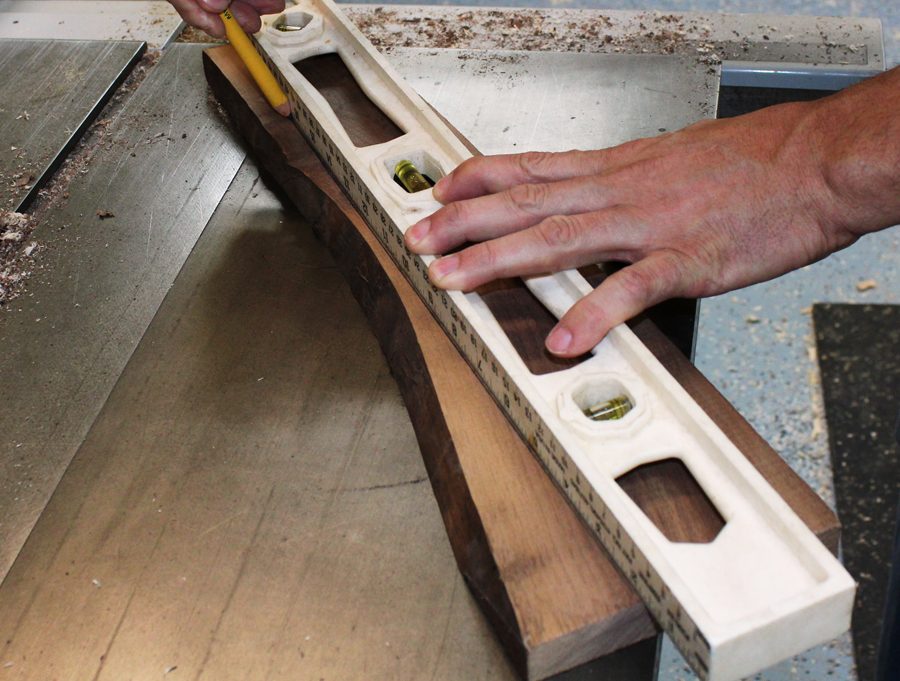
Flatten the Stock
Ground handling operations need to be precise and efficient. You can smooth them out by swinging the fence back and forth until you feel level with the table.
However, that is just a judgment based on reality, you need more specific parameters to achieve a better plan, contributing to the perfection of the final product.
If the wood panel is too curved, you need to determine the allowable curvature and bring them to that parameter.
It is best to choose other wood panels for many cases of wood that warps and deforms excessively during processing. Because if it continues, it will not achieve a high level of efficiency.
Decide the Level of Crook
Deciding the Level of Crook is an important step in how to operate the splicer. In this step, you will have to define the exact edges to join. It is necessary to prioritize the basic joins to create precise and refined quality products.
Leaving Markings Inside the Crook
Accuracy is always an important factor in the pairing process. Or even the integrity of the wooden boards is something to be concerned about. The compatibility will be that the two paired objects must always be in balance.
If you discover that one of the two objects using the pairing deviates from the line that the other party has planned, you need to correct the other.
The core of this step is to find a common voice between them to achieve the highest efficiency in the joint.
We can use reference lines to determine which redundancies need to be removed.
Draw a straight the Curvy straight edge
A circular band saw will conveniently track and cut along the planned reference line to get the edges with exact measurements when making the splicing.
Dealing with the Out-Of-Square Fence
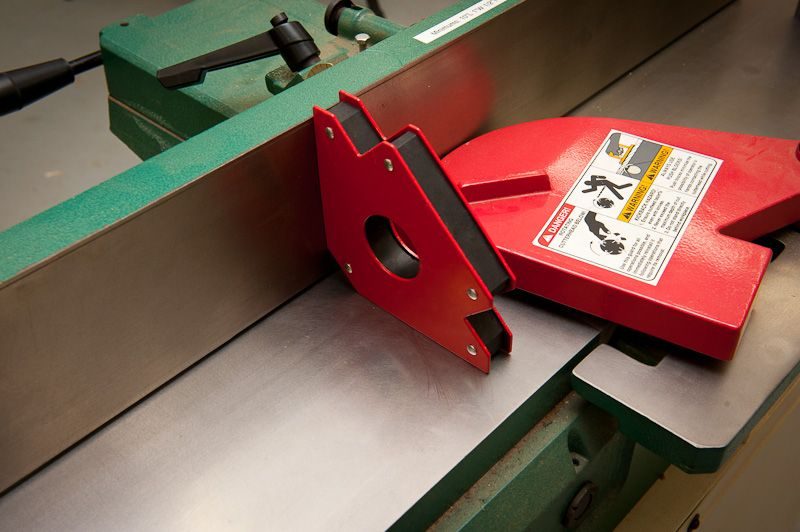
At this stage, you are faced with the square position problem mentioned earlier. They will often arise when you have too many boards to join and will create unnecessary errors.
To overcome this situation, you need to accurately mark the measurements and list them in an outfeed table for easy evaluation and tracking.
After that, you will mark the calculated measurements exactly on the face jointing of the wooden panels so that each time they pass through the fence, they can be reviewed.
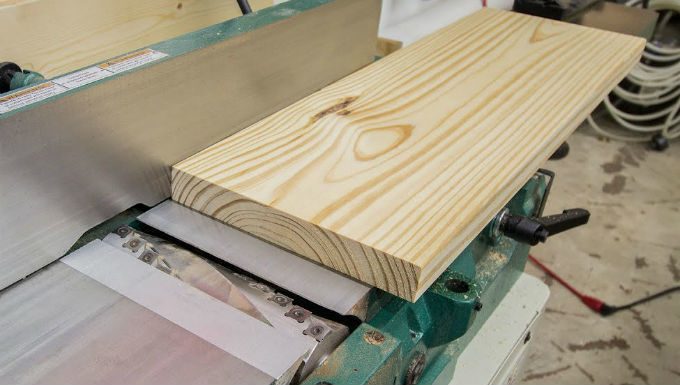
Run the Board Through the jointer
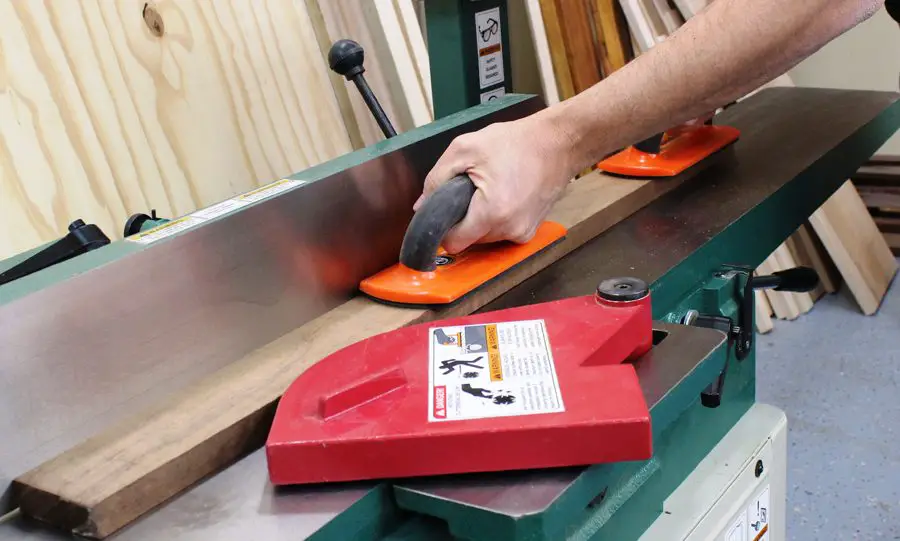
Running the Board Through the jointer is the key point when working with joiners.
At this step, you need to ensure adequate pressure, stiffness, and stability, which are all important factors closely related to the strength and correctness of the coupling.
You should not apply too much pressure while holding the coupling, so it will easily affect the operation of the jointer and the connection.
Hold by the Left Hand
You should try to keep your left hand only moving a few inches as you transition from the feeder to the feeder.
You should not move your hand in such a way that it will affect the quality of the product. You need to fix the position so that it is reasonable to facilitate movement.
At first, you will move to strong and steady pressure wood panels so that they can smoothly advance through the fence. Like this for a certain period, we will review and adjust the pressure accordingly.
This adjustment makes sense and will keep the plane of the two ends equal and similar. However, if we continue to exert strong pressure on them, the head is very easy to thin compared to the tail and body. Since then, the quality of wood panels has been seriously affected.
Push with the Right Hand
Combined with the strong pressure of the left hand will be the flexibility and flexibility of the right hand.
During the joining process, the right-hand plays the role of strengthening the stable pressure on the fence with standard push-pull movements.
If we keep a steady speed, the face jointing will be finished quickly. On the contrary, if the push is not regular, it is easy to make the surface ripple, less aesthetic.
Place the Stock
Finally, you will proceed to place the stock with the fence you like. And you need to ensure a certain accuracy of the wooden panel compared to the fence.
Basic principles
The first important issue that you need to pay attention to in this set of principles is adjusting the connectors to return to normal operating mode.
The cutters must be properly adjusted so that they can help flatten the wood face jointing when passed through them.
If the edge is too low or too high, quality cuts will not form. And in order for the wood grain to ensure and minimize tearing, we need to orient the movement speed and slope of the grain.
The last basic rule you need to master is not to crush the boards, just leave them with the right thickness. Thus, it is possible to ensure the effectiveness of the connections.
Plan to cut back if necessary
Before cutting with a jointer, you need to have a specific plan with certain numbers to bring the right wood panels.
You need to decide on the best orientation for the morsel and the depth of cut. And much of the curvature and slope of the grain will affect your direction.
With the naked eye, you can easily see the excess in some details and give specific directions for reduction. However, this excess percentage is very small in some cases and cannot be distinguished by our eyes.
So we will focus on how to use measuring tools. The strength of these tools is that they are almost absolutely accurate but are quite time-consuming.
You need to carefully study what the jointer you are doing here is to have the correct adjustment for the reduction plan. Avoid the case where excessive cutting leads to the wood being unusable, which causes a lot of waste.
Safety joints

Joint safety to ensure that the user of the jointer does not experience any injury.
We’ve noticed that a lot of people have been doing it incorrectly, especially beginners. And they can’t believe that this is really directly affecting their body and health. In the unfortunate event, your hand will be necrotic or even inactivated.
Based on the facts, we have learned the following coupling safety principles:
We will really need the support of pushrods, so we can ensure that our hands do not hurt. In addition, it can be manipulated much more flexibly and precisely.
Always use a properly functioning cutter head protector. Both can bring high operational efficiency and ensure we avoid various problems.
For longboards, we should not use excessive force. Because of this, it is easy to have an imbalance to the plane of the wood panel. There will be unevenness, in the beginning, middle and end.
During the use of the connector, you need to equip yourself with glasses and earplugs. Because they will help protect you from tiny wood chips.
You can choose headphones instead of regular earplugs. Being able to have fun and work at the same time is great.
Principles of eating together
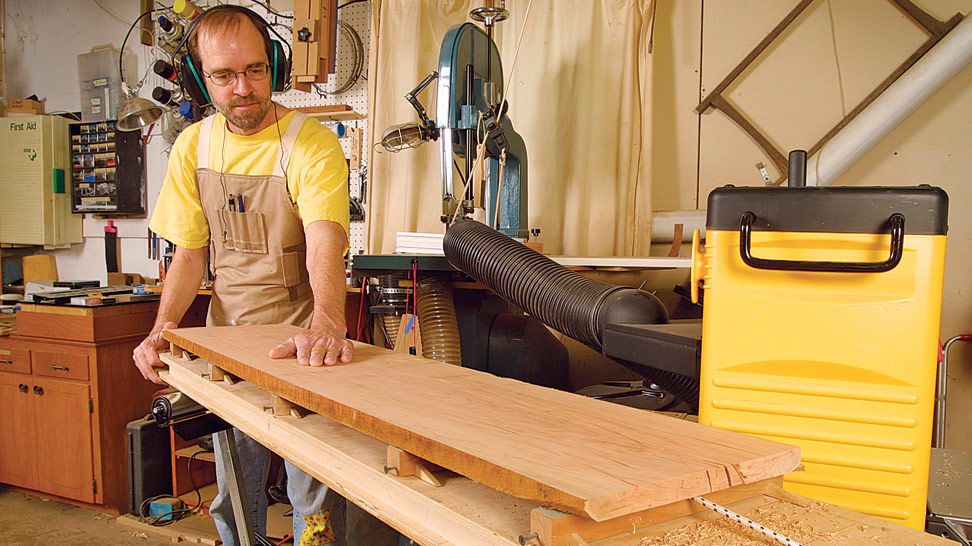
Successful pairing depends largely on proper body posture, downward pressure, and speed of movement. Besides, stability is also a necessary part that you need to have, and you need to adjust it during the operation of the connector.
When operating with the jointer, you need to have a wide-leg stance to help your body be stable and stand for a longer time.
Put the wooden board on the infeed table and outfeed table in front of the knife guard, then press the lead part firmly so that we can make a connection between the knife head and the wood plate head.
Using the right pressure and thrust on the back end of the infeed table, we should maintain them for a long time. In general, you need to be flexible in your movements so that you have the most comfortable posture.
Avoid applying excessive downward pressure on the wood panel, as it will easily affect the accuracy of the face jointing.
On the other hand, you should not move them too fast or too slow. If moving the wood too fast, the surface will be wavy and rough.
On the contrary, if the process is slow, it will be very time-consuming, and sometimes your body will be tired.
You will usually control movement speed, so it should be normal if you perceive it as normal. Be careful about feed rate, posture, and downward pressure to get quality boards!
Face joint
Face joining is an important step in thickness machining. However, you need to put together its small components first instead of joining the whole panel.
What you need to do is conduct a thorough parameter check and then proceed to a face transplant. If you do, it will save you a lot of time and effort.
In case there is no similarity between the parameters, we need to adjust to being compatible with each other.
Conclusion
We hope to help you successfully perform the above operations with how to operate the splicing jointer above. Besides, we have selected and brought you the video on how to use the connector below.
This video will be effective in confirming the above information on the jointer and helping you visualize more clearly.
Try it out and leave us your feedback! Your satisfaction is always the motivation to help us strive for useful and quality information.
Thank you for reading!