What is the process of laminating wood?
Wood lamination is a fancy way of saying you’re glueing pieces of wood together to make a larger piece. That’s all there is to it. However, there are an infinite number of things you can do with laminated wood.
In the first place, why would you want to laminate wood together? Woodworking with solid pieces of wood is a lot of fun, but glueing together several different colours of wood into one large piece takes it to the next level.
If you really wanted to, you could just cut one flat piece of wood to use as a cutting board. However, when you glue several smaller pieces together to make a nice looking design, it looks a lot better.
Also, using laminated wood, almost any woodworking project you currently do can be elevated to a whole new level. The best part is that once you’ve laminated the piece, the process is essentially the same.
Furthermore, you can glue several pieces at once and experiment with several different designs in the same session. Then you take those laminated blanks and turn them into something beautiful, and the different shades of wood in the blank make them look even better.
Stay with me and I’ll show you laminating wood together in your shop, and by the time we’re finished, you’ll be ready to start making your own laminated blanks.
Plane the pieces flat
The first thing you need to know about working with laminated blanks and laminated wood in general is that you need a very good mating surface where the boards will be glued together.
This necessitates a very flat surface. You can either do this by hand or with an electric planer. You can also choose board surfaces that have already been surfaced, which will be extremely flat.
You’ll need a decent thickness planer if you’re serious about making things out of laminated wood. You could complete a lot of work in a couple of passes that would take much longer by hand.
Joint the edges if needed
You’ll also need to run the edges through a jointer or make them flat by hand if you’re going to join something together on the edges. This is the same reason you flatten the faces: any two surfaces that are going to be glued together must be flat.
It’s unlikely that you’ll glue the edges of something together, but if you do, a couple of passes through the jointer will make the edges perfectly flat and ready for an excellent glue joint.
Because laminated wood is the star of the show, you’ll probably have to deal with a few glue joints. The longer they last and the better your woodworking project will be, the better start you give them by making flat surfaces.
Do a Dry Run to Test the Fit
When you’ve got the faces of your wood nice and flat, the next most important thing to do is to do a test fitting. This is merely aligning the two pieces of wood in the same manner that they will be glued together and inspecting the joint.
Pick up the two pieces, put your hands on the two faces that will be glued together, and examine the seam between them. Are you able to see right through it? Is it slouchy or clingy? Are there some regions that are more successful than others?
As you look at that scene, these are the questions you should be asking yourself. The goal is to only see the line where the two pieces meet, and not to see anything else through them.
The pieces should also fit together nicely, with no need to press them together to seal the joint. It’s fine to apply a teeny-tiny bit of pressure, but if you have to use clamps to see what the joint looks like, you should fix the wood first.
Use a good quality glue
It’s time to glue your pieces together now that you know they fit perfectly, but you can’t just use any old wood glue. If it isn’t already a habit of yours, it should become one. Use only high-quality wood glue from a reputable brand.
If you’re a complete novice who doesn’t trust anyone, look up some of your woodworking heroes and people you follow on social media. Examine the type of wood glue they employ, which is easy to spot if you watch videos of them at work.
It’s likely that if it’s good enough for them, it’ll be good enough for you. If you’re in a hurry and don’t want to do any of that, I use Titebond original wood glue with the red label, which has worked well for me.
It’s neither the most expensive nor the least expensive wood glue; it’s right in the middle. The product has been around for a long time, has been trusted by a large number of woodworkers, and has an excellent track record.
Apply a very thin layer of glue to both faces that will be pushed together in the centre of the joint with your finger or roller once you have your glue. If you’re going to do it by hand, put on a glove and add a thin layer so it doesn’t get soupy.
Use even clamping pressure
The next step is to start putting your clamps in place. It’s also critical to keep an eye on the clamping pressure. Clamping the daylights out of your project is a mistake, and you should really do something else instead.
It’s more important to have even clamping pressure than it is to have exceptionally high clamping pressure when making a really good joint. It’s more about placing several evenly spaced clamps on the pieces and ratcheting up a lot of pressure.
When you use extremely high pressure, it forces wood glue out of the joints, and you may end up with insufficient glue. Instead, use a medium-pressure setting and uniformly space your clamps.
Use lots of clamps evenly spaced
While we’re on the subject of clamp spacing, this is an extremely important point to discuss because it will make a significant difference. It’s much easier to use five clamps spaced an inch apart than to try to do the same job with just one or two clamps.
When you use fewer clamps, you get areas of high pressure right underneath the clamp, and the pressure gradually decreases as you move away. You’ll end up with areas of high and low pressure if you don’t use enough clamps.
There is no hard and fast rule about how many clamps per inch you should use. It’s just one of those things you get used to over time. On larger projects, I suggest using clams every couple to few inches, and that’s a good place to start.
The goal is to cover every inch of the wood you’re laminating so that it has the best chance of forming a strong glue joint. This entails clamps at the ends, followed by clamps evenly spaced throughout the middle sections.
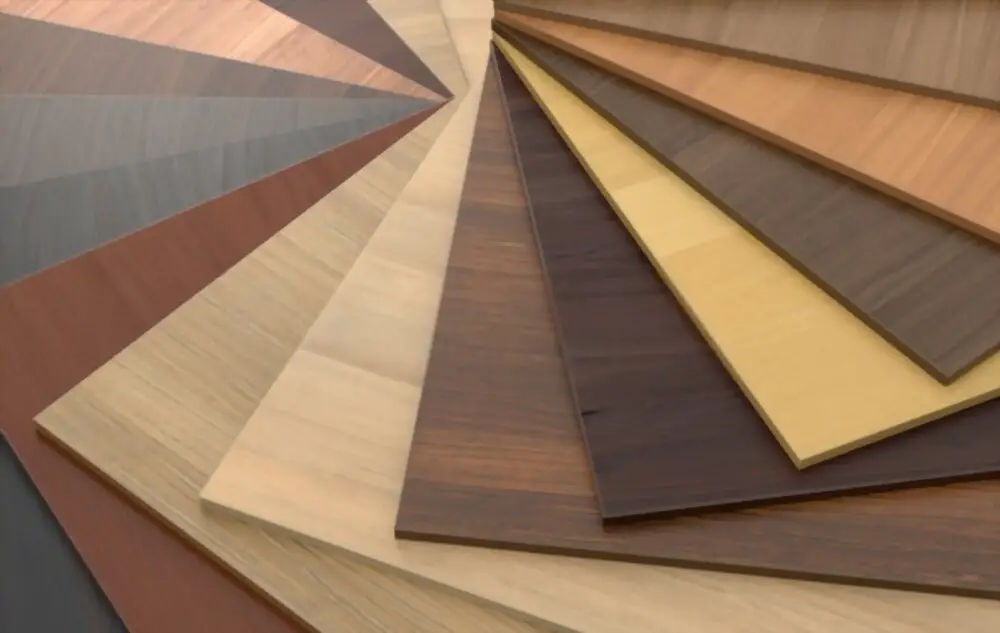
Test different looks before gluing
Testing different looks before applying any glue is something I recommend and something that is a lot of fun with this process. This is a very easy and enjoyable part of the laminating process, and I hope you don’t skip it.
To do so, gather a number of pieces of wood that you would use to make a bigger laminated blank and start piling them up in two different ways. Take a picture of the one you like after you’ve piled them up, and then make more.
Continue in this manner until you’ve found a few different laminated wood looks that you like, and you’ll have a few pictures to remind you of what to do and in what order. It’s easy, quick, and you’ll come across a lot of amazing designs. Don’t forget to write down the names of the species as well.
It’ll also uncover some designs that don’t look as good in real life as you might have hoped when you created them. That’ll happen now and then; just be thankful you didn’t put any glue between them and end up with an unsightly blank.
Keep those photos in a secure location. If you have them on your phone, email them to yourself, mark the email as important when you receive it, and save it somewhere safe. This way, even if your phone is lost or stolen, you’ll still have your photos in your email.
Laminated projects look more interesting
One of the best pieces of advice I can give you about laminating wood is that projects made of laminate will simply look more interesting. There are many beautiful wood species in the world, but they aren’t as fascinating on their own.
Almost anything that can be made out of solid wood can be made out of laminated wood to give it a new look. The project itself would be much more detailed, making it stand out among other solid wood projects.
Almost anything that can be made out of solid wood can be made out of laminated wood to give it a new look. The project itself would be much more detailed, making it stand out among other solid wood projects.
If you have to go to a show or somewhere else to sell your woodworking projects, this can be a simple way to set yourself apart. When everyone else brings solid wood, you bring some lovely laminates, and you just might clean the house.
Laminated wood projects are not more difficult
The other really cool thing about making woodworking projects out of laminated wood is this. The real construction of the project is the same as it would be if you were to use regular wood.
A piece of wood that has been glued together from several pieces of wood will perform similarly to a solid piece. It cuts, sands, and works the same as the original. You wouldn’t be able to tell the difference if you were blindfolded while working with it.
You’d most likely lose all of your fingers as well, but that’s beside the point.
The point is that once you’ve invested the time and effort into creating a laminated blank, the job is done. From there, the project is exactly the same as if you had created it using any other method.
In the end, the only significant difference is the appearance. That is the aspect of laminated wood that makes the time and effort worthwhile.
Bonus- Wood lamination for curved pieces
You can also use glue to join several pieces of wood together to make curved pieces of wood for some of your projects. There are a variety of methods for bending or curving a piece of wood, and one of them is lamination.
For example, you might make a curved form out of several thin strips of wood and glue all the pieces together while clamped to the form. Once the glue has dried and the pieces have been removed as a unit, they will have the same shape as the form they were clamped to.
Consider the bottom of a rocking chair’s rockers. You could make it out of several eighth-inch-thick pieces of wood glued together on a larger piece of wood cut to a curve. Remove the clamp once the glue has dried and the rocker will fall off, ready to be fitted.
What is the process of laminating wood?
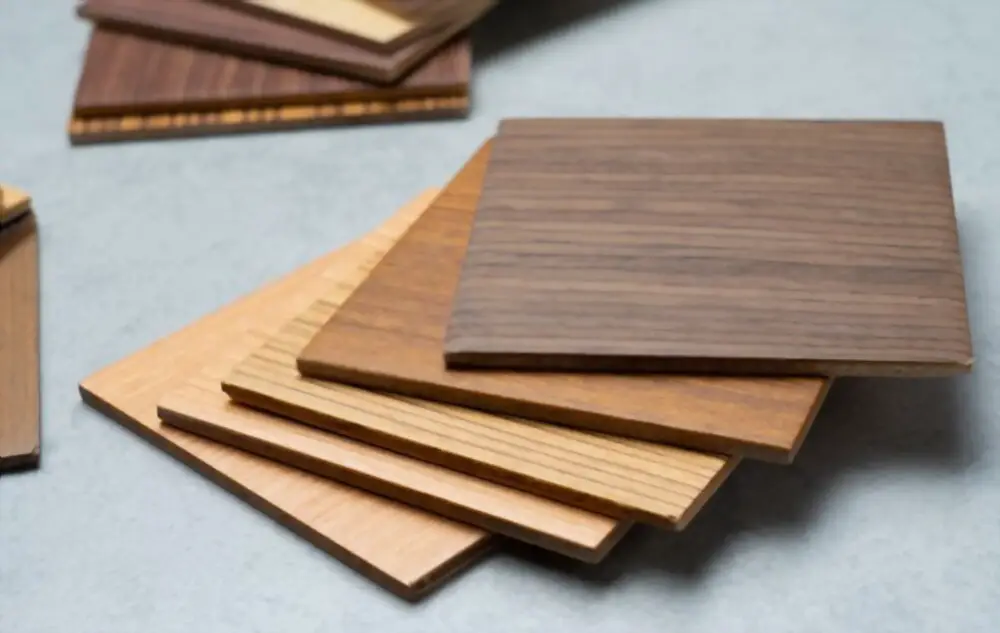
Laminated wood is a cost-effective and practical way to recycle what would otherwise be called waste wood. Several layers of wood are bonded together and then cut into planks or sheets. These planks or sheets are then used for a variety of purposes, including furniture, durable flooring, and truck beds and vans. Plywood is a common example of laminated wood, but it is not the only product that can be made using this method.
Manufacturing
Many thin strips of wood are used to make laminated wood. These strips are often cast-offs or a blend of different kinds of wood. These strips of wood are sanded down to make the surfaces smooth, and then they’re glued together under pressure to form a single, cohesive board out of the various woods. The grains of the strips in plywood will be at right angles to one another, while the grains of the different layers of other laminated wood sheets will be parallel. Additional layers are added to increase the thickness of boards that must be more structurally sound.
Attributes
Laminated wood offers a number of benefits that traditional solid wood does not. Due to its manufacturing process, laminated wood, for example, is resistant to warping and twisting. Laminated wood can be made of hardwood or softwood, depending on the customer’s needs, or from a variety of wood species to mix and match their strengths (such as the outer layers of a softwood for a certain look with the inner layers of a hardwood for strength). If the glue is exposed to moisture, insects, heat, or any combination of these factors, laminated wood will come apart.
What is the best glue for laminating wood?
Polyurethane glue
Polyurethane glue is one of the most powerful and long-lasting wood glues available. It is extremely adaptable, as it can be used on a variety of materials including wood, plastic, stone, metal, ceramic, foam, glass, and concrete. Gorilla Wood Glue is one of the most widely used polyurethane-based adhesives on the market.
What does it mean to laminate wood?
Laminating is the process of glueing two or more objects together. Although the term “wood laminate” is frequently used to refer to flooring, the process of laminating often involves veneer laminating and solid wood laminating to create furniture.