Discover how to check continuity in a long wire with some very simple methods
If you have a long cable that serves as a bridge to connect your house’s different elements, you should know how to solve its faults. Long cables are more prone to electrical continuity problems than short cables. You have to know how to check continuity in a long wire to accommodate it and not replace it with a new one.
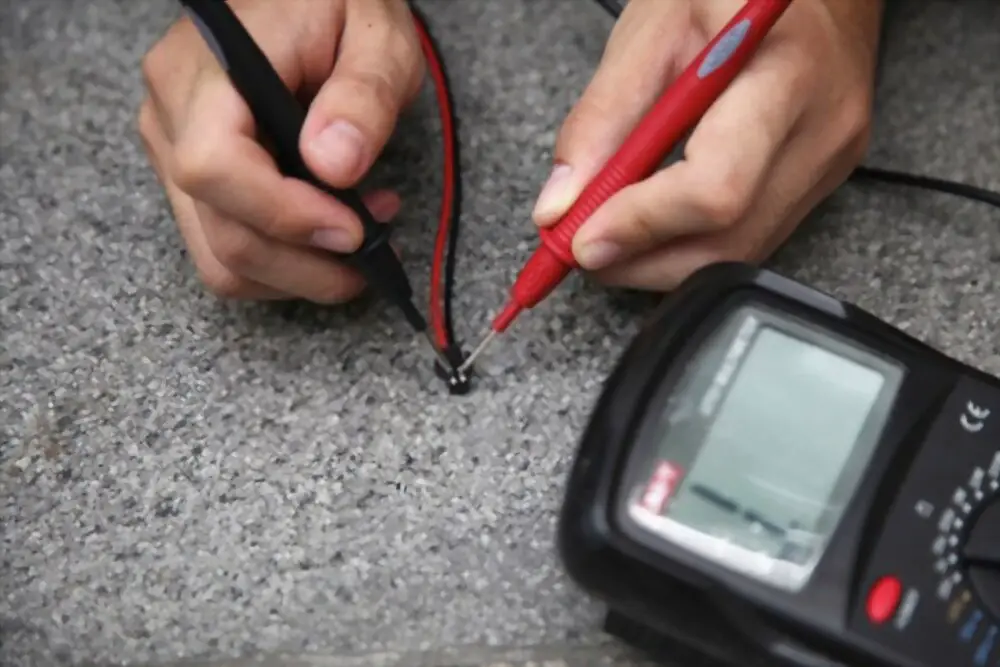
The only way you can verify that a light cable has absolute continuity is by using a multimeter at this time. You only have to take a cable section that you suspect is defective and only measure its power continuity. This process with which you verify the cable’s continuity can be done at home without help but with a multimeter in hand.
Can you test the continuity of a long cable without using the multimeter?
You can also test the continuity of an extra-long cable without using a multimeter. You can use a meter for the purpose. These meters that you use to check the electricity of the cables must have an efficient battery. Meter setup is straightforward to test a wire for continuity with ohm or resistance range.
For you to use the meter correctly, you have to take both ends of the cable and note if it has conductivity in resistance. This probe test is very effective, although it tends to fail sometimes, so you will not have a very sure answer. The best thing you can do is test the wire’s continuity with the multimeter that has the most credible result.
With the continuity tester method, you can quickly check if your cable has a short circuit. Shorts to the ground can be caused by excessive conduction or bad wiring. You don’t have to limit yourself to doing this study with the multimeter that gives slightly more reliable results.
The configuration you have to do to the multimeter is to measure resistance or ohms for your calculation. You have to place a part of the wire on the battery’s negative end to do the test. The cable must be connected to the ground cable and thus have a good measurement of the continuity.
Find out which is the symbol that has continuity on the multimeter
The continuity you can see on a multimeter can be indicated by a symbol such as a diode or a wave on your display. You can easily verify that the cable has a complete circuit, so the amount of energy it sends out is stable. With perfect conduction that goes from end to end, you can use your cable for light, extensions, or other things in your house.
The reason that you cannot see continuity with the multimeter in your cable may be due to a power failure. This failure may be due to a part of the cable being pinched or broken, which interrupts this linear flow of energy. You have to find a quick solution to this problem in continuity in your cables and more when they fulfill elementary functions.
Learn how you can check the continuity of a cable
You have to know how to check continuity in a long wire by accomplishing some basic steps. Among the things that you have to do to test the continuity in the cable are:
Step 1: Find a multimeter
You have to find the multimeter at home or buy it in a physical store to use it as a meter for different things. A multimeter has incredible uses at home, so it is necessary to buy it to measure the cable’s continuity. The purchase price for these multimeters is very affordable, so you will have no doubt buying it at home.
Step 2: You have to configure the multimeter
You have to configure the multimeter to give you the desired results when calculating the ohms of your cable. You need to configure this device to turn the dial into a continuity test mode. As your only interest is to know the continuity in energy that the cable has, you only have to focus on this objective.
Step 3: Select the continuity option
You should prioritize the “continuity” option on the multimeter over other available options. The amount of energy resistance in the cable must be stable no matter how high or low it is. If you don’t see continuity signals on your multimeter, then you have a cable problem that may be solvable.
Step 4: use the COM plug
You now have to use the COM plug by placing one end of the cable and the other grounding to test continuity. You have to place the cable very well in this socket or use the contact points to hold this item. If you have a more up-to-date multimeter, the COM socket may not be available but only contact points
Step 5: You must put the other end of the cable into the V plug
With the red cable that you have available, you must place it inside the V socket that the multimeter has. You can contact this other key to know if the continuity of this element is good finally. You can also use the contact points that some multimeters have to check cable continuity.
Step 6: Check the power
In the steps of checking continuity in a long wire, you have to check the power completely. You must have a dead circuit by placing both the red and black leads into the multimeter’s jacks. You have to run some test leads on the component you are testing at the moment.
All this analysis of the cable, the multimeter, and continuity may be very complex for you if you do not have previous knowledge of the subject. You can try to check if the cable you have at home has good power continuity to use. You do not have to miss this opportunity when verifying your cables’ operation with good uses at home.
Final words
Suppose you have any doubts about how to use the multimeter’s depth with all its settings, search online. You can have detailed information on this element used to measure all types of energy in different targets. Multimeters are great for you to use at home to troubleshoot some electrical problems.
You must act on your own to accommodate some cables that may have an unstable connection that has a solution. You won’t lose anything just by trying to use the long-wire continuity tester you’ll use at home.