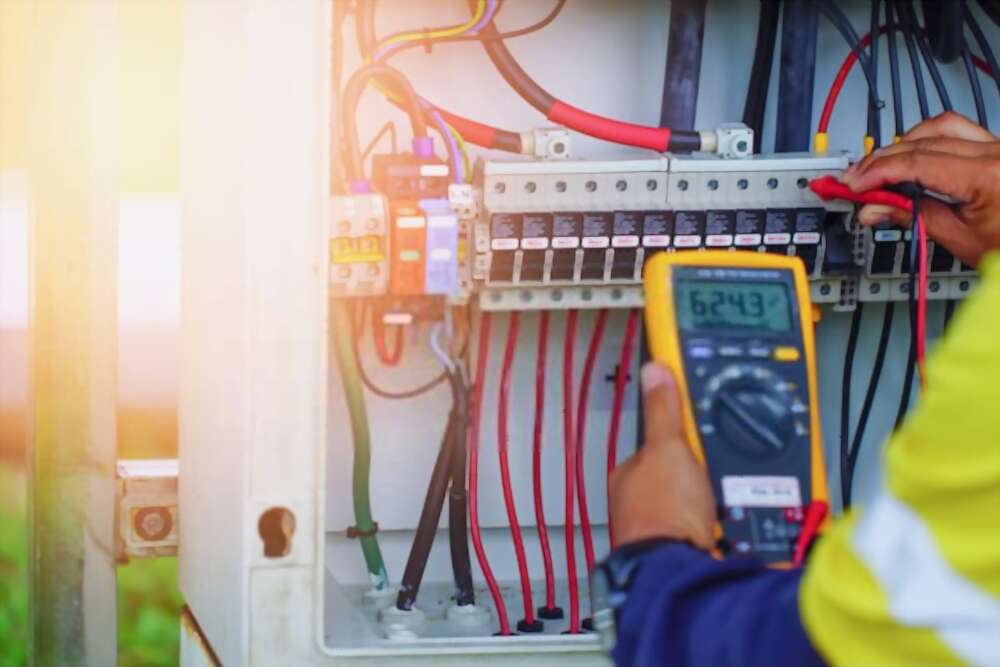
Discover how to measure amps with a clamp meter by following a few steps
If you are curious about the number of amps that a device you have at home sends or receives, you must learn to measure them. You will now learn how to measure amps with a clamp meter by following some basic steps without professional help. This measurement process will be very easy to do if you have an ammeter, achieving your measurement objective.
You should measure amps on a cord, connect ports on an appliance, or other electrical targets for stability. With the amps, you will know about the stability of electricity in your devices where 1 and 2 amps are commonly seen. Among the previous steps that you must complete before measuring the amperage are the following:
- You have to disconnect all the probes that have to test the meter from your ammeter
- Keep your fingers behind the tactile part of the amperage meter to avoid serious injury.
Steps To measure direct and alternating current

Now that you follow these steps to keep you safe from injury or electric shock, you should move on to the measurement. Among the steps that you must complete to measure direct and alternating current using the jaws of an ammeter are:
Step 1:
You have to turn the entire dial on the ammeter until you reach the correct setting for alternating current (AC) or direct current (DC). You should easily see the gag icon in the device that will indicate that your measurement is from there. You have to configure your device very well so that you have no doubts about the amperage measurement.
Tips:
When you see that the current gives a greater than 0.5 Amps measurement, you will notice that the point of the jaw flashes. When you see that the current is less than 0.5 amps, then the jaw icon will be fixed. You have to be very attentive to this icon and what you do in the amperage measurement process.
Step 2:
You have to prepare yourself before taking the corresponding action on the electrical target in front of you. You must wait a few minutes for the screen to be fixed, and then you must press “zero” to confirm the reading. When set the meter to zero, this will eliminate the direct current that the reading will throw up.
Tips:
The zero button option will only be valid when you set your ammeter correctly in DC mode; otherwise, it will not work. You have to set the dial to the indicated setting to get a good reading. You also have to verify that the jaws are closed and there is nothing to interrupt your contact.
Step 3:
In this step, if you need to know how to measure amps with a clamp meter, you have to press the clamp’s release. You have to fully open the ammeter’s clamp and place the conductor you will measure inside it. You don’t have to worry about putting pressure on the jaws because they are very strong for all things.
Step 4:
With the jaws on the electrical object to be measured, you have to close the jaw and center the conductors using the marks for alignment. You have to align the jaws very well so that they give a correct reading in amps or other calculations that you will do
Step 5:
Finally, you have to watch the screens to find out what kind of reading you get at high or very low amps on the device. If you know the number of volts emitted by the device you are measuring, you can also do a quick analysis in amps. In general, for every ten turns that a device such as a mobile charger has, it will only have 1 or 2 amps maximum.
Ways to Measure Alternating Current (AC) Using the Flexible Current Probe
You have to know everything about the ammeter and its extra measurements like measuring amps to milliamps or vice versa. It is time for you to learn how to measure an appliance’s alternating current just by using the flexible current probe. The preliminary steps that you must complete before measuring with the probe are:
- You do not have to apply the flexible probe to dangerous conductors, much less remove it quickly. You must be very careful when placing and removing this probe, avoiding strong electrical shocks.
- It is necessary that you remove power from the device you will analyse or wear special clothing to avoid electric shocks.
Fulfilling the steps in measuring amps with a clamp meter, but with the flexible current probe, you must follow a few steps. Among the things you need to do to get a correct probe measurement are:
Step 1:
You need to connect the flexible current probe to your meter very carefully.
Step 2:
You have to connect the flexible tube of your probe with the conductor to put it to work and have a good result. If you open the end of your probe to have the connection, you must verify that you will close it well. You should hear or feel the flexible probe completely blocking the measuring device.
Tips:
When you want to measure the current, you must center the conductor of your probe very well, searching for a good result. You have to avoid taking other measurements of conductors that carry live current in the apparatus.
Step 3:
You must maintain a good coupling to the probe with more than 2.5 centimeters or an inch away from the conductor. You must take care that the probe and the conductor do not make contact because this can interfere with the measurement.
Step 4:
You must turn the dial of the ammeter to the icon “Hz iFlex” in this configuration. You will access the option of flexible probes. You must see the stable icon on the screen to know that your ammeter is connected with the probe.
Tips:
When you make the measurement and the current of the object greater than 0.5 amps, the flexible probe icon will flash. When you make the measurement, and the object’s current is less than 0.5 amps, the flexible probe icon will remain fixed.
Step 5:
Finally, you have to read the ammeter’s measurement connected with the clamps of the flexible probe. They are very basic steps with which you can see the number of amps that an object carries.
What do I do if the probe doesn’t work?
If, for some reason, the flexible probe does not work, you have to analyse some things such as:
- You should inspect the coupling to see if it is well connected, closed, or has a factory defect.
- You must verify that the connection dial is in the “hx iflex” configuration for a flexible probe.
- You have to check the wire that goes from the probe to the ammeter to see if it is broken or damaged.