How do I make my own stencils?
Stencils are typically cut from a thin material that can hold their form cardboard stencil, plastic sheets, and metal are popular options. You could use paper, but it might rip or tear after repeated use. Plastic sheets, such as mylar, are the best option for making stencils by hand. You can design your own stencil at home. Basically, the cardboard stencil did not hold much longer.
What can I use to make a stencil?
Plastic sheets, such as mylar, are the best alternative for making stencils by hand. Mylar is easy stencil material to find online or in craft stores, and it can be cut with scissors or an X-ACTO knife. Most importantly, mylar sheets can be used over and over again.
How do I turn a picture into a stencil?
- Select a Picture.
- Contrast/brightness.
- Contrast Again.
- Cut
- Spray
How can I print stencils at home?
- Find a pattern you love.
- Line up your stencil design and Mylar sheet square and even.
- Trace your stencil design.
- Cut out your traced stencil pattern.
- Your stencil is ready to use!
How to make a stencil?
As technology advances, people are trying to find ways on how to make your own stencils online for the wall. There are so many things that can be done using stencils. These include everything from building a character to decorating your walls or even making a scrapbook page.
When you want to know how to make your own stencils online for a wall, the first step is to learn how to use a stencil. In using a stencil, you will use a coloured pencil or marker to create your own stencil form the image of your choice. If you are just starting with DIY stencil crafts, it would be best if you choose simple items that you already have at home. You could use crayons or even stickers. You can design your own stencil at home.
You can start creating your stencil by taking down your chosen image or design and placing it on the wall. For this, you will need a pen and a piece of white construction paper. You will then use the stencil to mark out the outline of the design. Make sure that you do it in a straight line. You can use different sizes of markers for more creativity. Make sure that you cover every inch of the room so that you do not miss any area when you’re creating your stencil.
Once you’ve got an idea of the outline, you can then prepare the paint. You can either paint using a brush or roller or paint using an airbrush. It doesn’t matter which one you prefer as long as you have paint that can reach all parts of the wall. Make sure that you leave enough space between the stencil and the paint.
To complete the job of how to make stencils for the wall, you will now need to place your stencil at the centre of the stencilled area. Use a hot iron to heat the paint so that you can cover the entire wall. Allow the paint to dry for an hour. When the paint dries, you will be left with a nice stencil that you can proudly display on your wall.
How to make handmade stencils for the wall is not difficult at all. However, you still need to follow these simple steps to stencil create something that you can be proud of. First, you will need to gather your materials. Get some stencils in different sizes so that you can stencil create the most unique design. Get some paper and a pen.
Next, you will need to prepare the paints and brushes. Get some acrylic paints that are suitable for drawing and painting. As a beginner, you will probably want to use black paint for this purpose. You also need to buy some thinners. Thinner paint will help you fill the stencils without worrying about smearing.
Lastly, you need to apply the stencil and allow it to dry. Once the stencil is completely dry, you can peel off the paint with a putty knife and then touch up the wall. So far, this was how to make stencils for wall art. The first step is always the most difficult, but once you get the hang of it, the rest will fall into place and you can create your own stencil and any kind of wall decorations you desire.
Now, when you have learned how to make stencils for wall art, you will be able to apply your artwork in different designs. Some people love to take pictures and portraits while others prefer to make wall decorations. No matter what your favourite activities, you will find that it takes practice. If you try to do everything at once, you will end up becoming a mess.
There are many different websites online that offer stencils that can help you create amazing works of art. Some websites even offer free stencils, but it’s up to you to decide which ones you want to use. If you want a more comprehensive site, you can pay a small fee and download unlimited stencils. These sites usually have tutorials that show you how to apply different stencils. Plus, there are a lot of other interesting tools and resources available.
So if you’re looking for an exciting and creative way to decorate your home, consider stencilling your walls. It is something fun that you can do by yourself or with the kids. The only limit is your imagination.
Wall stencils are a great way to add flair to any paint project. They look great and add personality to otherwise monotone walls.
You can use a wall stencil to decorate or personalize a room. You can create a stylish accent wall. You can use a wall stencil instead of messy and complicated wallpaper. You can create your faux backsplash or faux brick wall. The possibilities are endless!
It can be hard to find a pre-made wall stencil that you love, especially at an affordable price. A great solution is to make wall stencils yourself! It is easy stencil and fun and you can get exactly what you want.
Did you know that doing something creative like painting makes you a happier person? Doing a creative, hands-on project can make you feel less anxious, boost your self-esteem, make you feel a sense of accomplishment and reduce stress.
On top of all that, you get a great, personalized result that is all your own.
DIY Stencil Supplies
- Stencil Sheets ( Mylar or any transparent plastic sheets)
- Stencil design or pattern
- Marker
- Measuring tape or ruler
- Cutting Mat
- Exacto-Knife
- Adhesive Spray
- Masking Tape or Low lack Tape
- Stencil Paint
- Stencil Paint Brush
#1 Choose your pattern
The first step when you set out to make wall stencils is to pick out your pattern. You may have something in mind already, and if you are super artistic you can draw a pattern yourself!
If you are artistic, draw it by hand, but if you are not blessed with creative skills, look for a pattern on the internet. Find one you like and print it. If it is a large design you might need to go to a printer shop. It is important to measure the space you intend on stencilling if you plan on making your stencil a repetitive pattern. You need to make sure your pattern fits evenly in the space you want to fill.
Pinterest is a great way to get inspiration if you are having trouble figuring out what to settle on.
If you have never painted with stencils before, try to pick a simpler pattern rather than one with tiny and complicated lace-like details.
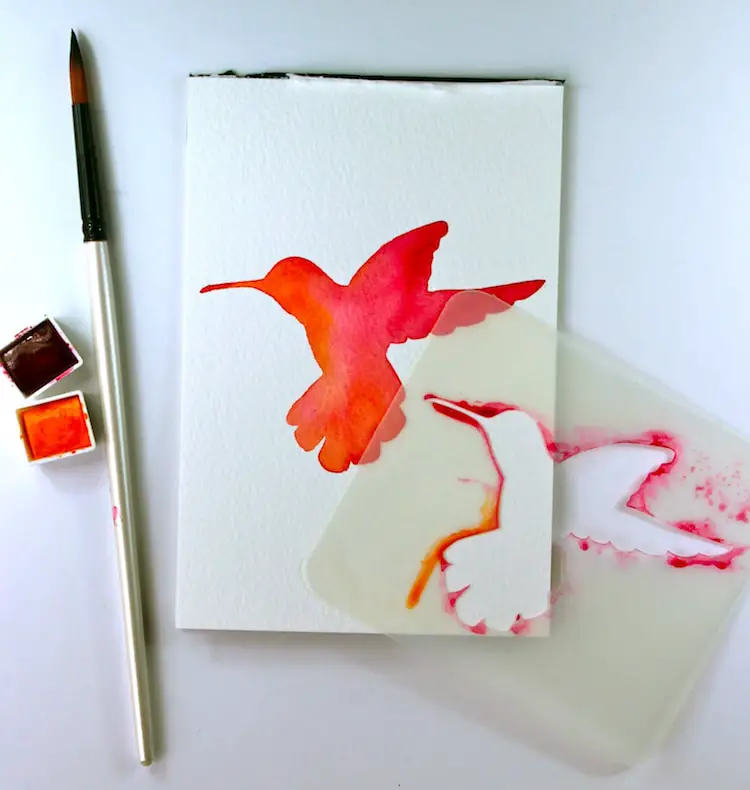
#2 Arrange your stencil design and Mylar / transparent sheet square and even
The easiest approach is to simply print out a design you like and tape your design to your stencil blank. If using a transparent stencil blank, you can tape your design either on top of or below the blank. If using a non-transparent stencil blank, then you will have to tape your design on top of the blank.
#3 Trace the pattern
Place your printed image underneath the semi-transparent stencil sheet. You should be able to see the pattern. Now you can trace the pattern using a marker.
Trace or draw your design directly on the stencil blank with either a sharpie or a fine tip marker. Consider using a ruler for marking straight lines. It will take some time for tracing, still be steady, take some time and finish the stencil pattern. Trust me, you will love it for sure and you will feel like a kid.
#4 Cut out your stencil designs
Use a precision knife or a vinyl cutter to cut out your design designs. Make sure the knife is sharp to prevent accidentally ripping the stencil material. An X-Acto knife would be the perfect example since it runs smoothly on the plastic sheet and causes minimal damage. Consider using a ruler for cutting straight lines.
Stencil cut out using an Exacto knife (this allows for more precision). This step was the most time-consuming part of the project. Press on a cutting mat in order not to ruin your desk or table.
Stencil cut out the design, keeping in mind that anything you cut out will be painted on the wall.
#5 Finally! It is ready
Congratulations! Yayyyy!! Your new stencil is ready for use! Use your new stencil to paint a wall, decorate furniture, or make DIY stencil cards for other people. What is better than designing your cards and personalizing them for your friends and loved ones?
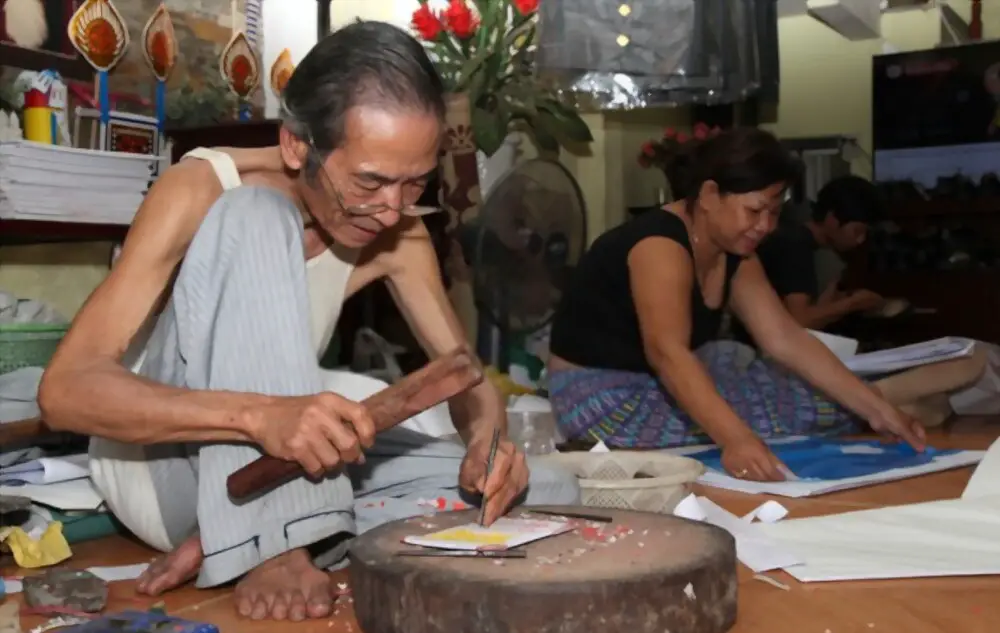
Plastic stencil maker
There are many vendors and manufacturers all around the world for plastic stencil maker. There are lots of designs and patterns for stencil lovers.