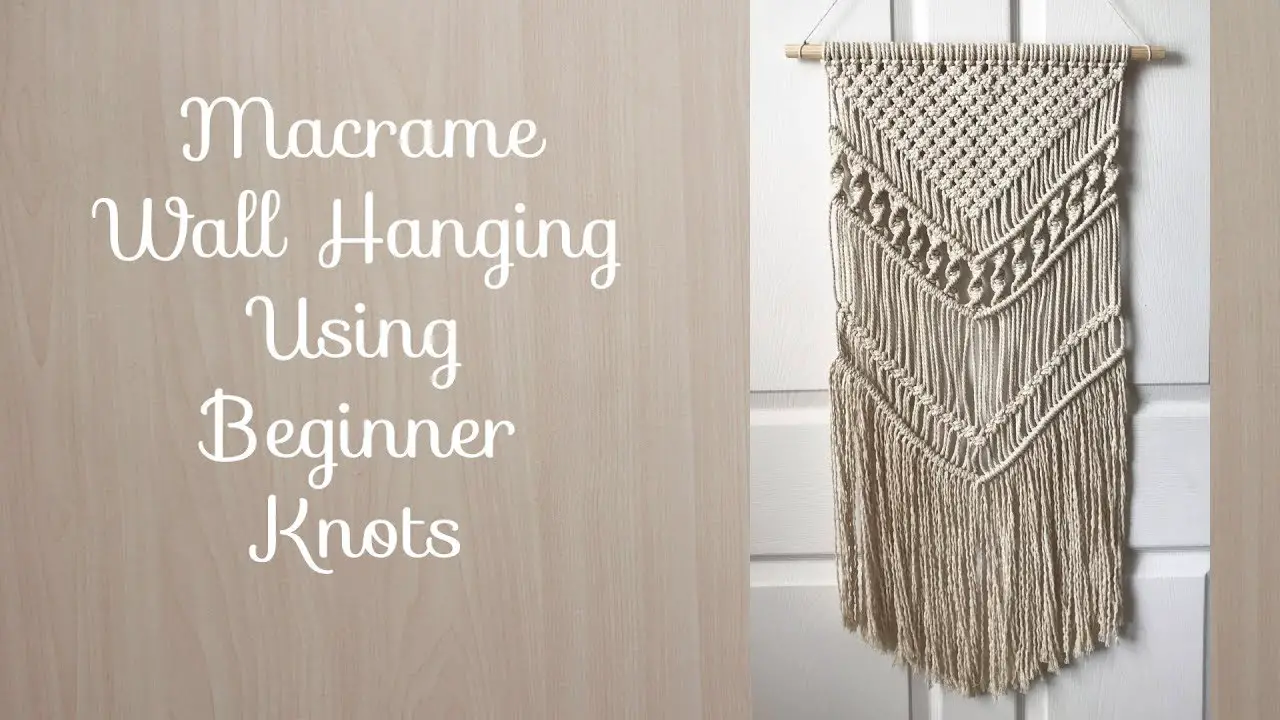
How do you make macrame wall hanging for beginners?
If you wonder How to make a macrame wall hanging, follow these steps,
- Lark’s Head Knot. ( Cut rope into 28 pieces, all 16 feet long )
- Square Knot. The Square Knot is the most fundamental of all macrame knots, and it is the only one you will need to know in making the wall-hanging.
- Macrame pattern.
- Trimming the bottom.
- Finishing touches.
What do you need to make a macrame wall hanging?
- Cotton Macrame rope
- If you are doing wall art, wood or metal dowel, or a similar tree branch or driftwood for another natural organic look.
- Hanging ring if designing a plant hanger
- Scissors
- Tape measure
- Tape
- If you do not need to use tape, you could “seal” the edges by melting the ends with a candle flame as an alternative.
- Rolling stand for clothes
What material do you use for macrame?
Materials used in macrame include cords made of cotton twine, linen, hemp, jute, leather, or yarn.
How do you start macrame for beginners?
- Fold your cord in half.
- Put the loop under your ring, hoop, or stick.
- Push the edges of the cord into the loop.
- Pull the macrame cord securely, and you will have a Lark’s Head knot.
Nook and corners about Macrame
Macrame is once again making a big splash. Macrame has been making quite the comeback. As Bohemian decor is once again becoming the primary trend, macrame has slowly regained its footing. Macrame has a unique feel and sound to it, a distinctive flair.
With the trend of hanging artwork in a non-traditional format gaining momentum, it’s no surprise that macrame patterns have made a comeback as well. Turning your photos, posters, or favorite pictures into exciting shapes such as circles, squares, hexagons,d more can bring out the rustic and artistic side of any room. Hanging a collage picture frame in an artistically designed macrame pattern creates a beautiful framing piece. Using a dowel, stringing different sized macrame cords is easy enough for anyone to master. The great thing about those cards is that they are so lightweight, you can hold them without thinking about it.
Victorian Era-inspired macrame patterns are making a comeback in craft stores across the country. Craft stores such as Etsy and eBay have turned into great sources for finding the perfect Victorian-inspired piece to use in your home decor. While Etsy may not be as actively updated as eBay, it does have a pretty massive selection of Victorian-inspired craft supplies. And with so many products on eBay, it is always a good idea to check in now and then, just if something becomes sold out or if someone else bought it first.
For those who are thinking about starting their store on Etsy, an excellent free video will show you how to do all the basics, including gluing, cutting, and stitching the macrame patterns. The video contains a written macrame tutorial that includes step-by-step directions and a detailed list of needed materials. It is an excellent video to get the very new chapter started.
There are numerous resources out there for those who want to find Victorian-inspired macrame patterns on the internet. I would start by bookmarking both sites mentioned above; then, from there, you can simply type in “Victorian pattern” in the search bar on your browser to see what comes up. Of course, if you do not want to go through all of that work, you can also bookmark websites such as YouTube and eBay. At YouTube, there is a helpful feature wherein when you watch a video, it will play right away on YouTube.
For a more in-depth macrame tutorial, an online book can teach you all of the details and techniques that make up the type of free macrame patterns. The book is called DIY macrame wall Hanging tutorial and has just over forty pages of great macrame instructions. It can be a little expensive (around sixty dollars in the US), but the price is well worth the price. It is available at Amazon and is also available for purchase on their website. The DIY macrame Wall hanging tutorial contains a short video, but many eat photo illustrations that help explain things better. It holds excellent macrame instructions.
If you are looking for some more spectacular DIY macrame projects that are sure to impress your friends, family, and even neighbors, you might want to consider a beautiful macrame plant hanger. The tutorial on this site explains all of the steps you need to know in detail. It is available in English and Spanish. You can find out how to make your handmade book lamps, planters, or even a beautiful Victorian lamp. It even includes how to make a wonderful collage of photos to hang on the wall.
There are many various ways to learn how to make unique DIY macrame patterns. With a basic knowledge of how to tie knots, you can make very intricate pieces like those mentioned above. However, if you have never learned how to tie knots before, it might be a better idea to start with some more simple patterns first. Once you master the basics of knot tying, you will be able to create a wide variety of stunning, unique pieces that will not only add beauty to your home but also give you pride in your work.
How to make a macrame wall hanging?
If you wonder How to make a macrame wall hanging, follow these steps,
Study how to create marvelous Macrame decor
Here, you will know how to create beautiful Macrame art, and also you will get answers to all queries and doubts regarding Macrame decor here.
Study and learn all the nooks and corners about Macrame projects. Start from scratch. Yes, Start from the beginner level and move on to the expert level. With this detailed many eat guide, you can get what to know about Macrame.
Nowadays, users prefer Macrame a lot. So it is trending now! Macrame is a potent style factor in the trending style of bohemian and modern boho ideas.
So, you need to see how to macrame?
Or maybe you are still questioning yourself, “Is there any way to learn Macrame?”
How difficult is it?
So here, you will know all the tricks and fun about the retro crafting trend, Macrame. You will get all the answers to queries and lingering doubts.
By the end of the article,
- You will obtain beautiful macrame wall hanging patterns and affordable.
- And you can include this macrame skill in your skill list.
Beginner Macrame
Macrame can be a fantastic hobby and seldom even more for those who experience crafts and creating unique items from scratch. You can exchange your macrame creations, give them away as presents to your family and friends, or simply hold them for yourself.
The opportunities are virtually limitless as well when it comes to what you can create. From necklaces, earrings, and other custom accessories, to door decorations, dreamcatchers, and so much more!
With that being stated, macrame might be hard for those who have never tinkered in it before. With this in mind, I have put a guide collectively to macrame for beginners below to help you get excited: If you wonder How to make a macrame wall hanging, follow these steps,
Basic Macrame Knots
The resulting five knots are the essentials to get excited with macrame. They will also permit you to make a wide diversity of things, including plant hangers, bracelets, and key chains. Getting these five essential macrame knots will assist you in getting started on a prosperous macrame journey.
- Lark’s Head
- Square
- Half-Hitch
- Double Half-Hitch
- Spiral
To get excited, you will require a few stocks. The most important is the macrame cord. You can get original here as there is a tremendous variety of colors and designs to pick from. Additionally, you will require a ring, stick, or hoop.
1. Lark’s Head Knot
The Lark’s Head knot is the most fundamental to macrame art. It is the origin knot you will practice when adding your cord and can be detected in nearly every macrame project.
- Fold the cord in half.
- Put the loop under your ring, hoop, or stick.
- Push the edges of the cord into the loop.
- Extract the macrame cord tight, and you will hold a Lark’s Head knot.
If you need to get a reversed Lark’s Head knot, you can flip your design to the backside or just do it differently.
2. Square Knot
The square knot holds two primary parts. The first side you create is a half square knot, and if you complete the second side, you will ought a full square knot.
- Start by making two Lark’s Head knots.
- You will hold a whole of 4 macrame cords.
- Practising the outer left cord, cross it above the two middle cords.
- Use the outer right cord and set it on top of the left and below the middle cords.
- You will now get it and pull it into the loop on the left side.
- Pick the cord tight.
- It is the first side of the square knot. Are sometimes offered
3. Half Hitch
A half hitch is a basic knot.
- Start with creating a Lark’s Head knot.
- Pick a cord and obtain the shape of the number “4”.
- Connect the cord into the hole at the head and pull it close.
4. Double Half Hitch
A double-half hitch is precisely what it appears like in that it is formed by creating two half hitch knots.
- Start with the Lark’s Head knot.
- Form the shape of the number “4” with one rope.
- Loop the rope into the hole at the top, pull close.
- Repeat by creating another “4” shape
- Drag it through the loop tightly.
5. Spiral Knot
The spiral knot is one of the most straightforward and most attractive. You have previously learned the basic skills to make it! It is simply made by duplicating half square knots or half hitch knots.
- Next, you secure the initial half of your square knot do not shift to the other side. Just continue working on the same side. You will see that the macrame will begin to create a spiral, do not resist it.
- If you need to get, a thick spiral begins with two Lark’s Head knots.
- If you need a single version, start by creating one Lark’s Head knot and the following repeat half hitch knots.
The twisting is thought to occur, so do not mess with it. Just keep going. It can be challenging to keep a record of your pattern so pay special attention here.
First and foremost, Practice! Yes, Practice How to do Macrame?
Why is practice so important? Like many other skills, it will cost you some bucks! So before proceeding to the actual project, it is a must to practice. If you wonder How to make a macrame wall hanging, follow these steps,
For practice, try Woolen dowel. It is cost-effective, and also, you can practice tirelessly without a sweat.
Macrame Practice Project
Reason for recommending small practice project
- It occupies the time gap while you wait for the macrame rope.
- It will give you the possibility to get intimate with different macrame knots, their names, and how to do them.
- By the end of the practice project, you will either thrilled or eager to go bigger, or you will realize this is not for you.
- Completing the practice project will give you the determination to spend your time and money to take the next level to your primary “real” macrame project.
Which project should I pick?
Choose which project you need to execute. Look for photos of macrame online. You can explore on Etsy, Pinterest, also on Google. Do some searching to view what is out there.
Which type of Macrame can I make? Start Small!
- Plant holder
- Pieces of jewelry like choker necklaces or bracelets
- Wall hanging
- Book mark
- Key chain
Big projects
- Table runner
- Hammock (Project like a hammock, leave it later to do)
- Light fixture
- Rug
- Headboard
- Garland or Bunting
Choose your project type. Wall hangers and plant holders are the popular beginner projects so far. By the end, you will understand and learn how much length of the cord is required. And you can get an outline of the project size. Discover a style that attracts you. More free-form and organic or symmetric with sharp lines and easily fixed patterns.
Where to find Macrame Patterns?
After determining what type of project and which style attracts you, you are set to view a pattern. There are YouTube videos that will drive you to make all varieties of projects that you may prefer. Three main reasons to buy a design are:
- Etsy is the biggest platform with lots of collections; you will get the pattern you imagine for.
- Patterns are a very affordable choice ($5 to $10).
- You can stay away from the computer.
What Macrame Pattern is used?
As far as patterns are concerned, there are several options available. To narrow down the search, go for ” Four of Diamonds” from Reform fibers. It’s also available on Etsy.
The material used for Macrame
After choosing the pattern and project next, you need to check on the material. Yes, pick the material which suits your budget. Usually, Macrame cords are high in price. If you look into amazon during offer times, you will get the Macrame cord at an affordable price and fit inside your bucks!
Materials required,
- Cotton macrame rope
- Wood or metal dowel, or an equivalent tree branch or driftwood; if you are doing macrame wall art
- Hanging ring if making a plant hanger
- Scissors
- Tape measure
- Tape
- If you do not need to use tape, you can “seal” the edges by melting the edges with a candle flame as a choice.
- Rolling rack for costumes
Time is taken more extensive over extensive Macrame Project
- Time purely depends on the project you choose. If it is smaller, then time will be less. If it is more extensive realistic are sometimes offered, then time will be more.
- After completing the Macrame, one thing to do is always review the knots so that it is easy to understand the knots and retrieve them from the fault to attain an expert level.
Can I do this?
Yes! Of course, you can. For your motivation, here I have added my experiences below; look for it and get motivated.
Time required to learn Macrame knots
You might have lots and lots of doubts and queries regarding knots. You will stop the work and look for references in the video. Pause and play is the repeated phase in these steps. But it is nature. To learn something new, you need to raise queries and know about it too. So coming back to a time, it purely depends on your doubts and redoes method.
Do not let this stop you. You may not “get” the knot till your tenth time. But you will get it. Just keep plugging away. Your ‘wowie’ moment is just around the corner.
Experience 1
On my first project, I never got the “diagonal clove hitch knot.” it never looked like the video. Cut out the complete row several times and started over about three times. Finally decided to “let it go.”
I hypothesized that the small string working with did not give itself well to the stitch. It just was not going to look the same. And guess what? I was right. As soon as I began to work with the giant rope, the oblique clove hitch knot looked precisely like the picture. What is the lesson here? Do not give up!
Experience 2
To keep a record of where you are in the steps, I suggest using a highlighter and marking off the steps as you make them.
Experience 3
Do not worry if you forget all the knots you assumed you already learned in your practice project. Every time I began on a new knot, I went back to YouTube and looked up the knot. There are easy-to-follow short videos on every macrame knot in the book. What did we do before YouTube, right?
For more macrame wall art inspiration, visit the My French Twist website.
Choices for Hanging the Macrame Project While You Work
- You can work with the dowel or ring hung anywhere that is comfortable.
- You can hang it on a doorknob, a drawer knob, or anyplace you can find to ensure your piece.
- Other plans are to use a suction cup hook or an over-the-door garland hanger.
- You can still take down a piece of art hanging on your wall and hang your item from the pin.
Q&A
1.Can Macrame be washed?
A lot of you have been asking if macrame items can be machine or hand washed. The answer is yes, but macrame wall hangings should be spot cleaned as they are not created to withstand the machine’s tumbling. Smaller items like bookmarks, coasters, placemats, and runners, depending on patterns, can be machine washed at 86 degrees Fahrenheit. Keep it in a tiny garment bag and hang it to try.
2.Can you use yarn to Macrame?
Macrame is made by hand, you do not require to use either knitting needles or crochet hooks, and free macrame patterns are a lot comfortable than they resemble to follow. The yarn you practice for the macrame is called the macrame cord. You can use different materials such as hemp, cotton twine, leather, or wool; you can add various beads for a different texture. The most important point while deciding which material to use for a design is speculating about the completed item and using procedure some methods. Thick and robust macrame rope will be helpful, and for some others, light and soft macrame yarn will be more helpful. Still, Yes! You can handle the thread for Macrame.
3.Can you use Jute to Macrame?
Jute is a significant element to use for several Macrame projects. It is not too expensive, and the heaviness of the yarn will give you quick results. You can buy jute in 2-ply sizes up to 5-ply. One thing to keep in mind when you’re using jute is that it is not colorfast. It implies that if you agree to be doing the jute in a design that will be reduced to electric or natural conditions for an extended time, it will fade. You will notice that the natural blend of jute, sometimes offered sandy, light-colored brown, will be noted for natural projects if you agree to use stones, shells, beads, and other rustic items.
Jute is also available in dyed colors realistic for those Macrame projects where you need shade. Or you can take your Macrame craft one step further by dying your jute.
4.How to choose the type of macrame cord for the project?
Choosing a cord for your requirements to use for your project comes down to 3 basic notions:
Esthetics: Braided and 3-PLY cords provide your project a distinct appearance than if you use single twist cords. When you use braided and 3-PLY cables, your knots resemble a bit cleaner, and single twist cords provide your work more of a fuzzy look and feel.
Type of project: I like to use 3-PLY or braided cords for my plant hangers and Macrame market bags. For macrame wall hangings, Macrame purses and Macrame jewelry favor working by single twist cords.
Now it could be that you totally disagree with me and like it the other way around, and that is perfectly fine. Ensure to order different types of cords to discover which look and feel you prefer.
Whether you follow a pattern: When you follow a way, color the same type of cord, 3-PLY and braided cables are a bit more rigid, and your knots will take up more space. Single twist cords create more minor knots, so your projects will come out smaller.
How thick should the Macrame cord be? : While preparing the mm cord thickness for your design, the fundamental rule would be to handle thin cables in small projects and thick ropes in big projects.
If you use small cords in a great design, REMEMBER will have to do a lot of knotting, and that your knots will be less visible. Thicker lines will show off your knots a lot better, which you want in the end.
5.What size cord should I use?
When you follow a pattern, it is recommended to use the same size mm cords or alter them to fit them. My recommendation per project type
- Big wall hanging: 4-10 mm
- Small wall hanging 3-5 mm
- Planter: 2-5 mm
- Macrame bags: 3-5 mm
- Jewelry: 1.5-3 mm
- Key chain / Bookmark: 1.5-3 mm
6.How much cord is required for Macrame?
Overall, your macrame cord requires to be about four times the length of your design if the threads are doubled, indicating folded in half to create two lines, next aim for eight times the length of your project.
So, if you are making macrame wall hanging patterns that are about a foot long with double strands, figure-eight feet of rope strand if you are in doubt, always cut more rope than you think you will need.
There are few factors to consider; these tips apply to projects made with macrame string, rope, and cord. For simplicity’s sake, here, the term “cord” below is used.
If your pattern names for many knots or closed spaces, your cord might require to be longer.
If your pattern orders for mostly open spaces or straight cords, you might not need as much yarn.
Heed the size cord recommended by the pattern, as altering the thickness could influence the amount of yarn you require. If the design does not define what thread to handle, check out this article from My French Twist on tips for preparing your next macrame project.
The thicker the cord, the longer the strands need because each knot will take up more real property on a thicker cord than a thinner one.
Macrame Lovers has additional excellent information on the topic as well. They go toward feature about the length of knotting cords versus core cords.
7.How to keep knots looking uniform?
As you match more experienced in the art of Macrame, you will need to focus even more on keeping your work smooth and uniform. You will want the tension to be even and your line of knots to be straight horizontally, vertically, and diagonally. You will be looking for firm edges and loops that are equal.
The easiest and secure way to accomplish perfection is by using the Macrame board or other anchoring methods to ensure your work while you are working. The Macrame board will help you retain your knots’ size and the pattern of your project uniform.
A great way to improve the skill of tying uniform knots is to practice. I recommend saving leftover bits of cording that you can later use to practice tying knots on. As you practice, your knots will become more uniform and even with time. It is the secret to an excellent macrame.
Get into the habit of securing your work before you tie that first knot. You will soon find that your Macrame projects look even with knots that align and are the same size. And that makes for a better-looking macrame!
8.What is a Macrame Board?
One of the fundamental pieces of macrame accessories is the macrame board. The board holds the work while the crafter knots it, and there are several types of boards available. Most macrame boards are flat sections of particleboard, foam, or pressed cardboard. The traditional style of board is when macrame boards can pin macrame projects to a flat surface. These boards require to be lightweight so that a knotter can keep them in his or her lap if wanted. Although there are several commercial boards available, they can also make at home.
The surface of a macrame board usually has a grid marked in inches or centimeters. The knotter usually depends on the grid marks to assure that the finished work is smooth. Hardly, boards feature small increments of sizes. Numerous macrame boards include some diagrams of the basic knots, which is particularly helpful for beginners. Usually, these diagrams have the lark’s head, square, double half hitch, and other superficial knots.
The most common macrame boards typically are about 11 by 17 inches (about 27 x 43 cm), though other sizes are sometimes offered. Usually, all range from 0.5 to 0.75 inches (about 1.25 – 1.88 cm) thick, depends on the supply and the manufacturer. Few of the new designs incorporate improvements to help the knotter follow the threads from tangling. For example, a macrame board could set pegs on each side of a long, narrow, wooden board. Those pegs hold the skeins of thread when they are not in use. A strip of cork down the board’s center allows the knotter to pin the work.
9.Why is macrame making a comeback?
Home decor designers include macrame in bulk. The humble fiber creations make a satin and modern comeback from their 1970s origins, with designers creating modern pieces in excellent scales, shapes, and colors for home decor use.
The 21st-century versions of the bohemian style can produce a more comfortable and motivated vibe to your living space.
Macrame’s birth was much more rural than today’s colossal macrame wall hangings and room dividers. In the 13th era, northern African weavers designed covers made of thick, durable knots to guard the skin of horses. The art design grew in the 1970s with the bearing of knotting thick rope or nylon to create long plant hangers and heavy window treatments, with other trendy decor items that could anchor a room.
10. Where did Macrame originate?
Sure, hand-knotted tapestries, plant hangers, and accessories loaded every nook and cranny in the ’70s and are performing a mighty comeback now. Still, this craft was retarded over hundreds of years from all around the world. Let’s investigate the ancient origins of Macrame!
The origin of Macrame is generally connected to Arabic weavers during the 13th era, using decorative knots to close the loose ends of hand-woven textiles. Nevertheless, decorative knot-tying can also be tracked back to third-century China on ritual textiles and wall hangings. While it might be challenging to pinpoint the original Macrame ever made, thanks to that 13th era Arabic Artisans, the craft slowly spread everywhere in Europe and ultimately became a common hobby for Sailors.
Wrap-Up
So, if you need to do macrame, don’t forget to check this article.