Do you want to spice up your trip with some excellent style and color? You can not only do it yourself, but you can get excellent results for less than the cost of a pair of speakers!
I’m passionate about assisting others, so I worked long and hard to compile this comprehensive do-it-yourself (DIY) guide on mounting LED strip lights in a vehicle.
What is LED?
Light-emitting diodes (LEDs) are light-producing semiconductor devices. Semiconductors are electronic components made up of silicon and other materials that allow electrons (electrical current) to flow in specific directions. Diodes are “one-way valves,” meaning they only allow current to flow in one direction. They also emit visible light, which is an intriguing feature. The cathode connects to the ground cable, while the anode (positive lead) connects to a positive power source.
In the world of electronics, light-emitting diodes (LEDs) are one of the most critical elements. They’ve been around for decades, but they’ve only become more useful in our daily lives in the last 10-15 years or so. It applies to both home and automobile lighting.
A semiconductor junction is used to power LEDs car. They are composed of two different materials, such as silicon and germanium, that are fused to create a diode-forming junction or bridge.
Diodes are critical components in the electronics industry because they act as one-way electrical valves.
The theory underpins microscopic transistors, which allow microprocessors and a slew of other modern technological marvels to function.
The LED chip (the semiconductor materials themselves) is a susceptible item, but a rugged and robust epoxy housing protects it. To link electricity, wires are bonded to tiny components.
How LED’s produce light
When diodes transfer electricity, they have a unique side effect.
Over time, more companies have built on them, and they now manufacture low-cost, attractive LEDs that can emit light in a variety of colors.
On the other hand, LEDs operate on a low voltage, unlike regular light bulbs (say around 1.5 volts or so each). It means LEDs must use them in conjunction with a resistor to keep the amount of current flowing to a minimum. Otherwise, they’ll quickly burn out.
When LEDs are operated by car voltage, resistors are used (usually somewhere around 12V).
Comparison between LEDs, light bulbs & neon bulbs
| Criteria | LEDs | Light bulbs | Neon tubes |
| Power use | Low | Moderate/high | Low |
| Cost | Low | Low/medium | Medium/high |
| Voltage | Low | Low/as required | High |
| Durability | Excellent | Poor/moderate | Poor/moderate |
| Life expectancy | Extremely high | Low/medium | Low/medium |
| Soft glow effect | Poor | Fair | Great |
In comparison to incandescent (filament-type) bulbs and neon tubes, LEDs have many advantages.
LEDs have significant advantages in virtually every category that matters, as seen in the table. They’re even more cost-effective.
It’s not only because they’re so tough and have such a long useful life (typically in the tens of thousands of hours), but also because they operate at a lower voltage.
One disadvantage is that they can’t recreate the “warm light” that neon tubes can, but this is a minor flaw in the grand scheme of things. They still look amazing when done well!
May be you like : How to Install Car Speakers By Simple Steps
How do multicolor RGB LEDs work?
RGB LEDs are made up of three different colors LED segments fused into a single small box.
Colors are created in various brightness levels to form different color combinations, much like images shown on your computer monitor or a phone’s liquid crystal display (LCD).
Three connections are available on RGB LEDs: one for each color. The three colors are driven at different brightness levels, and various hues of colors are generated using a specially built LED controller.
Simple red, green, and blue colors can, of course, be produced. The controller’s capabilities determine the number of color and brightness variations available.
How do your LED light strips work?
Three connections are available on RGB LEDs: one for each color. The three colors are driven at different brightness levels, and various hues of colors are generated using a specially built LED controller.
Simple red, green, and blue colors can, of course, be produced. The controller’s capabilities determine the number of color and brightness variations available.
UsingInstall very quickly switching on/off with separate wiring for each RGB color is made possible by an LED controller in more advanced light strips.
Car LEDs light strip have several RGB LEDs and resistors wired in parallel that are equally spaced. When the LED driver controller box is turned on, each color receives its own on/off signal. It permits for a wide range of brightness and color combinations.
The longer an LED is turned on, the brighter it appears to your eyes. If one color is switched on more often than the others, that color will stand out more. In most light sets, each light strip connects in parallel with other light strips by design. (For example, if blue is switched on more frequently than red, you’ll see a color mix with more blue in it.)
Choosing an excellent LED light strip set
Investing in a good LED light package is essential. There are so many on the market today that shopping can be a pain!
- Buyer feedback is positive, and consumers are satisfied.
- Installer-friendly to a degree
- MulticolorMulticolor modes are available.
- Adjust the music mode based on the sound.
- Modes of color rotation (gradient, fast, etc.)
- Controlling the brightness
Supplies, tools, and your shopping list
Before installing LED lights in your car, I suggest making an essential list of what you’ll need.
Tools needed-
- A multimeter is favored over a test light for calculating voltage.
- Crimp connector crimping tool
- Screwdrivers and other tools (as needed for your vehicle)
- pliers with a wire-cutting feature or wire-cutting pliers
Before beginning your installation, I strongly advise purchasing an inexpensive but delicate multimeter (left), such as this best-selling budget model from Amazon, as well as a wire crimp tool and wire crimp connectors (right). You’ll get professional results, and it’ll be a lot easier!
Supplies-
- 6′′ long or equivalent wire (“zip”) links (usually sold in a bundle of 100 or more).
- Crimp connectors for wires (small assortment)
- Electrical tape on a roll
- The glue of good quality that dries quickly
- Adapters for fuse taps (if wiring from fusebox)
If you’re doing car light installation to flat (or other material) surfaces, I highly suggest using a high-quality glue like this easy-to-use Gorilla super glue gel. Pick up some tiny wire ties like these to keep your installation wiring tidy or mount lights to wires or other nearby items.
Although it might not seem necessary right now, I highly advise purchasing a pack of wire ties. They’re fantastic for holding wires together and keeping them tidy.
Instal LED lighting in your car
To mount your LED lights, you’ll need to follow a few simple steps. It takes some time to do it correctly, but it’s well worth it!
Materials needed-
- Connect the controller (or the lights) to a +12V and ground power source.
- Secure the light strips in place.
- The operation must be tested and checked.
How to wire 12V LED strip lights for cars
Although using a cigarette lighter to power a television is convenient. It is not the best or most elegant solution. However, it is appropriate for short-term use.
Although many LED car interior LED lights to come with a cigarette socket power plug, this isn’t always the best choice. Ideally, you can hardwire them to turn off with the ignition switch, similar to how the car stereo does.
LED light strip wiring
You’ll need to hardwire the set to an adapter wire to get a +12V supply that turns on and off with the ignition.
You will usually locate a suitable wire in one of the following locations:
- Behind the stereo in the car (usually the first option)
- Wiring at the cigarette lighter socket
- In the vehicle’s body, at the fusebox
Tap off of the fusebox
The fusebox in your car, which contains a power source for the radio – and your LED kit – usually is located in one of many locations. (As seen above) Under a panel in the dash or (below) near the brake pedal on the lower driver’s side. Fuse marks are usually found in the owner’s manual.
Another possibility is to connect to a power source at the fusebox. It’s usually found on the dashboard’s left side, either near the lower left-hand side of the interior or under a panel on the dashboard.
Most cars have a power source for the radio that you can use.
Wiring adapters for fuseboxes make it simple to tap into a power circuit to install LED lights. You attach the power wire after plugging them in place of the original fuse.
Consider getting a fuse wiring adapter if you’re tapping into the fuse box.
If you don’t have an owner’s manual, you can check fuse power with the ignition on and off with a test meter before finding one that works. After that, link the LED power wire with a fuse tap adapter or another connection.
Connecting the wiring
After you’ve found a suitable power source, you’ll need to do the following:
- Join the LED control wires together.
- The negative power wire is grounded.
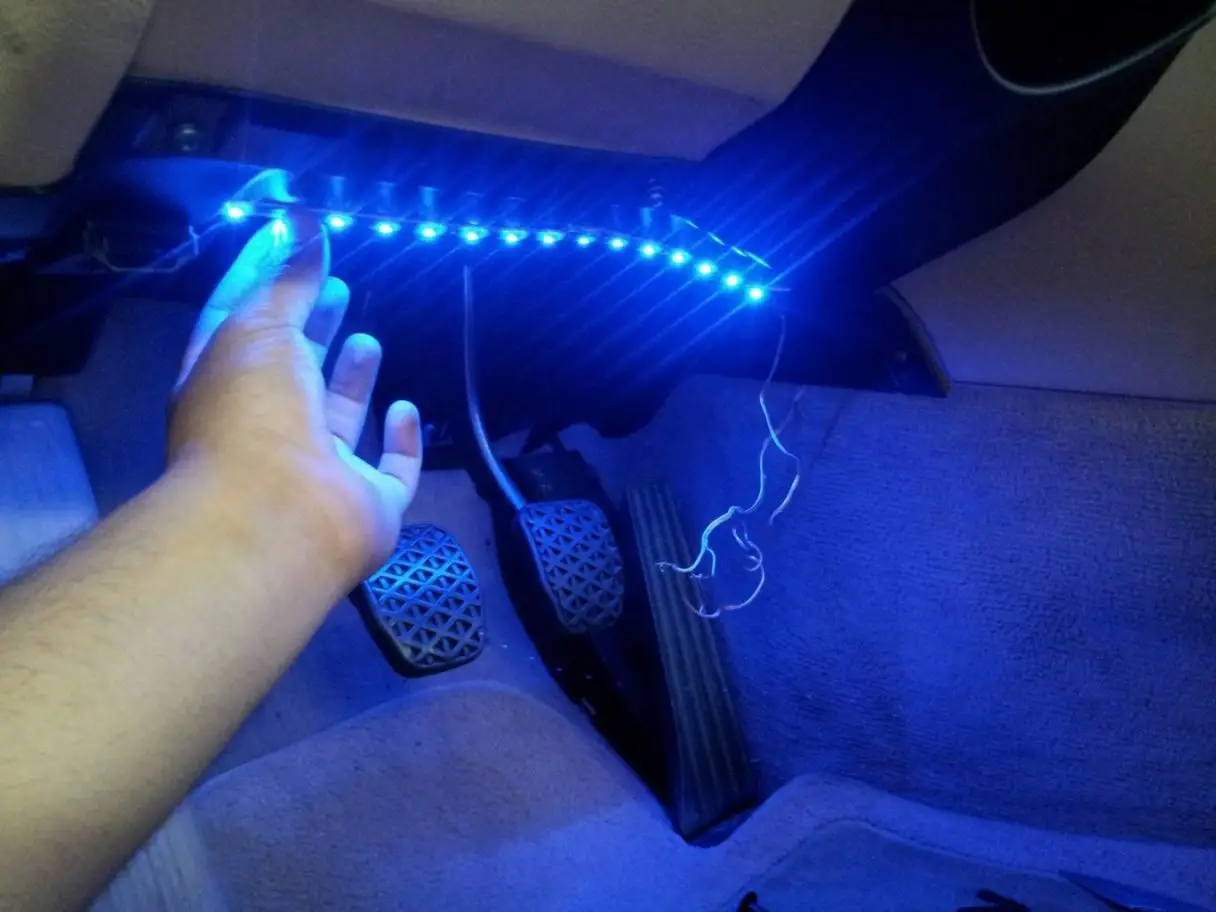
Mounting your LED light strips
The wire length is restricted since many light sets (like the one I’m using here) have the light strips permanently attached to the control box. However, most traditional installations should be sufficient.
My front and back lengths were approximately 48′′ (122 cm) and 58′′ (147 cm). Each front and rear pair is approximately 4 ft (1.22 m) and 5.6 ft (1.7 m) long.
Interior light strip locations
Diagram depicting traditional LED light strip positions in a car interior. For the front two, significant areas are under the dashboard and on the front or back of the seats. In most cases, use longer cables with light strips.
Mount your light strips (assuming you have four, as most sets do) as follows:
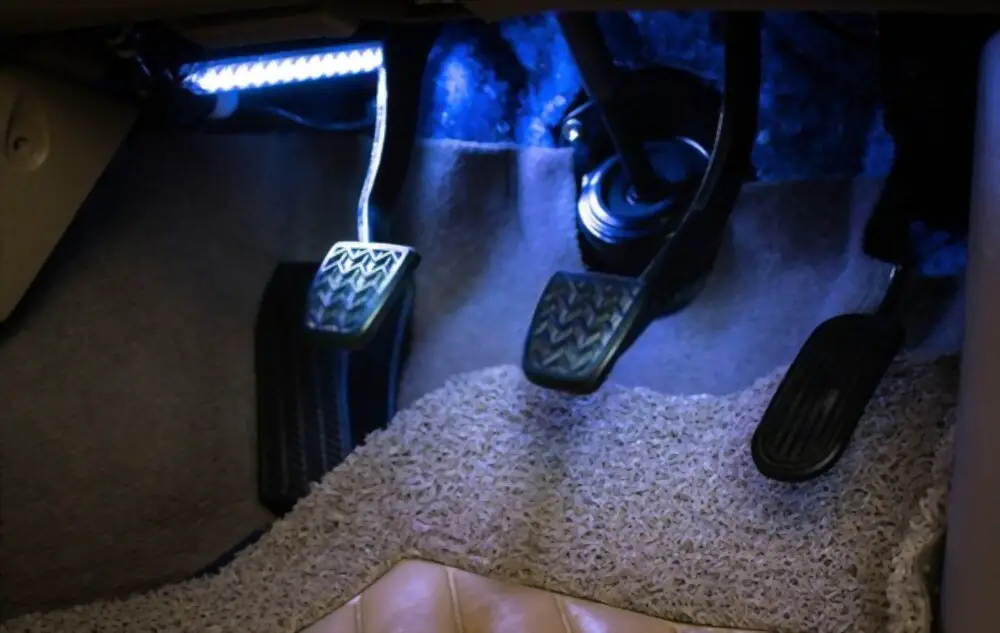
- Front left and right: behind the dashboard, facing down
- Under/on the front or rear edges of the front seats, left and right
You may also briefly test them by taping them in place with good quality tape before permanently installing them.
Locating the controller
The LED light set controller (for those with remote control and sound sensor) must be accessible from the remote and positioned in a location where it can adequately detect sound. Install it on one of the dashboard’s center console’s sides, where the Controller will conceal it. The driver’s side is most certainly the safest.
Infrared receiver (IR) sensors are commonly used in LED controllers that have a remote control. These require a clear line of sight to the control box’s sensor.
Additionally, versions have an internal sound sensor. In both cases, the control box must be placed where it is not entirely hidden and where the remote can operate it.
Installing the light strips and cables
Although automobile LED light strips for car interior usually come with self-adhesive tape on the back, it isn’t always practical. The adhesive fails due to repeated sessions of heat exposure, vibration, and being kicked by feet in a car.
As a result, I advise using the two methods I described earlier:
- When attaching to the under-dash plastic panels, use a high-quality adhesive.
- Fasten light strips to vehicle wiring bundles or dashboard brackets with wire links.
It’s a good idea to use a high-quality gel super glue like Gorilla Glue. While it may appear permanent, each light strip will only need a few tiny drops (about 4 to 5). While gel glue dries quickly, it is simple to work with and very solid.
Clean any surfaces with alcohol and a cloth, an alcohol pad, or a good surface cleaner before you begin. Silicon and other defensive materials, such as Armor Everything, leave a residue that makes glue adhere poorly.
Wire ties are also simple to use and allow for a variety of innovative installation options. A light strip can be supported by almost any nearby object or hole.
Attaching light strips to seats
After you’ve installed the light strips under the dash, you can do the same with the seats.
If you don’t want to use a permanent adhesive, you can use genuine Velcro instead. Generic Velcro has a low adhesive consistency and will not last long.
If wire ties are open, try using them on the seat frame. Wire links are excellent, but they can also be cut and removed without causing permanent damage.
LED amp rack lighting
Place them around your amps, facing them (for as many sides as you want or make sense for your system). It will give you a stunning appearance that you will be proud to flaunt.
In reality, you can use a simple relay connected to the remote wire and powered by the amp +12V and ground terminals to switch them on with your device automatically.
Can I put LED lights inside my car?
Some requirements must be considered before installing auto LED light strips inside a vehicle in certain parts of the United States. California is home to one of the most well-known restrictions. To make a car look better, it is essential to remember the regulations before installing this form of light.
The laws for this form of lighting in a vehicle are based on two main aspects in general. They are the luminosity level in conjunction with the color that is mounted in a particular vehicle. According to the authorities, these types of lights can be very distracting when they are pretty amplified.
Of course, even at high speeds, this means a certain degree of insecurity. That is why it is critical to understand the relevant laws before wasting resources. On the other hand, LED lighting inside a car is legal as long as the intensity is minimal. If you want to drive to California, here are some things to think about.
Are our interior car LEDs illegal?
It also ensures that most aftermarket lighting (such as high-intensity LED “off-road” lights) is illegal to use on a public road. It’s not illegal to put these on your car; it’s only illegal to drive with them on a public road.
How much cost does it cost to install interior LED lights in your car?
Installing LED lights inside the car is one of the most cost-effective choices, costing as little as $100. As a result, today’s LED lights come in a wide range of efficiency. Furthermore, since there are so many different types of LED lighting available these days, medium-quality lighting could cost anywhere from $300 to $500.
How do I hardwire LED lights in my car?
Interior LED lights, which come in various wavelengths and brightness levels, provide comfort, protection, and the ability to personalize your car. LED lights have several benefits, including a small scale, a longer lifespan, lower energy consumption than incandescent lights, quicker switching, and high reliability.
Step 1- Until you begin operating, disconnect your car’s battery.
Step 2- Connect a 12-gauge AWG cable to the positive terminal of your car battery.
Step 3- Connect the 12-gauge AWG cable to an in-line fuse as directed by the fuse manufacturer. The fuse protects your LED lights from high-voltage infusions from the car battery, which can be harmful.
Step 4- Drill a hole in your car’s firewall, which separates your engine from the rest of the interior. Fill the hole with rubber grommets to keep the 12-gauge AWG cable from rubbing against your car’s metal and damaging both. Pass the 12-gauge AWG cable via the firewall hole.
Step 5- As directed by the manufacturer, connect the 12-gauge AWG cable to the control switch.
Step 6- Connect the control switch to the interior LED lights with a 12-gauge AWG cable.
Reconnect the battery in your vehicle. When you start your engine, you should turn your LED lights on and off with the control switch.