You can still fire pottery and glaze clay pots if you don’t have a kiln at home. Without a proper pottery kiln, the process is even more complex. It is, however, probable. Some people, particularly for projects involving small children, prefer to use these methods.
There are three main methods for firing clay at home without a kiln, and we’ll show you how to use each and help you decide which is best for you.
The requirements of a firing medium
Glazing pottery often necessitates the use of a kiln. Kilns, on the other hand, are big and costly. The best ceramic kilns for home use will set you back at least a couple of hundred dollars. They can be difficult to store in your home at times, and many beginners aren’t prepared for such an investment. If you choose to use a different alternative, you can do so if:
- You don’t have access to a pottery studio
- No place to store a kiln
- You want to experiment with other firing mediums
Pottery is a costly hobby due to the pottery wheel and kiln, all of which require a lot of storage space. Many people don’t have enough room in their homes for a studio, so it’s understandable if they don’t want to spend money on a firing medium.
You won’t need a kiln, but a firing medium will be needed. There are a few standards that alternates must fulfill.
According to Goshen College, the firing medium you use should be able to:
Attain high temperatures
Allow the clay’s water to evaporate.
Harden the clay you’re working with.
The result should be the transformation of clay into pottery.
How to fire pottery without a kiln- the 3 methods
You can learn to fire pottery without a kiln in a variety of ways. However, the best choice for you can be determined by the pottery-making process you use and the type of clay you use.
It’s important to know exactly what you’re doing while firing pottery without a kiln for the first time.
Otherwise, the pottery can crack. Depending on your needs, use one of the three traditional methods for firing pottery without a kiln mentioned below.
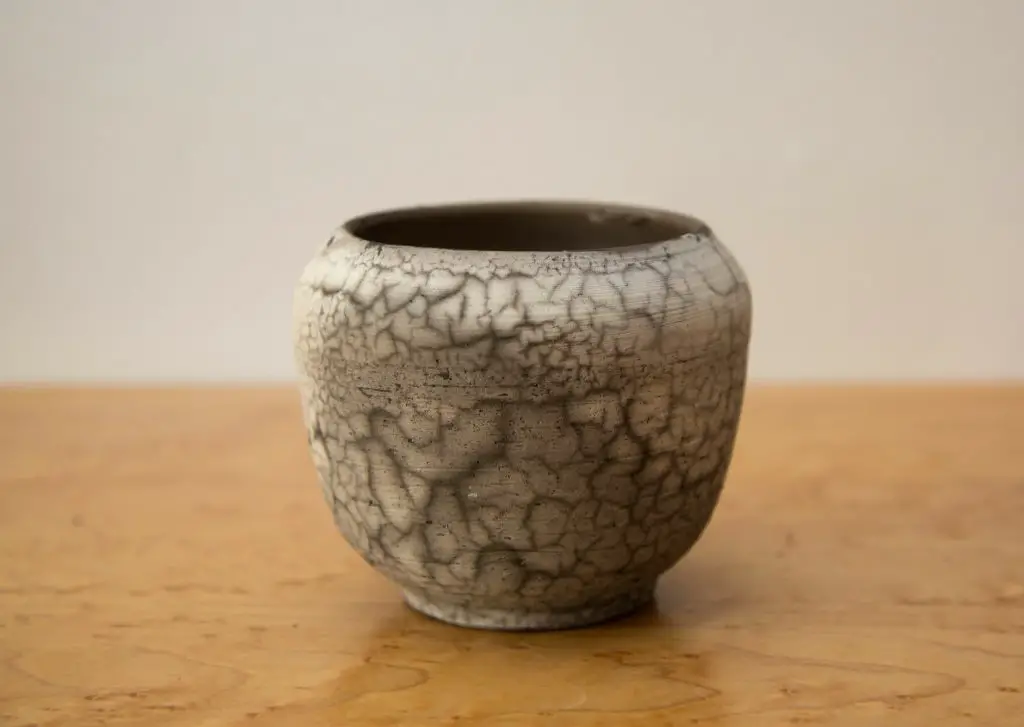
1.Raku Firing
Raku firing is a process for firing pottery without using a kiln, but it is time-consuming and takes up space. With this technique, you can still use a standard, food-safe glaze to make highly unique pieces with awesome design elements.
A bisque or biscuit fire is needed for raku firing. Most pottery undergoes a bisque firing before being fired again to melt and fuse the glaze to the clay object. This eliminates the possibility of damage to the pottery by using underglazes, stains, and other decorative techniques. The bisque firing method, on the other hand, is the most time-consuming.
This method of firing often necessitates a large pit area and a large barrel or similar object. Starting a fire and keeping an eye on it for long enough for it to reach the desired temperature can quickly become time-consuming. The method isn’t recommended for small children or someone who can’t safely maintain a fire for an extended period.
Another factor to consider when deciding if raku firing is right for your pottery project is the design you want to create. By incorporating sawdust, woodchips, seaweed, or animal dung into raku, you can make unique patterns and textures. The impact is particularly well-suited to metallic and copper-like appearances. However, the pattern does not repeat itself every time a piece of pottery is fired.
Finally, toxic fumes are produced during raku shooting. When there are children present, the procedure is extremely risky.
How to use Raku
Make sure the atmosphere is fire-safe before you begin.
A conventional bisque fire will be used to raku fire pottery. Place your pottery inside the hot medium and place the barrel near the fire. Barrels are ideal for this move since they usually have a few openings from which you can gain entry. The majority of people simply remove the top to put their items inside.
For a long time, the pottery must remain inside the barrel. Since you must gradually heat and improve the fire, the process is slow. In certain ways, the barrel serves as a kiln. You should be able to bring the fire to about 1,400 to 18,000 degrees Fahrenheit, which is hot enough to melt laze on your pottery.
When the pottery is red hot, remove it from the kiln and immediately immerse it in cold water or sawdust. Tongs and protective gloves are advised.
If your pottery has cooled, you can remove the carbon from the glaze with a cleanser. This move is optional, but it enhances the shine of the pottery. After that, set your item aside to dry for a few hours in a safe spot.
2.Pit Firing
The initial method of baking clay was pit firing, also known as smoke firing. It’s great for natural pottery, and you can use it to fire pottery with a glaze on it at the same time.
Without a kiln, the process reaches the temperatures needed to glaze pottery. Temperatures usually range from 1,600 to 2,000 degrees Fahrenheit, and the clay item is left inside to dry for 12 to 24 hours.
Pit firing, on the other hand, should never be used around combustibles. A large open space is best. You’ll need a location where you can keep the pit hot and dry. To house your pottery and shield it from strong winds, you’ll dig a big hole. Another choice is to bisque fire the pottery first, then glaze it in a pit fire.
Pit shooting has the disadvantage of being difficult to maintain consistency. Other firing methods can make the pottery more fragile. Smoke vapor, on the other hand, can be used to produce colors and patterns.
How to use pit firing
This method is similar to raku firing in that it involves starting a fire in a trap, but without the barrel. To put the pottery, dig a big pit. Some people like to cook on a conventional barbecue grill. To start the fire, use wood chips, gas, or paper (without any paint or glue on it).
Maintain a high temperature in the pit, between 1,800 and 2,000 degrees F. The clay should be left in the sun for 12 to 24 hours. You can either fire the pottery before glazing it or glaze it first and then fire it again. You may also glaze and fire the pottery all at once.
When the pottery has hardened, remove it from the pit with tongs. Allow it to air dry. You may also wait for the fire to go out before removing the pottery.
3.Kitchen oven
Although there is some debate about the feasibility of using a kitchen oven for pottery, this approach could be suitable for projects involving beginners or young children.
The kitchen oven works well as a no-kiln clay substitute because it helps the pottery to dry quickly. Since food-safe glazes can be baked, it’s an easy way to make decorative parts only. You can also learn and experiment with art projects without having to invest in a costly piece of equipment.
The kitchen oven, on the other hand, has a few drawbacks. m The method, for example, uses temperatures that are still too low for glazing. For safety reasons, you should only use those forms of clay in an oven, and the results can often become brittle. To decorate the pottery, it’s best to paint it after it’s been fired in an oven.
With handmade clay, for example, using a kitchen oven is perfect (e.g. salt dough clay). The drying process is accelerated by using the oven. To prevent the item from sticking to the oven, several people suggested using a baking pan with a liner.
How to use a kitchen oven
Kiln fired clay at low temperatures in most pottery projects that use a kitchen oven. Preheat the oven to 250 degrees F and bake your pottery for about an hour.
Since baking time varies, thicker projects can take up to three hours to complete. If the content becomes rough, the project is finished in the oven. If you use it too much, it will begin to crack.
Then, to decorate the pieces, you’ll want to use acrylic paint. If you’re using salt dough, you should paint it before firing it. Glaze, on the other hand, cannot be used in an oven. The glaze would not stay in place because the temperature is too low.
How to glaze pottery without a kiln
The glaze is required for the decoration of pottery. It makes the item more durable, heavier, and easier to use. While some projects don’t need a glaze, if you want practical pottery, you may want to learn how to glaze without a kiln.
If you want to glaze pottery in the home oven that you didn’t make in a kiln, the natural method could change the glaze. There are many glaze choices to choose from, but you must make sure that the one you choose is the best fit for your needs. Before you buy a choice, always read the labels on the glaze.
Only decorative pottery glazes are labeled as being safe to use without excessive heat. Unless the glaze contains flux, they aren’t usually food healthy and food safe oven-bake clay. Most of these glazes need only a small amount of heat rather than several thousand degrees.
Acrylic paint is used to decorate pottery projects that do not require the use of a kiln. Paint is only suitable for decorative purposes; it is not suitable for use on food-safe ceramics. Food coloring can also be used to change the color of the dough in other ventures. However, you can make your roadside glaze at home.
How to make roadside glaze
You may also produce your pet-safe glaze. Collecting natural materials and shooting the glaze in a special process is all part of the process of creating a glaze. It’s much more intimate than pouring a store-bought glaze from a bottle, produces no plastic waste, and allows you to glaze pottery without a kiln.
First, you’ll need to locate a spot with plenty of rock formations to pick. Since it has natural blemishes and character, impure clay is perfect.
Clay minerals have been mined since the Stone Age, according to the United States Geological Survey (USGS). Learning more about how and where these minerals shape in your area will aid you in locating the best deposits with the least amount of environmental impact.
Crush the minerals you need with a sledgehammer once you’ve found them. The parts should be small enough to grind or mill with a grinder. After that, you’ll use the grinder to make smaller parts. When the minerals have crumbled, combine them with water until they form a cohesive mass.
Then, before firing your pottery in a pit fire, you may add this homemade roadside glaze to it. To vitrify, the pit fire should be between 1,600 and 2,000 degrees Fahrenheit.
Keep in mind that certain areas have legislation prohibiting the use of roadside clay or glaze.
Summary
There are many excellent ways to fire pottery without using a kiln. However, the best method for you will always rely on the amount of room you have and the type of craft ceramics at home you want to make. Most low-temperature processes, for example, aren’t suitable for food-safe ceramics.
It takes a lot of trial and error to fire pottery at home.
Consider purchasing an electronic solution if you try a few methods and still believe a kiln is a perfect way for you to fire glaze or making pottery at home. You might also try meeting up with other potters to see if they have a kiln you could borrow. Pottery clubs also pool their resources to buy costly equipment for mutual use.
How do you fire clay without a kiln?
A professional kiln is not available to everybody. When making miniatures or jewelry out of natural clay as a DIY project or a one-time experiment, it can seem absurd to invest in one.
The Skutt FireBox 8×6 LT Multimedia Kiln is a perfect starter kiln if you intend on making clay parts regularly and want to experiment with glazes. And guess what? Instructables is holding a clay contest, and the grand prize winner will receive this incredible kiln, as well as a tonne of clay supplies, glazes, Laguna clay, and equipment from The Ceramic Shop.
Anyway, you can’t avoid firing in your DIY projects because it’s needed to build the bond between clay molecules that prevents it from dissolving in water.
Step 1: Materials needed
You will need:
- 2 wide-mouthed clay pots
- Sawdust
- Coal
- Kerosene
- Matches
Step 2: Set up Pot A
Place the fully dry clay bits on top of a layer of sawdust (about an inch or two thick) in Pot A, taking care to uniformly distribute them.
Step 3: Top it up with another layer of sawdust
To fully cover the bits, add another layer of sawdust.
Step 4: Burn Coal
- Fill pot B with coal.
- Coat the coal bits with kerosene.
- Light it and heat it to a red-hot temperature.
*When dealing with flames, use caution. The coal in the pot appears to crackle and spurt out. Make certain you take the requisite precautions*.
Step 5: Transfer Coal
When the coal is red hot, carefully move it to the first pit, right on top of the sawdust, using tongs.
Step 6: Leave the Set up
The coal would take at least 4 hours to burn full, and another couple of hours for the heat to dissipate. Set it aside for the time being.
Step 7: Carefully fish out the fired pieces
This method produces a black production. This isn’t soot at all. The sawdust, which aids in the gradual and even distribution of heat, also acts as a barrier, reducing the amount of oxygen available to the clay parts. As a result, the iron compounds in clay undergo a reduction reaction, resulting in the production of black. The bits, on the other hand, become solid and the clay molecules bond together in a similar way to kiln firing, rendering the clay insoluble in water.
This process is used to fire all of my clay jewelry and keepsakes, which are then painted with acrylic paints.
Another instructable on DIY clay jewelry can be found here, where I go over how to make a pair of cute clay earrings. In that tutorial, you can see how the painted parts look.
Can I make pottery without a kiln?
Is it possible to make pottery without a kiln? This is a common issue. Yeah, you can make pottery without using a kiln. In reality, you can completely fire pottery without a kiln, and we’ll go over how to do it, as well as some alternatives to a traditional kiln and why it’s important to know.
Why fire without a kiln?
You might be wondering why you’d want to fire clay without using a kiln. Some people do so for a variety of reasons, including the following:
- Kilns are not cheap.
- They frequently take up a lot of space.
- They’re something that you may not be able to afford right now.
- If you’re not sure if you want to devote time to this hobby, it might not be financially feasible.
When it comes to outdoor shooting, however, this must reach a temperature of at least 1000 degrees Fahrenheit. This isn’t something you can do just inside your building. Another reason is because of this. Different types of clay are fired to different temperatures, and you can normally only work with earthenware since it is a low-fire bisque that works for you. Modern kilns can reach temperatures of up to 2400 degrees, but you don’t need one if you’re working with clay that isn’t super high-fire. However, most popular clays, especially beginner clays, melt about 1900 degrees Fahrenheit.
Tribal people fire without a kiln for a variety of reasons, including the following:
At a higher temperature, the clay can be contained.
To get wood kindling to burn, you can make a bonfire-like atmosphere.
It’s fairly simple to contain.
That is why this method of pit firing is so common because it is easy to control and produces excellent results.
Can’t I just use an Oven?
No, you can’t use the oven to fire pottery. Of course, you can bake it, but you can’t shoot it. This is because firing pottery clay in an oven is simply not feasible, for a variety of reasons.
- Ovens don’t get hot enough to even start getting red-hot.
- When exposed to such high temperatures, they are prone to combusting and exploding.
- It can also melt or crack the clay if you’re not careful.
Clay can be baked in the oven at any time. That’s where those kid-friendly, easy-to-use clays come from.
You can, of course, air-dry it, but the problem with air-drying clay is that it can’t be used. It’s purely decorative, and there’s a risk it won’t stay together. There are other options if you want to shoot, and you will find them listed below.
How to pit fire clay?
To pit fire clay, all you have to do is start it and keep an eye on it. You mustn’t leave this unattended. To get it started and completely fired, do the following:
- If you’re concerned about breakage, cover the vent partially with tin or pottery fragments as soon as the wood starts to burn to restrict the burn and heat it slowly at first. If you tend to smash the pottery, try opening it up a little bit at a time to allow the fuel to come in and burn until it’s red hot.
- You’ll start moving more fuel into there from there, burning it and making it expand until it’s red hot.
- You’ll probably need to double-check that you have enough kindling and let it sit for around 12 hours at this stage.
- Allow it to cool slowly, then cover it with a layer of dirt or wood ashes to choke out the air if you want it to be smokier and darker. This is a great way to make black pottery.
- Allow cooling until it reaches a temperature of fewer than 500 degrees. It’s best not to handle it until it’s reached room temperature, but you can start rolling it out by prodding and pushing it.
If you have problems, keep in mind that mistakes will happen, and then just think about it and try again. You’ll be pleased with it because mistakes lead to new ideas, opportunities, and learning.
Safety tips
The importance of safety cannot be overstated, and you should always adhere to the rules. Here are a few things to keep in mind when doing this sort of pottery, or any pottery for that matter:
- Still keep an eye on where you’re shooting and how you’re firing it.
- When shooting, always keep in mind the local protection and fire codes.
- Be cautious of any open fires, and make sure you know how to spot them if they’re strict.
- Never do this in an area where there is a risk of the fire spreading.
- Do have a stock of water on hand in case anything unexpected occurs.
- Keep an eye on the wind patterns, and if you think it could catch other things on fire, don’t fire that day.
- Still keep an eye on these.
- If you have a kid, make sure you teach them how to do this safely and never leave them unattended with it.
- Tell someone else not to mess with this because the temperatures are far higher than a typical cooking fire.
- Always make sure they aren’t hot before picking them up and touching them while removing them. To keep your hands protected from heat and flames, you can use tongs like Kemper Dripping Tongs.
- Since there is always the risk of catching fire, you should wear protective goggles, fireproof gloves, and keep your hair and other flammable clothes away from the air.
You can have a more enjoyable experience when shooting by understanding simple safety precautions, and from there, you can avoid the worst-case scenario.
Can you air dry pottery clay?
Drying pottery should not be forced. When the clay is already leather-hard or drier, using heaters or hot air blowers like hair dryers can cause serious cracking. It’s best to dry slowly and evenly. Cover parts loosely with plastic if they are drying too fast.
Drying pottery and clay pieces is a crucial phase in preparing them for beering. There are two major factors to remember.
- Clay objects with protuberances or irregular thicknesses (for example, handles) must be dried uniformly.
- Before loading clay into the kiln for bisquing, make sure it’s completely dry.
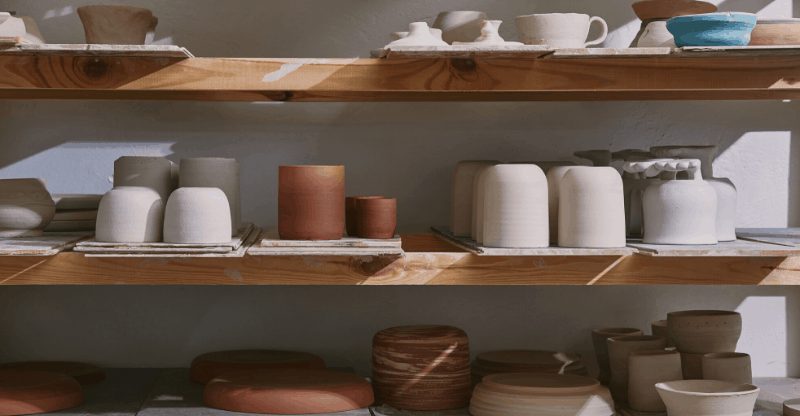
General guidelines
- Place pots on shelves to allow air to flow freely around each item.
- Drying pottery should not be forced. When the clay is already leather-hard or drier, using heaters or hot air blowers like hair dryers can cause serious cracking.
- It’s best to dry slowly and evenly. Cover parts loosely with plastic if they are drying too fast. Cover the piece with newspaper, then plastic if there is a lot of humidity. Any condensation would be absorbed by the newspaper.
- Remove any inflexible armatures before attempting to dry an item beyond leather hardness. The clay will break if the armature cannot be squeezed easily enough.
Use Wire racks to dry clay slabs and tiles
Since slabs and tiles typically only have one long surface exposed to the sunlight, they are more vulnerable to warping and cracking. This causes the slab to dry unevenly.
After a slab or tile has been made, one way to ensure that it dries uniformly is to position it on a wire rack.
- Using a rolling pin, roll out a slab onto a piece of cloth.
- Lift it as if it were a sling and place it on a shelf.
This method reduces the chances of the clay being folded or heavily bent, which creates internal tension and can result in warping.
Use the drywall to dry clay slabs and tiles
Because drywall is made of plaster, it can be used to work with slabs and tiles. Drywall, like cement, absorbs moisture from the clay. Make sure you have standard drywall, not the kinds of moisture barriers to keep mold at bay.
- On sheets of newspaper, roll slabs, or tiles.
- Move the slab or tiles to the first piece of drywall after they’ve been rolled out.
- Place another sheet of newspaper on top, then the second piece of drywall.
- As required, repeat the process.
- Allow the slabs or tiles to sit in the drywall parts until they are stiff leather-hard or bone dry.
On both sides, the drywall absorbs moisture from the slabs and tiles, allowing the clay to dry uniformly and steadily.
Important: Even a speck of plaster dust or particles will cause your clay to burst in the kiln. Make sure any cut or open edges of the drywall sections are sealed. For either side of the drywall board, use three strips of duct tape, one centered along the edge and one overlapping the first strip of tape.
Can you fire a glaze in an oven?
Since real glaze contains a lot of silica, it needs some flux to melt at 2200 or 2300 degrees in a pottery kiln. As a result, a silica glaze cannot be fired in a home oven. However, enamels can be painted on ceramics that are fired at 300 degrees Fahrenheit. Unfortunately, they are not suitable for consumption.
While firing pottery clay in a pottery oven is not possible at home, it is possible to oven bake ceramics that have been decorated and painted with special paint. For this project, you’ll need to start with glazed pottery. After allowing the paint to dry for 24 hours, bake it for 35 minutes at 150°C (300°F) in your oven.