Cutting Styrofoam (polystyrene foam) can be difficult due to the material’s tendency to crack, leaving uneven edges. Carve Styrofoam into parts with smooth, even edges using these tips.

Step 1: Mark the Styrofoam.
- To make a straight cutting line, use a sharp, thin object to pierce the foam. Mark a groove in the Styrofoam.
- In the scored cutting line, break the Styrofoam. Place the foam on a table or countertop with the scored line running around the edge for better results. To make a clean split, press down along the scored line. Remove any excess foam with a serrated kitchen knife or a craft knife if desired.
Step 2:Use a waxed sharpened kitchen knife to remove Styrofoam.
- Wax the knife by rubbing the whole blade over a candle many times. Using a white candle to stop having colored candle wax on your foam.
- Long, sawing motions were used for cutting polystyrene foam with the serrated knife. To avoid cracking or crushing the Styrofoam, apply, even pressure to the knife during the sawing motions.
Step 3:Cut polystyrene foam with an electric kitchen knife.
- To make clean cuts in Styrofoam, use an electric kitchen knife like a carving knife or a fish fillet knife.
- Place the electric knife along the desired cutting line on the foam. Enable the serrated blades of the electric knife to cut through the Styrofoam without applying pressure.
Step 4:Use a craft knife to cut Styrofoam
A craft knife is great for cutting small, thin foam parts, but it’s not recommended for anything thicker than 1 inch (2.54 cm). Unlike serrated blades that tear through the foam, the sharp blades in craft knives appear to flatten or compress the Styrofoam. This could lead to crooked or irregular cuts in thick foam sections.
- For small, precise cuts, use a craft knife. Bevel cuts and v-cuts in foam can also be made with craft knives.
- With the craft knife, make small, steady cuts into the Styrofoam. In the foam, make a shallow cut mark. Run the craft knife through the foam several times after the initial cut, each time making deeper cuts until the Styrofoam is cut through from top to bottom.
- Change the blades in craft knives often while cutting Styrofoam. Dull blades can cut the foam in rough, irregular slices.
Step 5:Use a hand saw to cut Styrofoam.
Straight cuts in polystyrene foam are made with compass saws, coping saws, and hacksaws. When cutting soft foam, avoid using styrofoam saw with a flexible blade because the blade can wobble, resulting in irregular cuts.
- Long, sawing motions were used to cut the Styrofoam. Maintain consistent pressure on the saw to avoid crushing the Styrofoam.
Step 6:Cut Styrofoam with power saws
Jigsaws, band saws, and scroll saws, which are used for cutting wood, may also be used to cut Styrofoam. Cutting big, bulky pieces of foam with power saws is especially useful.
- Follow the manufacturer’s instructions for the saw you’re using. When using power saws to cut Styrofoam, always wear protective goggles.
Step 7:Utilize a hot wire cutter
Hotwire cutters, which can be found at home improvement or hobby shops, use a heated wire to melt through the foam and create a smooth edge. For cutting shapes out of Styrofoam, hot wire cutters are particularly useful.
- With the hot wire cutter, apply consistent pressure to the desired cutting line. When using a hot wire cutter, use great care because the wires are very hot and can cause serious burns.
Tips
- Consider using cookie cutters to make several Styrofoam shapes. Metal cookie cutters should be used for cutting styrofoam sheets that are no more than 1/2-inch (1.27-cm) thick.
- When cutting Styrofoam, use a cutting board or cutting pad to cover the work surface.
- Rub the rough area of Styrofoam with another piece of Styrofoam to smooth the rough edges.
Warnings
- Burns may be caused by hot wire cutters because they are hot. Allowing children to use hot wire cutters is not a good idea.
- When cutting Styrofoam, use caution. Cutting tools are razor-sharp and can injure you. Seek medical attention immediately if you get cut.
- Wear a dust mask while cutting Styrofoam with a power saw. Power saws can produce “foam dust,” which looks like sawdust but can be irritating if inhaled.
Things you’ll need
- Sharp, thin objects like knives
- Countertop or table
- Serrated kitchen knife
- Candle
- Electric kitchen knife
- Craft knife
- Hotwire cutter
- Hand saw
- Power saw
- Safety goggles
- Dust mask
- Cutting mat or cutting board
What is the best tool for cutting Styrofoam?
Foam is one of the most flexible materials to work with for a do-it-yourself project since it can be used for a variety of purposes. Cutting foam is a different story than cutting wood, but it still necessitates the right tools for the job. Making those cuts and shapes without the right tools can be messy, time-consuming, and real pain.
You can cut thin foam boards and make easy cuts by hand with basic materials. You’ll need some electric tools to make wider cuts or cut through five-inch-thick foam parts, like the pros do. For slicing and shaping foams, check out the foam cutting tools mentioned below.
May be you like this post : How to clean Styrofoam
List of the best tools to cut styrofoam
1.Hotwire knife

If you’re going to be cutting a lot of foam and don’t want to make a mess, a hot wire styrofoam knife is a perfect choice. This knife can be powered by batteries or plugged into the wall, and it can heat up to high temperatures, allowing you to slice through foam with ease.
Unlike a serrated knife, which can make a big mess by removing pieces of foam when cutting, this knife will heat the foam and melt it away, allowing you to push the blade through it.
It’s important to be able to heat your knife and, regardless of the type of foam you’ll be cutting. Although some hot wire knives heat up, you want to make sure that the one you pick is solid and durable enough to maintain a high temperature for the duration of its use, so you don’t have to worry about it cooling down to the point where it won’t cut through your foam.
Although you may need some kind of energy to use a hot wire knife, it is the best choice on the market for serious crafters who want to be able to cut through their foam and with a smooth, non-jagged edge. You can choose from a variety of different features to ensure that you have purchased the correct tool for the job.
One of the key advantages of using a hot wire knife is that you can pack it up and take it with you, making it easy to craft on the go or in a different place without having to think about how you’ll transport all of your tools and materials.
2.Saw and specialized blade
While a table saw with a specific blade that can handle the foam you need cut down to size isn’t the best choice if you’re going to be doing delicate work on your foam, it’s a good idea if you want to make quick cuts.
As compared to conventional saw blades, which behave like a serrated knife and produce a lot more waste and dust when used to cut foam, this type of blade can slice through the foam and produce less dust. The saw would be able to handle rigid foam with ease thanks to positioned cutouts in the blade. Unfortunately, if you’re dealing with finer or more fragile foam, this isn’t a good idea because it will be ripped and ruined.
Look for blades with a ceramic coating, as this will minimize friction between the blade and the foam. As a result, the amount of effort and force required to drive the blade through the foam to make the necessary cuts would be reduced. Heat is required to cut through foam, and when you use blades designed to focus the heat of the saw and blade along the cutting edge, you can rest assured that the blade can cut through the foam.
If you choose this choice for a foam cutting tool, one issue you will face is that it is difficult to transport. If you want to craft on the go and want to bring your foam cutting tools with you, you’ll be disappointed by the size of your saw and blades, which are too big to carry around. If you need to be able to take your tools with you on the road or to another location to craft, then you may want to look for a smaller option that will make this possible.
3.Foam cutting saw
If you’re going to be cutting a lot of thick foam, a foam-cutting saw could be a good investment. Unfortunately, this may be one of the most expensive options available, but it is one that the professionals use, indicating that it is, without a doubt, the best alternative available for fast and accurate cuts.
They have a flat base with small wheels that roll along the surface of the foam you’re cutting, reducing friction. This will expedite the procedure.
There’s no need to worry about the blade going to the side with these saws because they have such a big foundation. When using the saw, you’ll be able to maintain a smooth up and down motion, ensuring that your foam has straight edges and that you don’t have to worry about the quality or accuracy of your cuts.
Although there are some DIY tutorials available to guide people through the process of making this form of saw on their own, if you want to ensure that you get high-quality cuts, you should buy the real thing.
4.Dremel
Although a Dremel tool can’t be used to cut larger pieces of foam down to size, it’s important when you need to create intricate designs in your foam and want a lot of control over the final product. It can be very difficult to use this tool without shredding the edge of the foam that you are working on, which is why it only has a few uses and it is not the right tool for the job.
Nonetheless, if you’re in a hurry, your Dremel will cut down your foam, but your edges will be untidy and you’ll most likely have a big mess on your hands.
When cutting and removing the foam with your Dremel, you’ll be relying on friction and rubbing the edge of the foam, rather than heat, which will cut through the foam without causing much harm. You can be prepared by using this method in an environment where you can clean up your mess until you understand the difference.
It’s also worth noting that cutting foam with a Dremel can take much longer and take much longer than cutting foam with a hot wire knife, which is made for this purpose.
5.Hotwire scroll table
Although a hot wire knife is usually the only tool you’ll need to cut through the foam, a scrolling table will allow you to rest the piece of foam you’re working with on the table while still having full control over it. You will not only have complete control over your piece of foam when cutting it, but you will also not have to worry about your hands shifting and causing you to make a mistake.
It’s important to think about whether you need a table with defined measurements or whether a simple scroll table would suffice. While both will improve your ability to cut foam and control the location and size of the cuts you make, a table with measurements will make it much easier to cut pieces to a specific size without having to worry about measuring.
6.Utility knife
While both will improve your ability to cut foam and control the location and size of the cuts you make, a table with measurements will make it much easier to cut pieces to a specific size without having to worry about measuring.
Since cutting through foam will dull your knife’s sharp blades, it’s a good idea to select one with blades that can be modified. Another option is to use a utility knife with blades that pop off when they become dull, revealing a sharp blade underneath. This will keep you from having to return to the store to get new knives as you dull their blades.
Features
The table included measurements
When looking for a hot wire knife cutter, one thing to think about is if you want one with a table and defined measurements. When you choose a hot wire cutter that has a table not only will you have a solid surface on which you can rest your foam while you are cutting it, but you will be able to measure it and cut those angles, thanks to the dimensions that are displayed on the table itself.
This makes it simple to cut the foam you’re dealing with to a particular size or ensure that the angles you’ve cut are right.
While an included table is not needed for all projects, if you want the most leverage over the foam you’re cutting and want to be able to transfer and control it when it comes into contact with the hot wire.
Because of its size, you won’t be able to use this tool on the go as, and it will take up more storage space, but it’s a fantastic choice for someone who wants to improve their control and precision and is willing to rely on a high-quality tool to cut styrofoam.
Battery Operated
Battery operated and corded, have their own set of pros and cons, making it impossible for certain people to choose what type is the best one for them. If you’re concerned about whether or not you’ll be able to take your hot wire knife with you and want to ensure that you won’t have to depend on finding an outlet to use it, a hot wire knife that runs on batteries is the way to go.
When using a battery-operated hot wire knife, one issue you’ll encounter is that when the batteries fail, you won’t have the same amount of strength to cut through the foam as you did before. This can be inconvenient, particularly if you’re in the middle of a project, and is a good reason to keep extra batteries on hand at all times. If you don’t want to deal with this thing, then you might want to consider buying a hot wire knife that is corded and will plug into an outlet.
While you won’t have as much freedom over where you take and use your hot wire knife, you won’t have to worry about whether or not you will have the strength that you need to complete your art. Additionally, extra batteries can be costly, particularly if you use your hot wire knife, so keep that in mind when selecting a product.
Corded Electric
It is a smart idea to use corded tools if you want to ensure that your tools are as safe as possible. Although this does mean you’ll need access to an electrical outlet to use your tool, it also means you won’t have to worry about it dying on you while you’re working with it.
Consider purchasing a tool with a long cord so that you can extend the tool further away from the wall, which will come in handy when cutting large pieces of foam.
Although corded tools are a little more costly to buy, they don’t need you to replace the batteries, so you won’t have to think about this extra cost over the tool’s lifetime.
Optional Tips
While corded tools a little more expensive to purchase, they do not require you to change the batteries, which means that you won’t have to worry about this added expense over the life of your tool.
Although a straight edge can suffice for the job or project at hand, if you want your tool to be as flexible as possible, look for one that includes additional tips for cutting more complicated shapes. These tips can not only make it easier to cut different shapes and patterns into your foam but they can also be swapped out if one form of foam works better than another. This enables you to tailor your work and make the most of your new tool.
What is the best way to cut Styrofoam?
Lightweight and simple to paint, styrofoam is a perfect material for any number of arts and crafts. It’s simple to cut styrofoam into any shape you want, but you’ll need the right tool for the job. Cutting styrofoam balls with cookie cutters, knives, or box cutters is an option. For a smoother, more finished look, try cutting foam with an electric knife. You’ll be cutting styrofoam into the shapes you need in no time, whether you’re making custom pieces for your cosplay outfit, unique decorations for your holiday tree, or prop elements for a theatre production.
Cutting Styrofoam
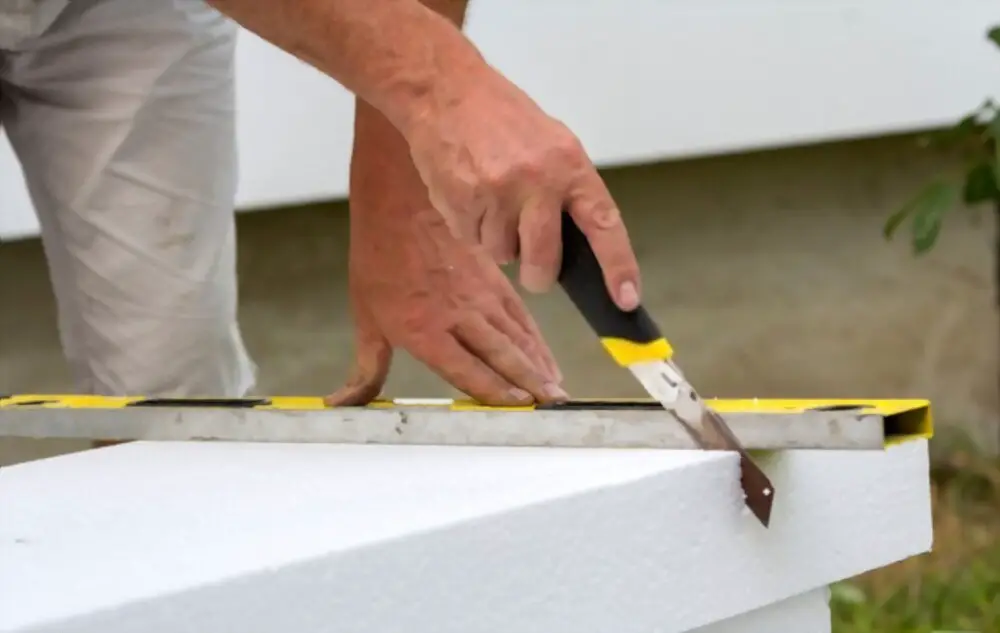
Use a blade for straight cuts.
Before cutting the styrofoam, run the blade over an old candle for a cleaner break.
- To stop coloured candle wax on your foam, wax your blade with a white candle.
Use dental floss for cutting through styrofoam sheets.
Cutting straight lines across sheets of styrofoam with dental floss is a breeze. Push the end of the floss furthest from you towards you to slice the styrofoam.
Use cookie cutters to make unique shapes.
You could cut through the styrofoam with a cookie cutter if you have a thin slice (no more than two inches or five centimeters thick). Press the cookie cutter’s thin edge against the styrofoam until it punches through to the other side. The resulting styrofoam slice would be in the form of a cookie cutter.
Try cutting it underwater.
If you don’t want to make a mess, cut styrofoam underwater by submerging a slice in a tub or bucket of water and cutting styrofoam with a knife underwater. This keeps the tiny crumbs from flying all over the place and allows you to make a quicker, and thus smoother, cut. Since styrofoam does not absorb water, the cut styrofoam block can be patted dry afterward.
Cutting styrofoam with electric tools
Cut thicker pieces of styrofoam with electric knife
An electric knife is your best bet if you’re cutting through multiple bits of styrofoam at once or a single piece that’s several inches (several centimeters) thick. They’re great for straight cuts, but they may also aid in a curving cut.
For cutting larger pieces, use foam cutting saw
Cutting through large bricks of styrofoam, such as those used to package televisions and other large appliances, requires the use of foam cutting saws. They are, however, the most expensive choice, with prices ranging from $150 to USD 400.
- In most cases, all you have to do is turn on the saw and press the piece of styrofoam you want to cut into the blade while keeping your hands clean. Consult the manufacturer’s instructions for the saw you’re using.
- Wear a dust mask and safety goggles while cutting styrofoam with a power saw. Power saws produce “foam dust,” which resembles sawdust but can irritate the lungs if inhaled.
Utilize a hot wire cutter for smooth cuts.
Hotwire cutters use a heated wire to cut through the foam, leaving a smooth edge. They are particularly useful for making rounded edges or shapes out of styrofoam.
- With the hot wire cutter, apply steady, consistent pressure along the desired cutting line. The wire will break if you move too through the foam.
- When using a hot wire cutter, use great care because the wires are very hot and can cause serious burns.
- Hotwire cutters are ideal because they make the smoothest cuts and leave the fewest styrofoam crumbs behind.
Making various cuts
Follow the directions for the craft you’re making.
When cutting styrofoam, you may want to start with curved cuts and then move on to straight cuts. Both are permissible as long as you obey the project’s instructions.
- If you’re working on a project of your design and don’t have any instructions, you can start by making curved or straight cuts. Remember, it’s your idea, so break any rules you want!
To avoid cracking or crushing the foam, apply, even pressure to the knife during the cutting process. Long, sawing motions can reduce the number of foam crumbs generated as well.
Cut indentations
Start in the middle if you want to cut a depression in styrofoam. Draw a line around the area you want to remove, then choose a tool that will allow you to remove it while maintaining the depth and curvature you want.
- A knife is a perfect tool for removing a depression with vertical sides. Choose a suitable long knife and cut along the line you’ve drawn.
- In certain cases, a rounded sanding tool works better than a knife for making indentations.
Cut channels with bladed tool.
Cutting channels through styrofoam is best done with a long, serrated knife or an electric knife. Make a mark on your styrofoam for the length and depth of the channel, then punch your blade through the styrofoam to the depth you marked. Remove the piece until it has become loose.
- Break channels into a piece of styrofoam or around the surface of a piece of styrofoam using this technique.
Make round styrofoam balls by cutting down the middle.
By drawing a line along the equator of a round styrofoam ball with a sharp pencil, you can cut it in half. The manufacturer has already labeled this line on several styrofoam balls. To bisect the ball, use a sharp blade, a hot wire cutter, or an electric knife.
How do you smooth cut Styrofoam?
Many art projects benefit from the use of styrofoam as a foundation. It comes in a variety of ball and cone sizes, as well as various foam sheet thicknesses and die-cut forms. You can make your shapes and art projects by trimming and smoothing cut Styrofoam parts. The majority of the tools used for trimming and smoothing Styrofoam are common household products, making the process simple and inexpensive.
Cutting and trimming Styrofoam
Step 1
Rub the blade of a serrated knife, craft knife, or electronic carving knife with an old wax candle. This will cause the blade of your cutting knife to slip into and through the Styrofoam.
Step 2
Use a permanent marking pen to measure and mark your cutting line on the foam, or press an indentation into the foam with a ball-point pen.
Step 3
With a waxed cutting blade, cut and trim along the indicated line. Use quick sawing movements and small strokes. If you yank on the blades too hard, the Styrofoam will crack and break.
Sanding and smoothing Styrofoam
Step 1
Cut or trim the pieces of Styrofoam for your project.
Step 2
Cut a scrap piece of Styrofoam into a 2-inch rectangle. Rub the scrap piece’s cut edge against the Styrofoam project pieces’ cut edges. The rough-cut edges will be sanded and smoothed as a result of this.
Step 3
Rub a scrap piece of Styrofoam against the cut’s rough corner edges. Round, mix, taper, and form Styrofoam project bits.
How do you rigid foam?
Rigid insulation foam is the ideal material for insulating a specific area while minimizing moisture and mildewing. To make clean cuts, all you need is a utility knife or an electric saw. Any amateur home repairman can make a precise incision in rigid insulation foam if they cut it and with the right equipment.
Readying the cut
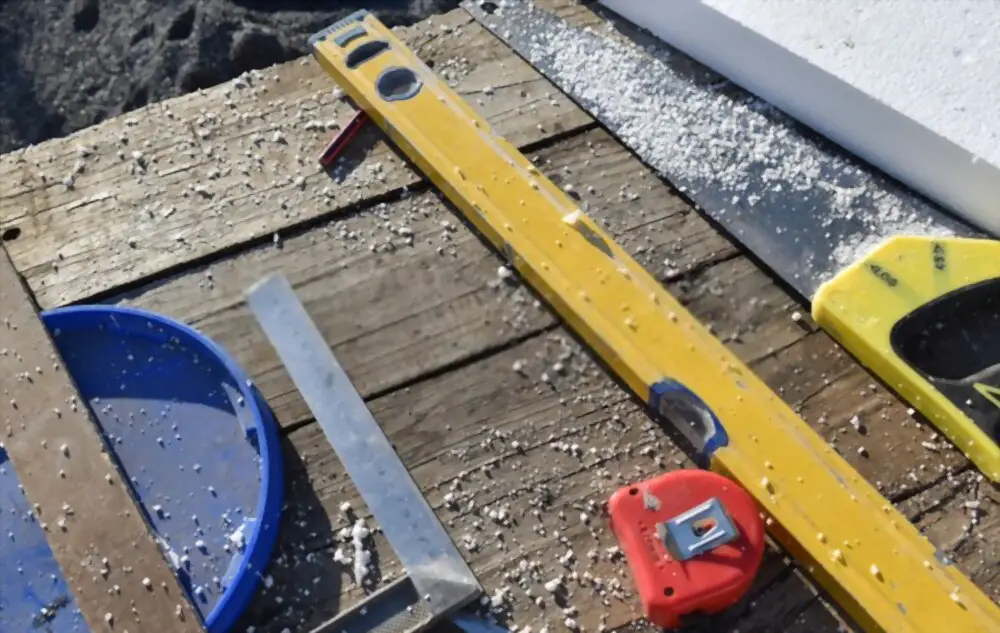
Measure your cut with a straightedge ruler.
Measure the length and width of the rigid foam you’ll need for a particular project before cutting it. Check these measurements against the length and width of your rigid foam insulation to ensure it is long and wide enough.
- Check the length and width of item 2-3 times for more accurate measurements.
Use a permanent market to mark the cutting line
Using your straightedge ruler to direct you as you make the label on the rigid foam insulation. Draw a line along the side of your straightedge with your permanent marker, then double-check the marking for accuracy.
- It’s preferable to start with markings that are a few inches or centimeters too big than too small. If required, you can always cut more foam later.
It would be easier to make a precise cut if you keep the board flat when cutting. If you don’t have a work table, cut your foam insulation on a flat, smooth surface.
- Cut rigid foam insulation on decorative tables only if a protective shield, such as a knife block, is in place. You run the risk of scratching the table.
Clamp the rigid foam to the flat surface.
Use rubber clamps to connect both sides of the insulation to the work surface.
- When cutting the rigid foam insulation, this will prevent it from slipping or falling.
Cutting with a utility knife
Knives with ridges running along the bottom of the blade are known as segmented knives. Utility knives with segmented blades are more effective at cutting rigid insulation foam than other alternatives.
- Segmented blades are available online or at most hardware stores.
- Segmented blades are also known as box cutters.
Score the insulated foam with your utility knife.
Working as near as possible to the cutting line, run the utility knife along the straightedge’s edge.
Make a second cut to finish the incision.
In most cases, scoring the insulation foam only removes a portion of it. To separate the line from the rest of the insulation piece, run the utility knife through it a second time.
Remove the clamps and examine the foam piece.
Draw another line, secure the foam piece with clamps, and make another cut if the cut is imperfect or the piece is larger than what you need. However, if you’re happy with the cut, your rigid foam insulation is ready to use.
Using a Saw Instead
Use an electric saw
Though utility knives are capable of cutting rigid foam insulation, table saws provide a cleaner, smoother break. If you need the rigid foam insulation to match exact specifications, buy or rent a table saw.
- Table saws, on the other hand, are a more expensive choice, with prices ranging from $150 to USD 400.
- While most table saws can cut foam, a specialized foam cutting saw can be purchased online or at several home improvement stores.
Put on protective gear before handling the saw.
Flyaway foam can be protected by wearing safety goggles, glasses, or a face shield. Wear a dust mask or respirator while working to protect your lungs from foam dust.
- When using the saw, avoid wearing long sleeves, ties, jewelry, or loose-fitting clothing.
- When using a table saw, never wear gloves. Gloves are insufficient protection against the blade of a saw, and the fabric may get entangled in the machinery.
Run the saw’s blade through the marked line.
Keep the handheld saw steady in your hands as you direct the blade along the line if you’re using one. Instead of clamping the foam, force it through the blade on table saws.
- Maintain a distance of at least 6 inches (15 cm) between your hands and the blade at all times.
- Before using your electric saw, read the directions to ensure that you are using it safely.
- To cut through the insulation, use a handheld circular saw with a blade length of 4 to 4.5 inches (10 to 11 cm).
Check your rigid insulation cut for errors.
Make another cut with your electric saw if the insulation appears to be too wide or the cut appears irregular. If not, remove any remaining foam dust with a brush and use the cut insulation foam in the project.