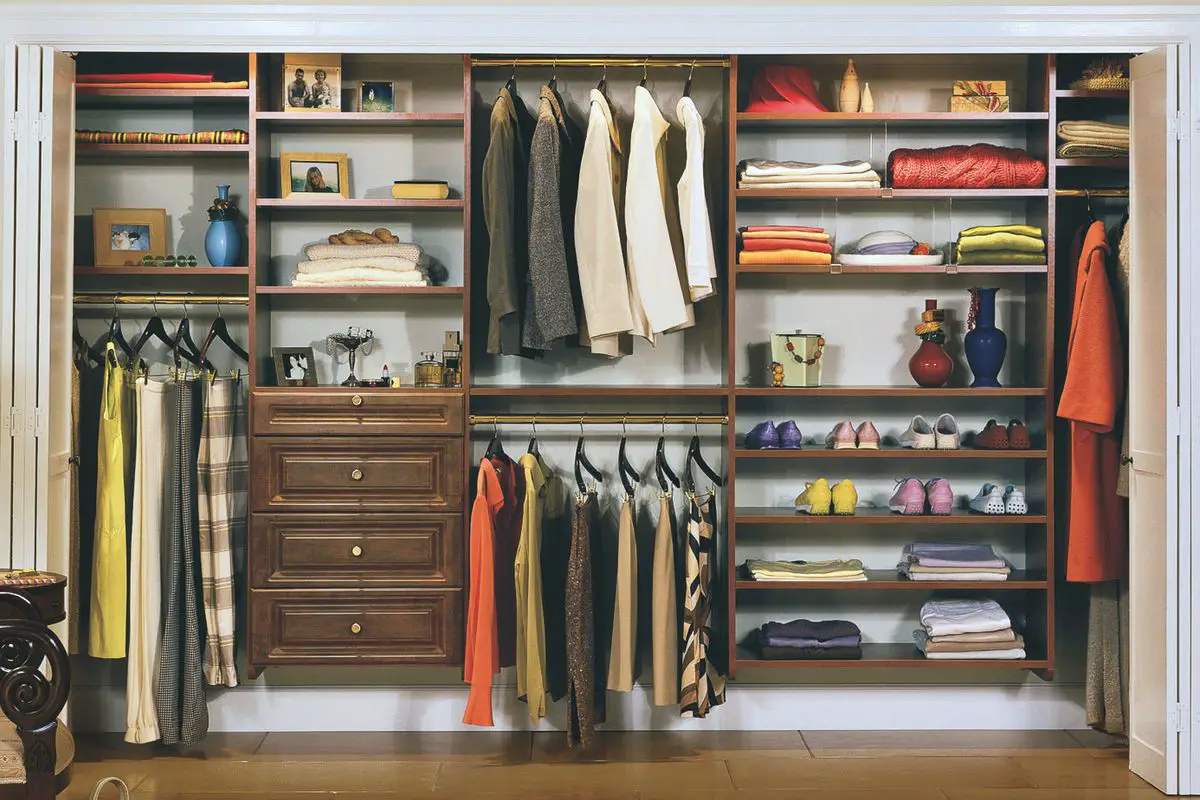
Are your clothes and shoes or other materials in the home excessive? Has your closet space become short day by day? Are you want to build a room-based closet to steal few feet from your room? If this is you, then you are on the right page, my friend. Because today in this article we are going to tell you about how to build a closet inside the room.
Everyone loves an extra space in their room to organize their clothes and shoes and other things. So making a closet inside your room is always the best idea. If you don’t have a closet in the room, don’t worry you can make it an easy way by following our guide. So, first, let’s discuss the things that’ll need to make a closet in the room.
What are the things required to build a Closet?
So, the materials and the tools required to make the closet in your room are given below.
Required Materials
- Half inches Drywall
- Three inches drywall screws
- 8d finish nails
- 16d nails
- 2x4s
- Constructive Adhesive
- Shims
- Double doors
- Toggle bolts
Required Tools
- Hammer
- Brad nail gun
- Miter saw
- Pry bar
- Air compressor
- Air hose
- Circular saw
- Caulk gun
- Chalk line
- Drill/driver – cordless
- Drill bit set
- Framing square
- Hearing protection
- Level
- Tape measure
- Safety glasses
- Speed square
- Stepladder
- Stud finder
How do I build a closet in my room?
Building a closet inside your room is not a very difficult task. An enthusiastic builder can make a nice closet in 4 weeks. And it is like making a door frame in your room. Although if you want the lighting system inside your closet then you need to spend some time on it. And for that, you also need to discuss it with your local building department. To build a normal closet, no permit is required. But when you are going to add a light system to it then you need the electric permit.
So, the first thing is to find the space of your room where you are going to make your closet. If you make the closet like one door size or depending on your room size you need to decrease or increase the size of your closet. Also, if you are thinking about hanging clothes inside them, then make the closet 26 inches deep. Besides, you also need to focus on the heat ducts, electrical boxes, and windows while building the closet dimensions to avoid conflict between them.
As from the carpenter’s view, you need a circular saw to cut the framing lumber, a power meter box to cut new trim, and a drill to drive screws. You can buy and install the doors if you don’t build them on your own. But along with this a power miter box and a pneumatic nail gun make your jobs easier for you and especially more pleasurable. You can rent these things instead of buying them.
In our article, we are going to show you the building of the hinged double-door closet because they are studier and less troublemaker than the closet of bi-fold doors. Thus, to build a double door closet, order two sets of doors from a full-service lumberyard or a home center near you. For the 2×4 walls that have half inch drywall on each side you have to order 4-9 or 16 jambs wide doors. When you order the door, make sure that a roller catches at the top of the door to hold the door shut. Remember that a hinged door always needs space to swing open. To make sure to keep the space where you are going to build your hinged door closet. But if there is not enough space on the front of the closet then instead of building a hinged door try making a bifold door. To build the bifold doors closet order the rough opening dimensions doors.
Before you go to make your closet, know some prep work related to this process. If a carpenter is present in your room first roll the carpenter and back it out of the way by using the tackless strips. In this process always remember to use rubber gloves to avoid injuries from the wickedly sharp barbs on the tackless strips. The room floor is made with protected hardwood, vinyl, or tile, then covered by two layers of heavy kraft paper and a thin plywood layer or a hardboard. Besides, pry off the baseboard with the flat pry bar. If you are thinking of reuse the pry bars then use the nails through the backside of it. Also, you can check DIY for cheapest closet updates.
Step by Step Process
STEP 1: Frame Your Walls with New Closet Doors
Using the stud finder framing your places and marking it for your closet with doors. Make the mark where the wall butts exist in the walls and the ceilings. If it is possible for you then stick the new wall plates and studs on an existing frame of your room using 3-inches screws. Otherwise, you can use other methods.
If you want to enable the lighting system inside your closet, then make sure to put the electrical box that can provide you with the electrical sources and plan how you will attach the cable route with it. But, if you are not an expert in the electric procedure or you don’t have the knowledge of electrical things, then never think of doing it on your own. Contract with a licensable electrician to take help for this job. To set the box you have to draw a chalk line on the attached bottom and the top plates. When you are going to plumb up from the bottom plate to the ceiling, mark it with the perfect and straight 2x4s. This job needs to be done precisely, so that when the time comes to install the door, you do not have to go to the crooked walls.
When you install the plates, complete the walls by simply measuring and cutting the studs, door trimmers and cripples to fit with the walls. When you cut the studs measuring add 1 or 16 inches on your wall. It’s much easier than the toe-screw tight-fitting studs. With the help of constructive toggle and adhesive, attach the studs in the wall. Or else you can also do this process of nailing an existing stud on your wall. When you use the toggles, drill the toggle location and hold it in the 2×4 place. Make the toggle location about 2 feet apart with the 1 and 4 inch bit both for the 2×4 and the drywall. After that, remove your 2×4 and then drill your drywall with the 5 or 8 inch spade bit. Then, mount the toggles in 2×4 and spread the adhesive and shove the toggle wings carefully through their holes.
Then, pick up the lumbers for the studs and trimmers, Next, for the short cripples to cut the crooked lumber. To do this process you need the trimmer studs and the header length. When you install the header remember to measure your cripples.
STEP 2: Lay out your Closet walls
First, if your floor is covered with the carpet, then roll back the carpet and pry out the baseboard. Then lay out the wall and floor by measuring 30 inches and line with the chalk.
STEP 3: Cut the Top Wall Plates and the Bottom Wall Plates
On the bottom and top plates between the walls cut the 2x4s fit. Marking the position of the studs, door openings, and on the both sides for intersecting walls. Align the bottom plate with the outside edge by marking with the chalk, then screw or nail it in the floor. Don’t fasten the process of plate attaching in the door opening, because you can cut out this one later if needed.
STEP 4: Level the Top Plate Position
By measuring a straight 2×4 and 4 feet on the bottom plates to plumb up it. Now mark the location on the top plate of your ceiling. Between your marking area snap the chalk lines. With the help of a stud finder locate the ceiling joists or you can do it by wrapping your knuckle. Now, mark them, in the section where they cross the top plate. The ceiling joist we use on our process is run parallel with the wall.
STEP 5: Attach Top Plate on the Ceiling
To the top plate joists screw with 3-inches screws where they intersect with each other. Or if you want you can also attach the plates with the construction adhesive. Where no joists are present attach with 1/4th inch to 4 inch toggle bolts. To secure the plates with ceiling additionally add 3 inches drywall in the angel to catch selling nailers.
STEP 6: Make Your Studs Fasten
Cut the studs so it can fit properly with your top and bottom place. Then, according to your building plan toe-screw them onto the plates. Cut trimmers and also the nails each in a straight stud in a manner so that 16d sinker nails drive at an angle. If you want to triple your closet space with the built-in closet drawers, you are also able to do it by using another method.
STEP 7: Headers Installation
Attached the 2×4 headers by putting the 16d nails together. Put them on the top of the trimmers and nail the studs. Cut the top plate and the header. Then, cripples the toe-screw on them.
STEP 8: Installing the Doors
Now, if you want the light system on your closet, then you have to fix the wire on the wall before you install your closet door. And this time, set the electric boxes and the tables and also verified it by a professional electrician. After finishing the electric process hang the drywall to it. Hang it with the help of the tape and cement & sand mixture. Then pain and prime your walls before you go to install the doors and also trim it.
Now it is the time to install the door. But installation of the doors is varied depending on the type of the floors you have. If the floor is made with wood or ceramic tile, then you can set the door jambs directly on the floor. But if your floor is out of level, then you have to scribe it first.Then find out the bottom of one of the side jambs to make the jamb head level. If the floor is covered with the carpet, then roll over on the side and jamb to level it. The carpet and the pad on your floor cover up the shims. To finish the floor, allow a half inch clearance area. If the floor carpet is very thick you need to raise the entire door frame with extra shimming. To do this job measure your carpet height and door clearanc
To make a strong strategy for your square door frame, shim the door frame both in bottom and the top and also behind each hinge location. In this step in each set of shims, initially drive the one 8d finish nail. Not cut them now. Firstly, make sure about the doors and check the fit with the frames. In most cases, it does not fit a hundred percent. You have to adjust the jamb in or out by driving the shims to make the door line up. In this process, your focus is to make an even gap from all around the doors. When the fit is proper according to you, add the nails in each location. And also in the door trimmer stud put 3 inch screw on each of the top hinges. Now, by using a sharp utility knife, score the shims and with the jambs snap them off the flash.
Now, after setting the door if the door is not properly closed or open on the bottom side, then it may occur due to either the jambs being twisted on the wall that is not plumb out. Or, maybe the doors are warped. In that case, you can use a solution and push the doors until the jambs do not fit with the door line up. It may be difficult because the jamb no longer remains exactly glass with the drywall.
Install a door trim and dashboard that will be matched with your room trim. If you are not very experienced in carpet installation. Then asked a friend who can cut it properly and relay the carpet.
Now, measure your closet interior and go to shop the closet organizers. You can make the outfit of your closet with the Melamine components or other components what you want.
STEP 9: Door Jamb Leveling
In the opening of the closet door, fit the door jamb in the center and make it tight by using the pair of shims in each top corner of it. To check the level of the door use the 4-feet level against the door jamb.
STEP 10: Level perfectly the door jamb button
To exactly level your head jamb, on the lower side shim under the side jamb.
STEP 11: Shim the side Jamb with Plumb and Nail
Now, put the 8d finish nail through the jamb and shims with each top side. On one jamb make the 4-feet level. Plumb, the champs by pairing the shims behind each hinge. After that for each shim, put the finish nails. Double check the process by taking shims in or out.
STEP 12: Help of a Spacer align the second side of the Jamb
Cut a 1×2 spacer to fit another side jambs by putting this between the two jambs on the top and the door frames. Insert the hinge in each hinge location and then fit the opposite jamb with nails and shims.
STEP 13: Fit the Doors
Fit the doors on the frame by hanging it. Adjust the shims until the door is not properly fitted from top to bottom. Line up the doors and make a perfect position by using the shims location. To stiffen the top jambs put a shim on the top.
STEP 14: Finely Tune the fit
To align the door bottom using the jambs and take them in or out until the bottom is in even position. Use a block of wood in this process. And again using nails fit the jambs in their new position.
STEP 15: Make the Hinges stronger
Replace the center jamb hinges with the top hinges and drive the 3-inch screw to it which is the same or in the same color. Make sure that there is no gap between the doors and if needed use shims to cover that.
STEP 16: Use the Casing Trim the Doors
Mark and cut the trim to make a casing that will fit on the door. Fasten this process with the pairs of nails and drive the door, jamb and framing. In the door, tops install the roller catches. Now the process is finally finished. Enjoy with your room based cabinet.
Frequently Asked Questions
A. How much does it cost to build a closet?
The price always varies depending on the materials you buy.A commercial hinged door can cost nearly 20$ per square foot. Whether a veneer closet can cost you nearly 22$.
B. How do you build a closet in a room without a closet?
It is a very simple process. We discuss this topic in this whole article step by step. So read them carefully and make your room flexible with the closet.