A continuously running toilet is often a sign of small problems:
- The float valve is badly adjusted or damaged.
- A seal is leaking, forcing the valve to be triggered to fill the missing water level in the tank.
- Too much limescale has accumulated in the tank and is clogging the mechanism.
- The flush tank is slightly cracked and leaking water.
- The installation is not watertight enough.
For all these causes of leakage, there is a simple way to intervene and solve the problem.
Follow the guide, we tell you everything.
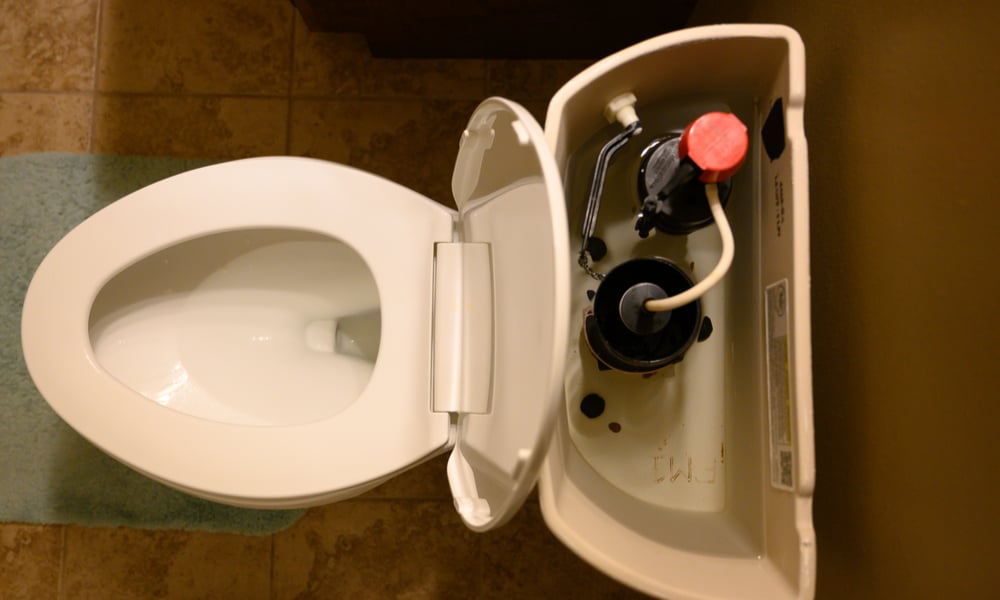
Open the tank lid to take stock of the situation
To find out where your toilet is leaking, you don’t have to be a plumbing expert or Sherlock Holmes. Simply examine the outside of the tank, the bowl, and check the inside.
To open the tank, it’s very simple:
- Unscrew the push button or knob at the top of the pull rod.
- Then remove the tank cover and put it down carefully (the ceramic is fragile).
You can proceed to the next steps.
Check if the float is well adjusted
The first thing to do is to check if your float slides well along its guide rod.
- Flush the toilet.
- Watch the tank fill with water and observe the float.
If the float is not adjusted properly, the water level in the tank will overflow through the overflow of the flush mechanism. This will cause the tank to refill constantly. To avoid any mess!
To solve this problem, it is necessary to lower the maximum water level in the tank. To do this, adjust the height of the float at the end of its stroke by unscrewing the guide.
Depending on whether it is too high or too low, screw or unscrew the rod to which it is attached.
This simple operation will adjust the height of the float at the end of the stroke.
If, despite this adjustment, nothing changes and your toilet still flushes, let’s go to the second step.
How to change a toilet float valve?
Over time, the mechanism placed in the tank of your toilet can become damaged. Our tips for replacing and adjusting it
Check for limescale
Again, you don’t have to be a plumber to get through this.
Check for limescale on the toilet mechanism or float valve. Limescale may also be embedded in the toilet seals. Cleaning these parts will require removing them from the tank.
Limescale can cause several problems:
- Deteriorate the seals and damage them.
- Clog the guide on which the float circulates.
- Clogging the entire mechanism: the valve that retains the water may be scaled.
If you notice the presence of scale, it is better to act as follows:
- Dismantle the tank and change all the seals.
- Disassemble the mechanism and bathe it in a 50/50 mixture of hot water and white vinegar.
- Clean the inside of the tank with white vinegar.
White vinegar is an important ally against limescale and scale residues.
All this should allow your toilet to work properly again. However, if you notice that the float is too damaged, change the mechanism, it will be more profitable and durable.
Similarly, if when changing the seals you find that the valve that triggers the water supply is too damaged, it is possible to change the membrane.
Float valve with a threaded rod to adjust the height of the valve

Nothing can be seen at first glance
If, when checking that everything is in order, you do not notice any defects, it is probably because the problem comes from a joint between the tank and the bowl. It is then necessary to disassemble the tank from the bowl in order to clean or replace it.
Removing the tank to change the joint between the bowl and the tank is a delicate step. Be careful not to chip the ceramic by manipulating the fixing rods of the tank.
Here are the steps to follow:
- Turn off the water supply.
- Flush the toilet to empty the tank.
- Unscrew the water inlet from the cistern.
- Remove the flush mechanism (usually a quarter turn is sufficient).
- Unscrew the two rods holding the cistern.
- Remove the tank from the toilet bowl.
Once the toilet tank is removed, check the condition of the seal. Chances are that it has become porous or has simply been pinched during assembly.
Simply replace the gasket with one of the same thickness and diameter. Proceed in the opposite way to reassemble the tank. Be careful not to tighten the fixing screws too much so as not to chip the ceramic.
Some advice to remember
- As soon as you notice a small leak on your flush, check the float first. It is often the cause of the problem. A small adjustment, and your repairs will not go any further.
- Pour a little white vinegar into your water tank from time to time. Be careful, don’t put too much, nor too often, because vinegar and synthetic materials (rubber gaskets) don’t mix well. ½ liter of white vinegar once a month and let it sit for a few hours, that’s the solution to eliminate excess limescale.
- If you dismantle your water tank, take the opportunity to change the seals. If you disassemble your water tank, take the opportunity to change all the seals, the kits are really cheap.
- Avoid pouring commercial cleaning products directly into your flush tank. Over time, these products will damage your toilet’s seals.
By following these tips, your repair should go smoothly, without a hitch. The only thing is to be careful when handling the ceramic elements, they are fragile.
Have a good do-it-yourself and good repair to all.