When you search for the best grouts for showers, you will have many products that will pop up. One thing you need to know is that the grouts must be fully sealed and waterproof. You also need to know some things like color, sanded vs. unsanded grout and cement vs. epoxy based. You can use these best grout for shower:
- Standard cement grout and add a ceiling agent
- Waterproof epoxy grouts
- Pre sealed waterproof grout
In A Shower, Which Is The Greatest Grout For Using?
Grout could be particularly difficult to work within showers. What is the reason for this? Because the air humidity in showering may cause all kinds of difficulties for grout, from direct connection with the liquid but also through the high humidity produced by vapor & condensation, particularly whenever the incorrect kind of grout has been used in your shower. Since cement-based grout was porous & rapidly absorbs moisture, this could be a major problem. It can cause any grout to disintegrate or even the formation of mold or fungi, both of which can be detrimental to anyone sharing a room. It also entails the possibility of cracking & shrinkage throughout the long run. As a result, cement-based grout can not be used in the shower or even a bathroom.
In a bathroom, which is your safest for using the grout?
Epoxy grout seems to be ideal for use in shower & other wet areas. Epoxy grout was constructed of resins & fillers which make it operate as a sealant glue and therefore is waterproof. Epoxy grout, contrary to cement-based tile, is extremely durable & does not require sealing, making it a superior alternative for shower, kitchens, bathrooms, or other humid spaces. Although epoxy grout was pricier than cement-based grouting, the extra cost is almost always offset by epoxy grout’s toughness & lifespan in damp settings.
Many experienced & competent contractors would use epoxy grout on tiles or mosaics that would be in wet, damp settings, including outdoors situations and sometimes even pools since it’s so trustworthy & durable. For its adhesive power, weatherproof epoxy grout seems to be perfect for showering & bathrooms. It is resistant to cracking, staining, and shrinking, making it an excellent choice for moist areas.
The Top Best grout for shower walls
1.Elmer’s E873 Tile Grout

If you are looking for an inexpensive grout or repairing an old grout, or looking for the cheapest way to install the tiles in your shower, this will be a perfect choice. This product is resistant to mildew and also waterproof. This is the cheapest product and can be used very quickly.
Polyblend Cement-Based Grout
If you are buying a budget-friendly grout, we recommend you this standard cement-based grout. This is standard and old fashioned grout. It involves a necessary cleanup procedure. But the main concern is that it is tough to screw this grout.
2.Laticrete’s SpectraLOCK Pro Epoxy

On the other hand, if you seem for the best performing and long-lasting grout by spending some more dollars, this is for you. This is an excellent product that is resistant against mildews, rots and resistant to stains. It looks like plastic, so some people may oppose buying this grout. This grout comes in three parts, which require a lot of assembling before installation.
3.Perma Tile Waterproof Tile Grouts

Last but not least. If you are looking for the amplest and straightforward grout, then we recommend this. It comes with waterproof resistance at the same cost as a regular grout. The advantage of this grout is that it comes pre-sealed, and it requires only one step to install the grout.
4.Elmer’s E873 Tile Grout for showers
5.Polyblend Cement-Based Grout

6.Laticrete’s SpectraLOCK Pro Epoxy
7.Perma Tile Waterproof Tile Grout
Inside A Shower, Using Epoxy Grout
Clean the surface where the grout would be installed well before you begin. Stir your epoxy grout as per the manufacturer’s directions. It could differ depending on the brand. Refill the joints using epoxy grout & smoothing it out using a trowel. Clean any leftover grout from tiles with a moist sponge. Concentrate on a little state at a time. Depending on how rapidly you wipe to remove the debris grout, there will almost certainly be some grout mist. Remove any leftover dust from the tiles with a paper towel & water. You’ll very certainly need to do this on a regular basis. You can reduce the quantity of extra grout by working slowly & methodically.
Would I Need To Laminate My Showers Tiles Grout?
Grout would be a porous material, which many people are unaware of. Any fluid that enters into contact with the top would be absorbed. You might be able to deal with not sealing the grout in the outdoor kitchen. Is it, nevertheless, necessary to seal your tile grout throughout the shower?
The grout within your shower must be sealed at all times to prevent moisture from entering the porous structure. A sealant will keep moisture from becoming trapped beneath the tile & grout which can lead to mold & mildew growth.
Why Must Shower Grout Get Sealed?
It’s not difficult to stamp the grout. It’s much more worthwhile because of the security it provides. You won’t need a sealant if you choose epoxy-based grouting that resists water organically in the shower. The sealer is required for most who would utilize the more classic sand-based grout. That sealant absorbs water so quickly that it cannot be sealed.
Although some people debate whether or not to seal the grouting in the bathtub, the majority of people feel that it is necessary. It is inexpensive, takes little time, and therefore will safeguard your shower. Finally, adding extra safety to the shower isn’t going to hurt.
Other Things To Consider
The top grout has mainly two functions: it keeps the tiles together, and the other is the prevention of water and moisture entering into them. It also provides a clean and finished look to your tiles.
- The grout needs to be waterproofed, or at least it must be water or moisture resistant.
- Check if you are repairing the tiles or working with the new tiles.
- It will be tough to blend the new grout with the old grout.
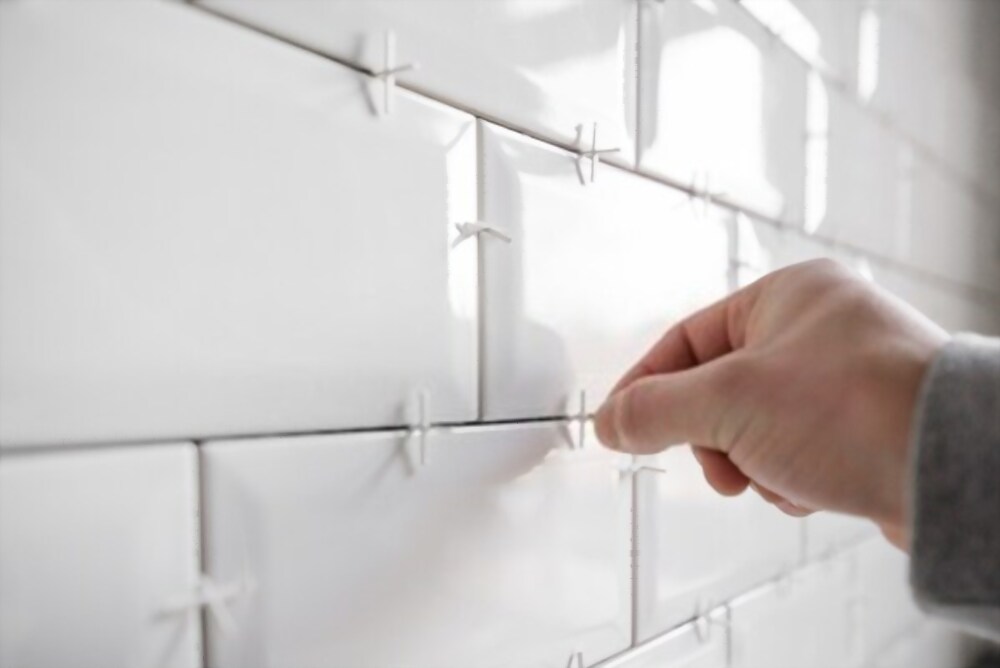
- Consider the gaps between the tiles. Most of the tiles have space ⅛ or 1/16 between them.
- If you are using mosaic tiles, then you must use epoxy or sanded grout.
Another thing to consider is the temperature. If you are using epoxy grout, then the temperature is the main factor because you need to mix the epoxy resin with a curing agent under lower temperatures below 60 degrees Fahrenheit.
A small tip is that do not mix the entire grout in the tub. Mix in small batches. This can be considered for both epoxy and cement-based grouts.
What Is The Best Showers Grout?
Shower grout is a type of cement that fills tiny gaps between the tiles. It keeps the tiles together and also prevents the water and moisture from entering the walls or tiles. The type of grout you need depends on how wide your gaps are and what quality you want, and the tile color.
Sealing The Grout On Your Shower Using A Variety Of Techniques
The grout sealing was a really simple procedure. It’ll be a lot easier over tiling the shower, which you’ve just started. It will be a piece of cake. It’s crucial to remember not to use grout sealer over tiles that are non-glazed. The sealer would penetrate the tile & would not be removed. The following are among the numerous ways to apply grouting sealant:
Brush On – It forms of sealant has a creamy look but is applied straight to the grout using a little brush point, although most people prefer not to use it.
Ensure there’s no sealant on the tiles; minor areas won’t hurt, but they should be washed away.
Brushing mostly on sealant is a time-consuming process. The sealer doesn’t often flow uniformly out the brushes, making a basic process take an inordinate amount of time. You may be confined in your bath spending days sealing the tiles, which may drive someone insane.
Roller– When applying grout with such a roller, the pulley travels down the mortar line avoids missing any areas & requires very few touch-ups.
That is perhaps the most straightforward technique. No, it won’t still be flawless, but the thinner roller should keep the line extremely close towards the seams line rather than pouring out onto tiles as the brush might. By far the most popular among the fans.
Spray-On – Among individuals who don’t want to waste lots of time of their day attempting to maintain the little grout line immaculate, that’s the product for you.
However, it isn’t all it’s talked up to be. Afterward, you’ll need to wash the tiles, however, some people don’t mind doing so & even keep it on.
When spraying onto the area, it is supposed to only sink into the grout, not really the glazed tiling. It’ll also fade off with time.
Grout Sealant Application
When undertaking house renovations, you’ll encounter a lot of chemicals that you’ll be cautious about utilizing. A sealer is no exception. Always adhere to the item’s safety instructions
Let’s go as to how to spray the sealant to a grout inside the shower, which is a fairly straightforward process:
The First Procedure Is To Cleaning The Grout Thoroughly:
Remove all loosened grout & dirt with a coarse scrubbing pad as well as a pail of fresh water. Using a clean cloth, wipe away the debris & water.
Allow for the required drying time, which is usually approximately 45 minutes.
You could also clean the extra grout & remove stains with a toothbrush.
The next stage is to assess which type of sealant to use.
As previously said, there seem to be a few various ways to apply grout sealant. However, sealers come in a variety of brands & styles. The type of sealant you apply would be determined by the type of tiles you have. The sealer is clearly labeled with instructions on how to operate it
The Following Are Two Primary Types Of Sealants:
Penetrating Sealers – Those sealers include a water/mineral spirits basis that permits latex/silicon particles to enter the grout. Because as sealant soaks into the grout, the rubber or silicone connects the dots. This will prevent the dampness out completely.
Membrane Formation Sealers- It provides a water-repellent covering on the grout’s surfaces. These are not suitable for usage in a washroom since water cannot escape from beneath the tiles. Those varieties also won’t stick to glossy tiles
Choose Your Preferred Applicator.
Now Is Time To Begin The Grout Distribution Process.
Put on plastic gloves (domestic “dishwashing” gloves perform well) as well as prepare the sealer according to your preference. For each approach, follow the instruction carefully.
When spraying, make care to saturate your grout area while avoiding the tile as much as possible. Working on tiny portions at a time, wipe tile off as needed with a fresh, dry cloth. The time it takes for the sealer to dry is usually approximately ten minutes. Using a clean, moist hand towel, wipe away any remaining sealant from grout.
It’s necessary to apply the second coat once it’s completely dried. The amount of coats you’ll need is determined by the degree of coverage you want. Whenever the water droplets on the top of the grouting roll freely before soaking in, then know the shower is adequately sealed.
Allow the sealer to dry completely before using the bathroom for the very first time, but instead, relax & enjoy the fresh new shower.
However, How Much Grouting Sealant Do You Need?
The first task is to decide how much grout you’ll need. You wouldn’t want to be midway through & run out of food. You could always return or store unopened containers. To avoid the growth of mold & mildew seal the grout once every year.
Grout would be used more frequently in smaller tile designs than in larger tile patterns. Additional lines to complete with smaller tiles. That’s advisable to use a grouting sealer if you’re using little tiles because it would quicken up the procedure.
Using 12-inch tiling, a one-quart bottle of grouting sealer would seal roughly 200 sq ft of grout. If you’re doing it oneself, the sealer is not too pricey. It would certainly cost hundreds to hire an expert.
Final Thoughts:
Check the packet of grout for the recommended drying process. Various groups take different amounts of time to dry. The grout should heal faster if the freshly tiled space is kept warm.
Water-based sealants dry far quicker than solvent-based sealants but are significantly safer for use. Solvent-based sealants, on the other hand, are significantly more robust but last far lengthier.